

Create an account
Visit the LLMEasy registration page to create an account.You’ll automatically receive a $3 trial credit on signup.
Add credit to your account
You can use Online top-up or Redeem code. After adding credit, return to the console and confirm that Current balance has updated before you create an API Key.
- Online top-up
- Redeem code
After you sign in, open the Console and click Top up in the Account card.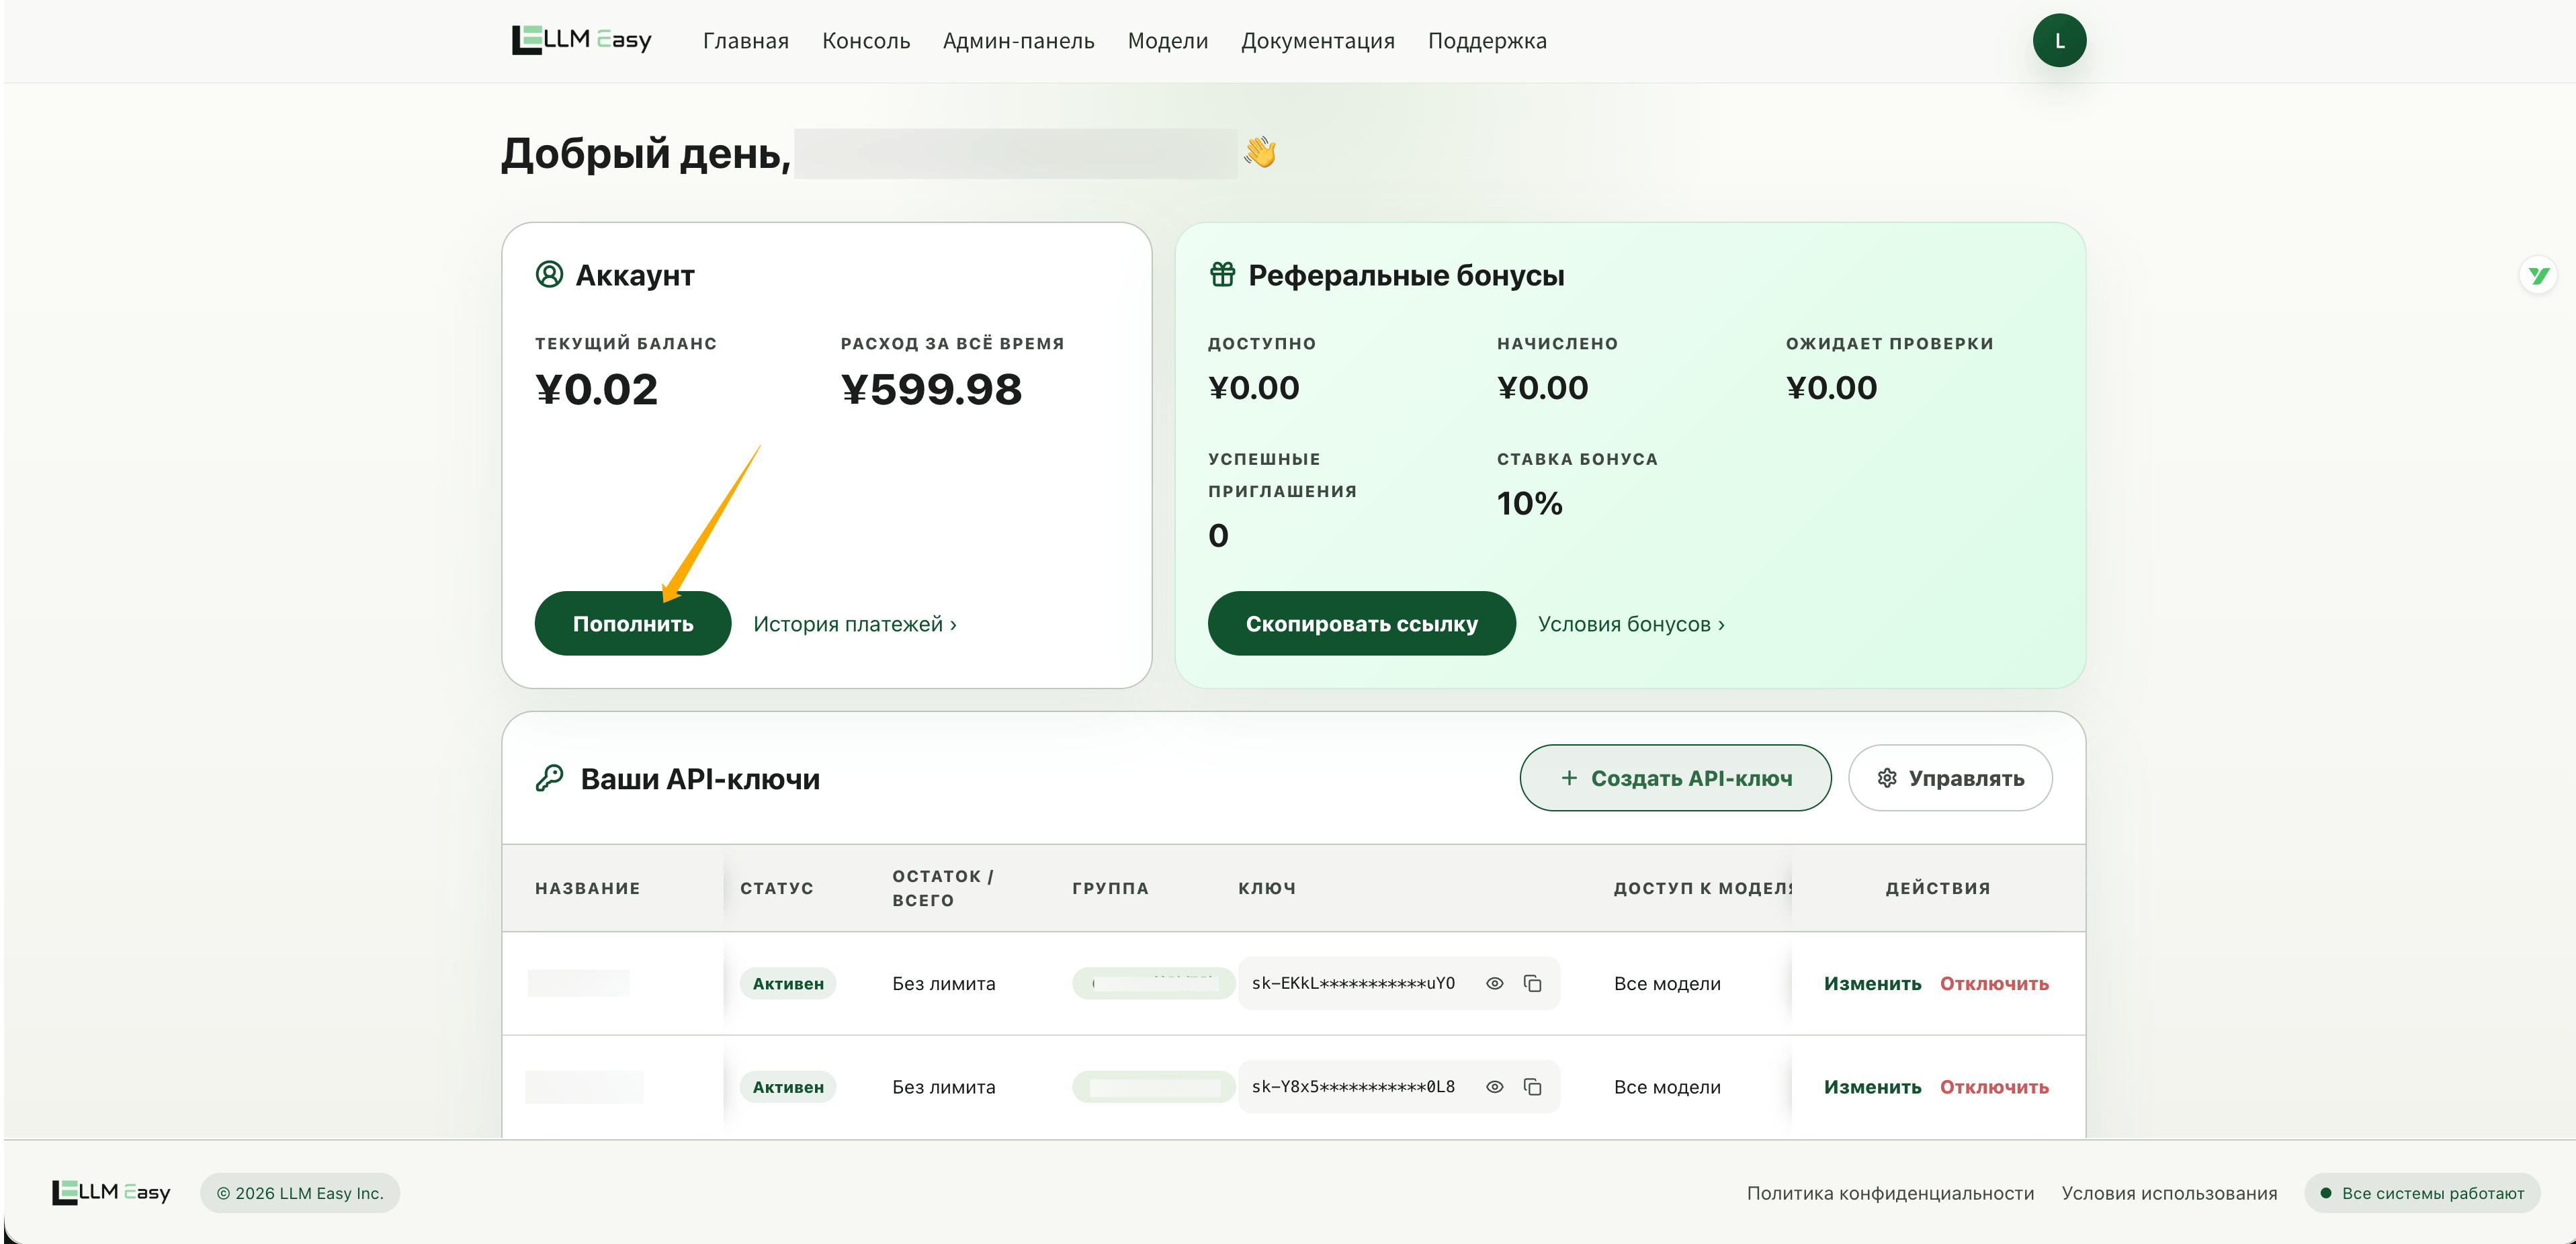
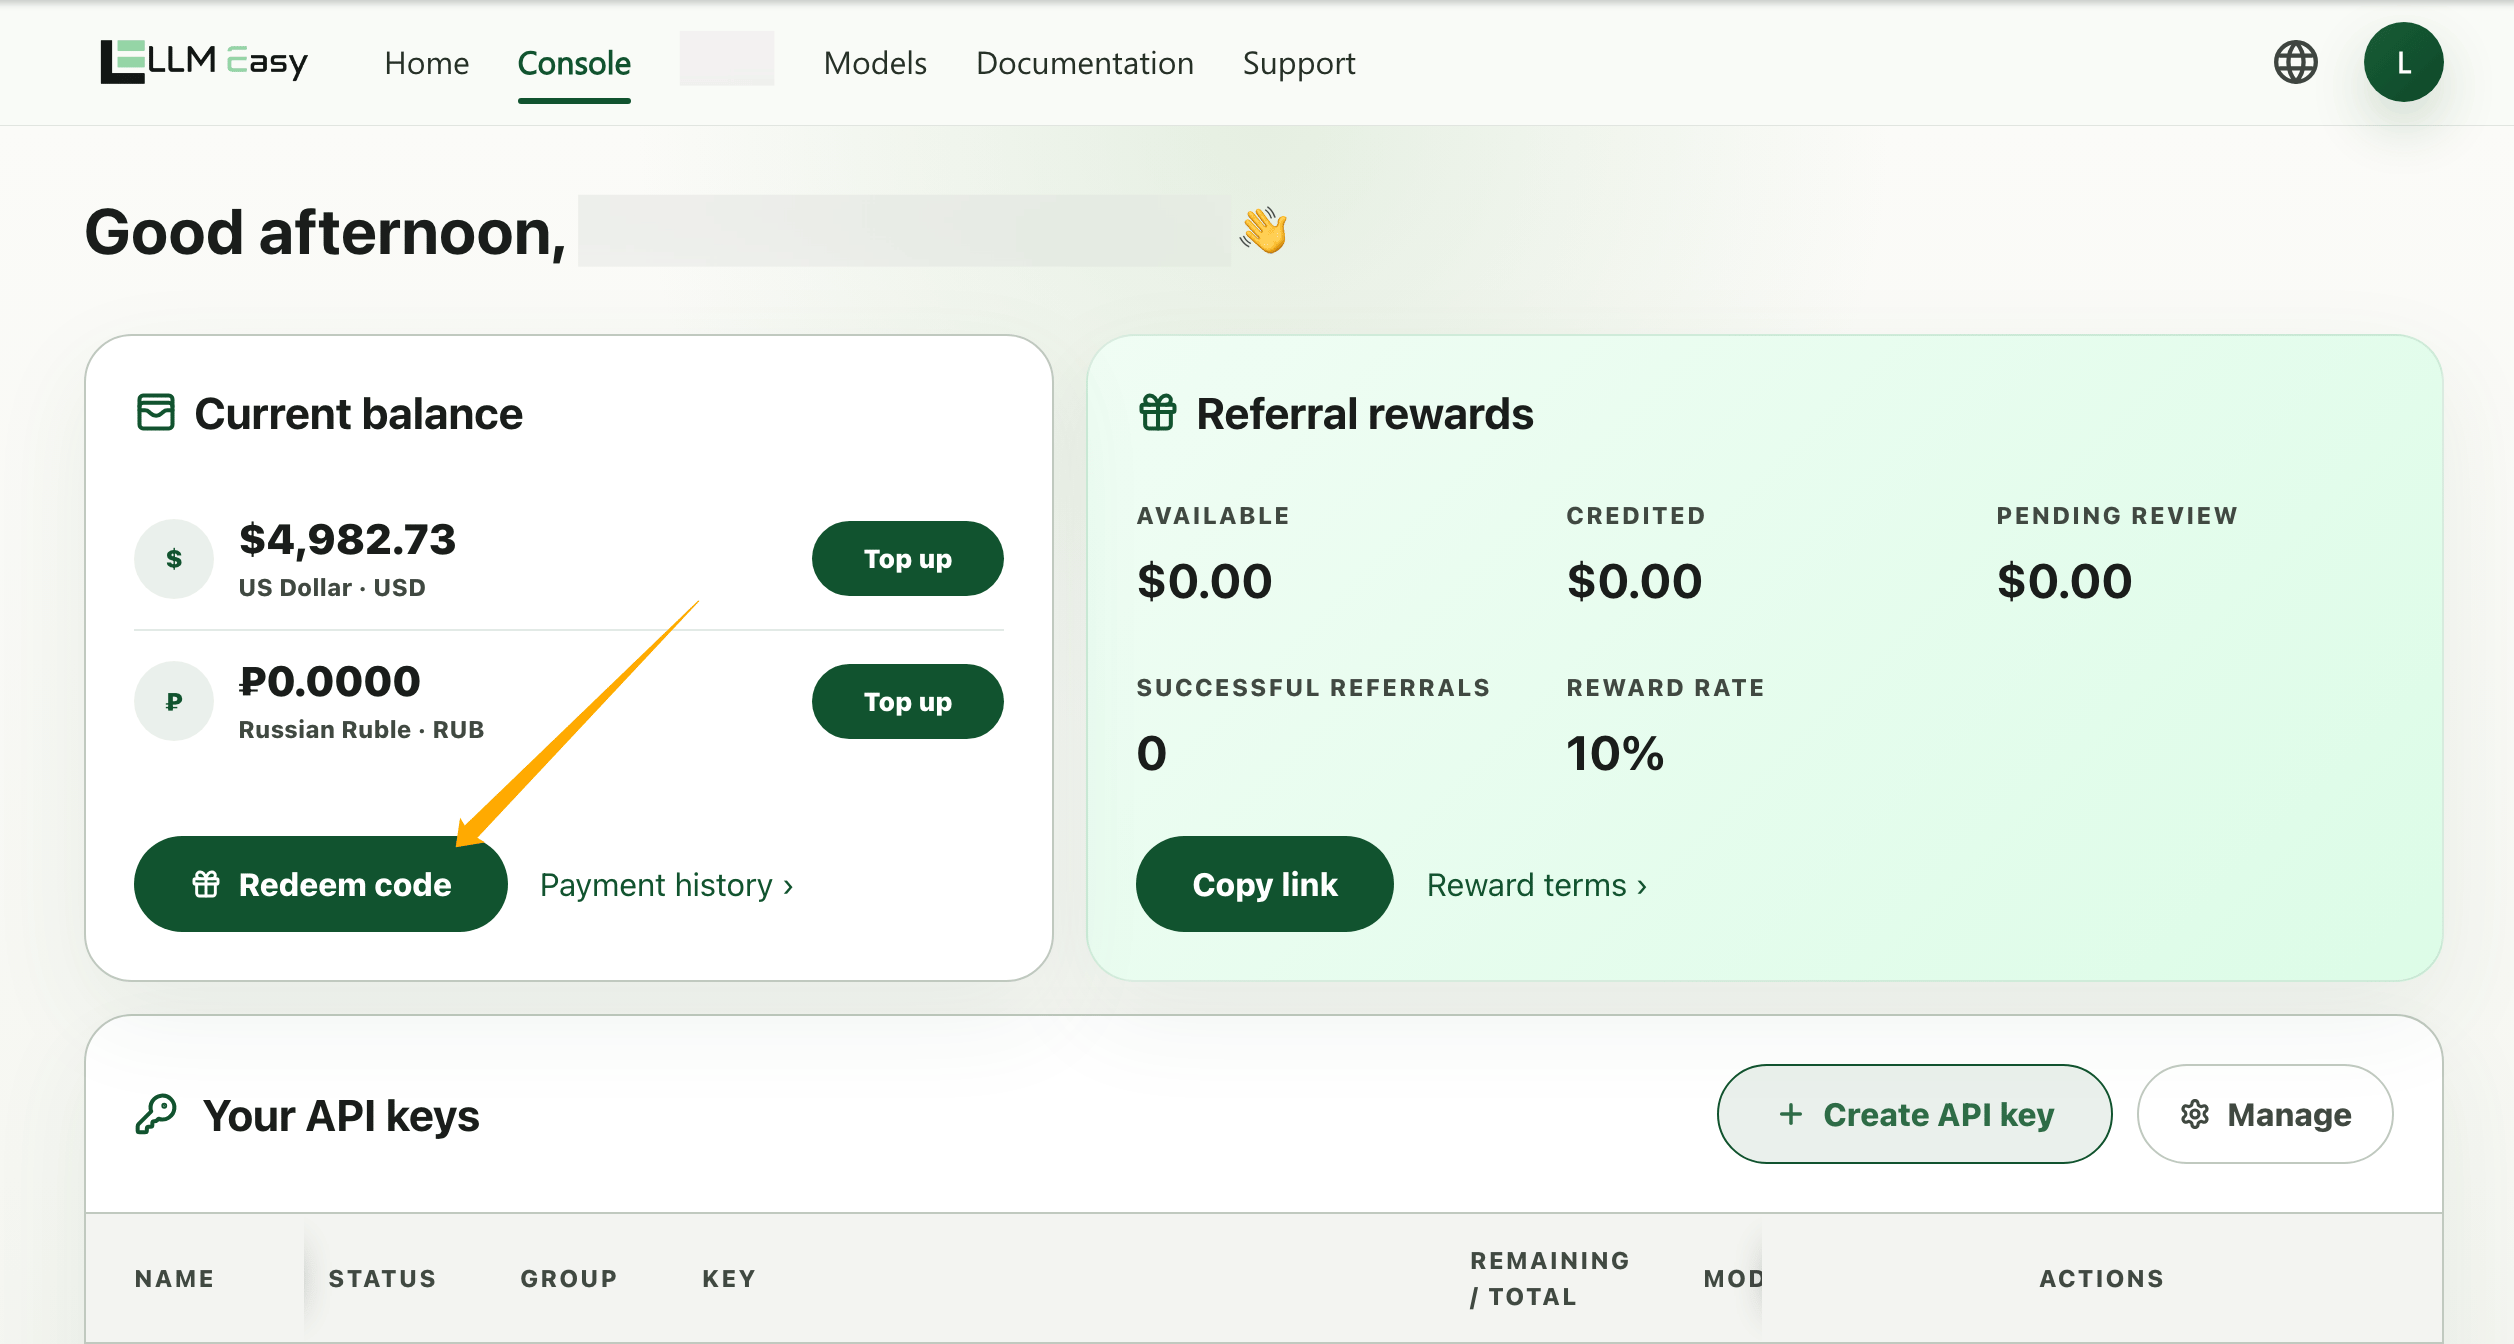
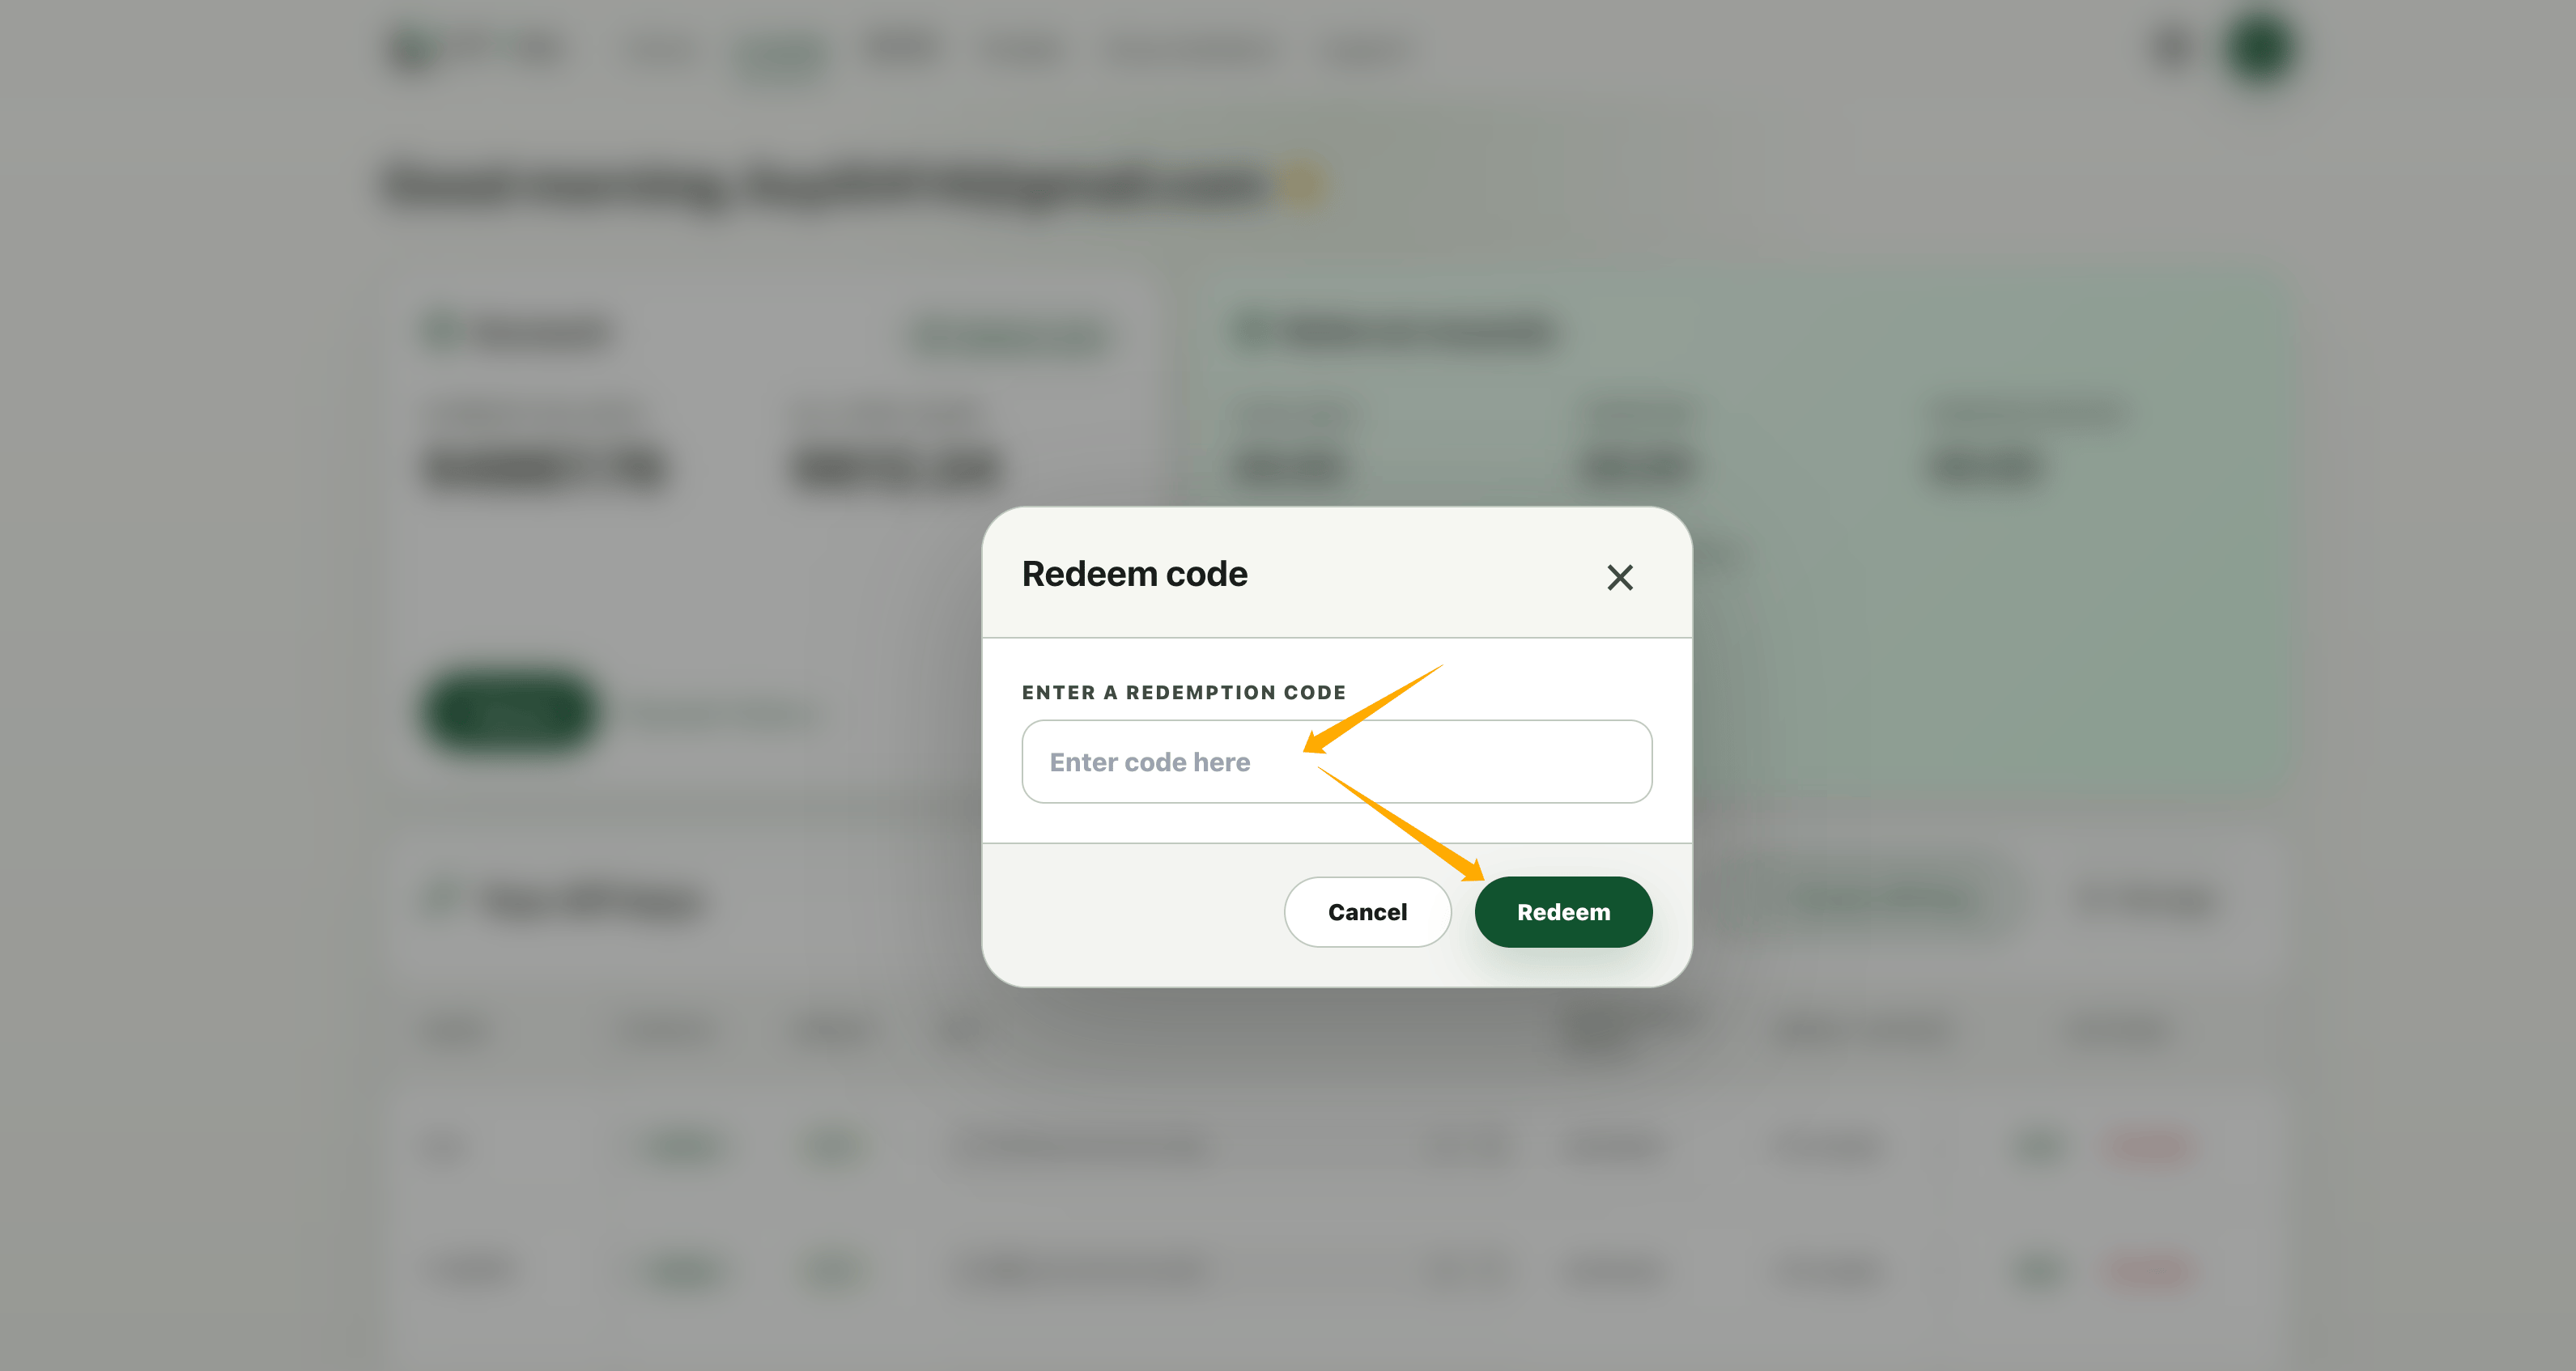
Open API Key management and create an API Key
Once you have available credit, click Create API Key in the Your API Keys section of the console.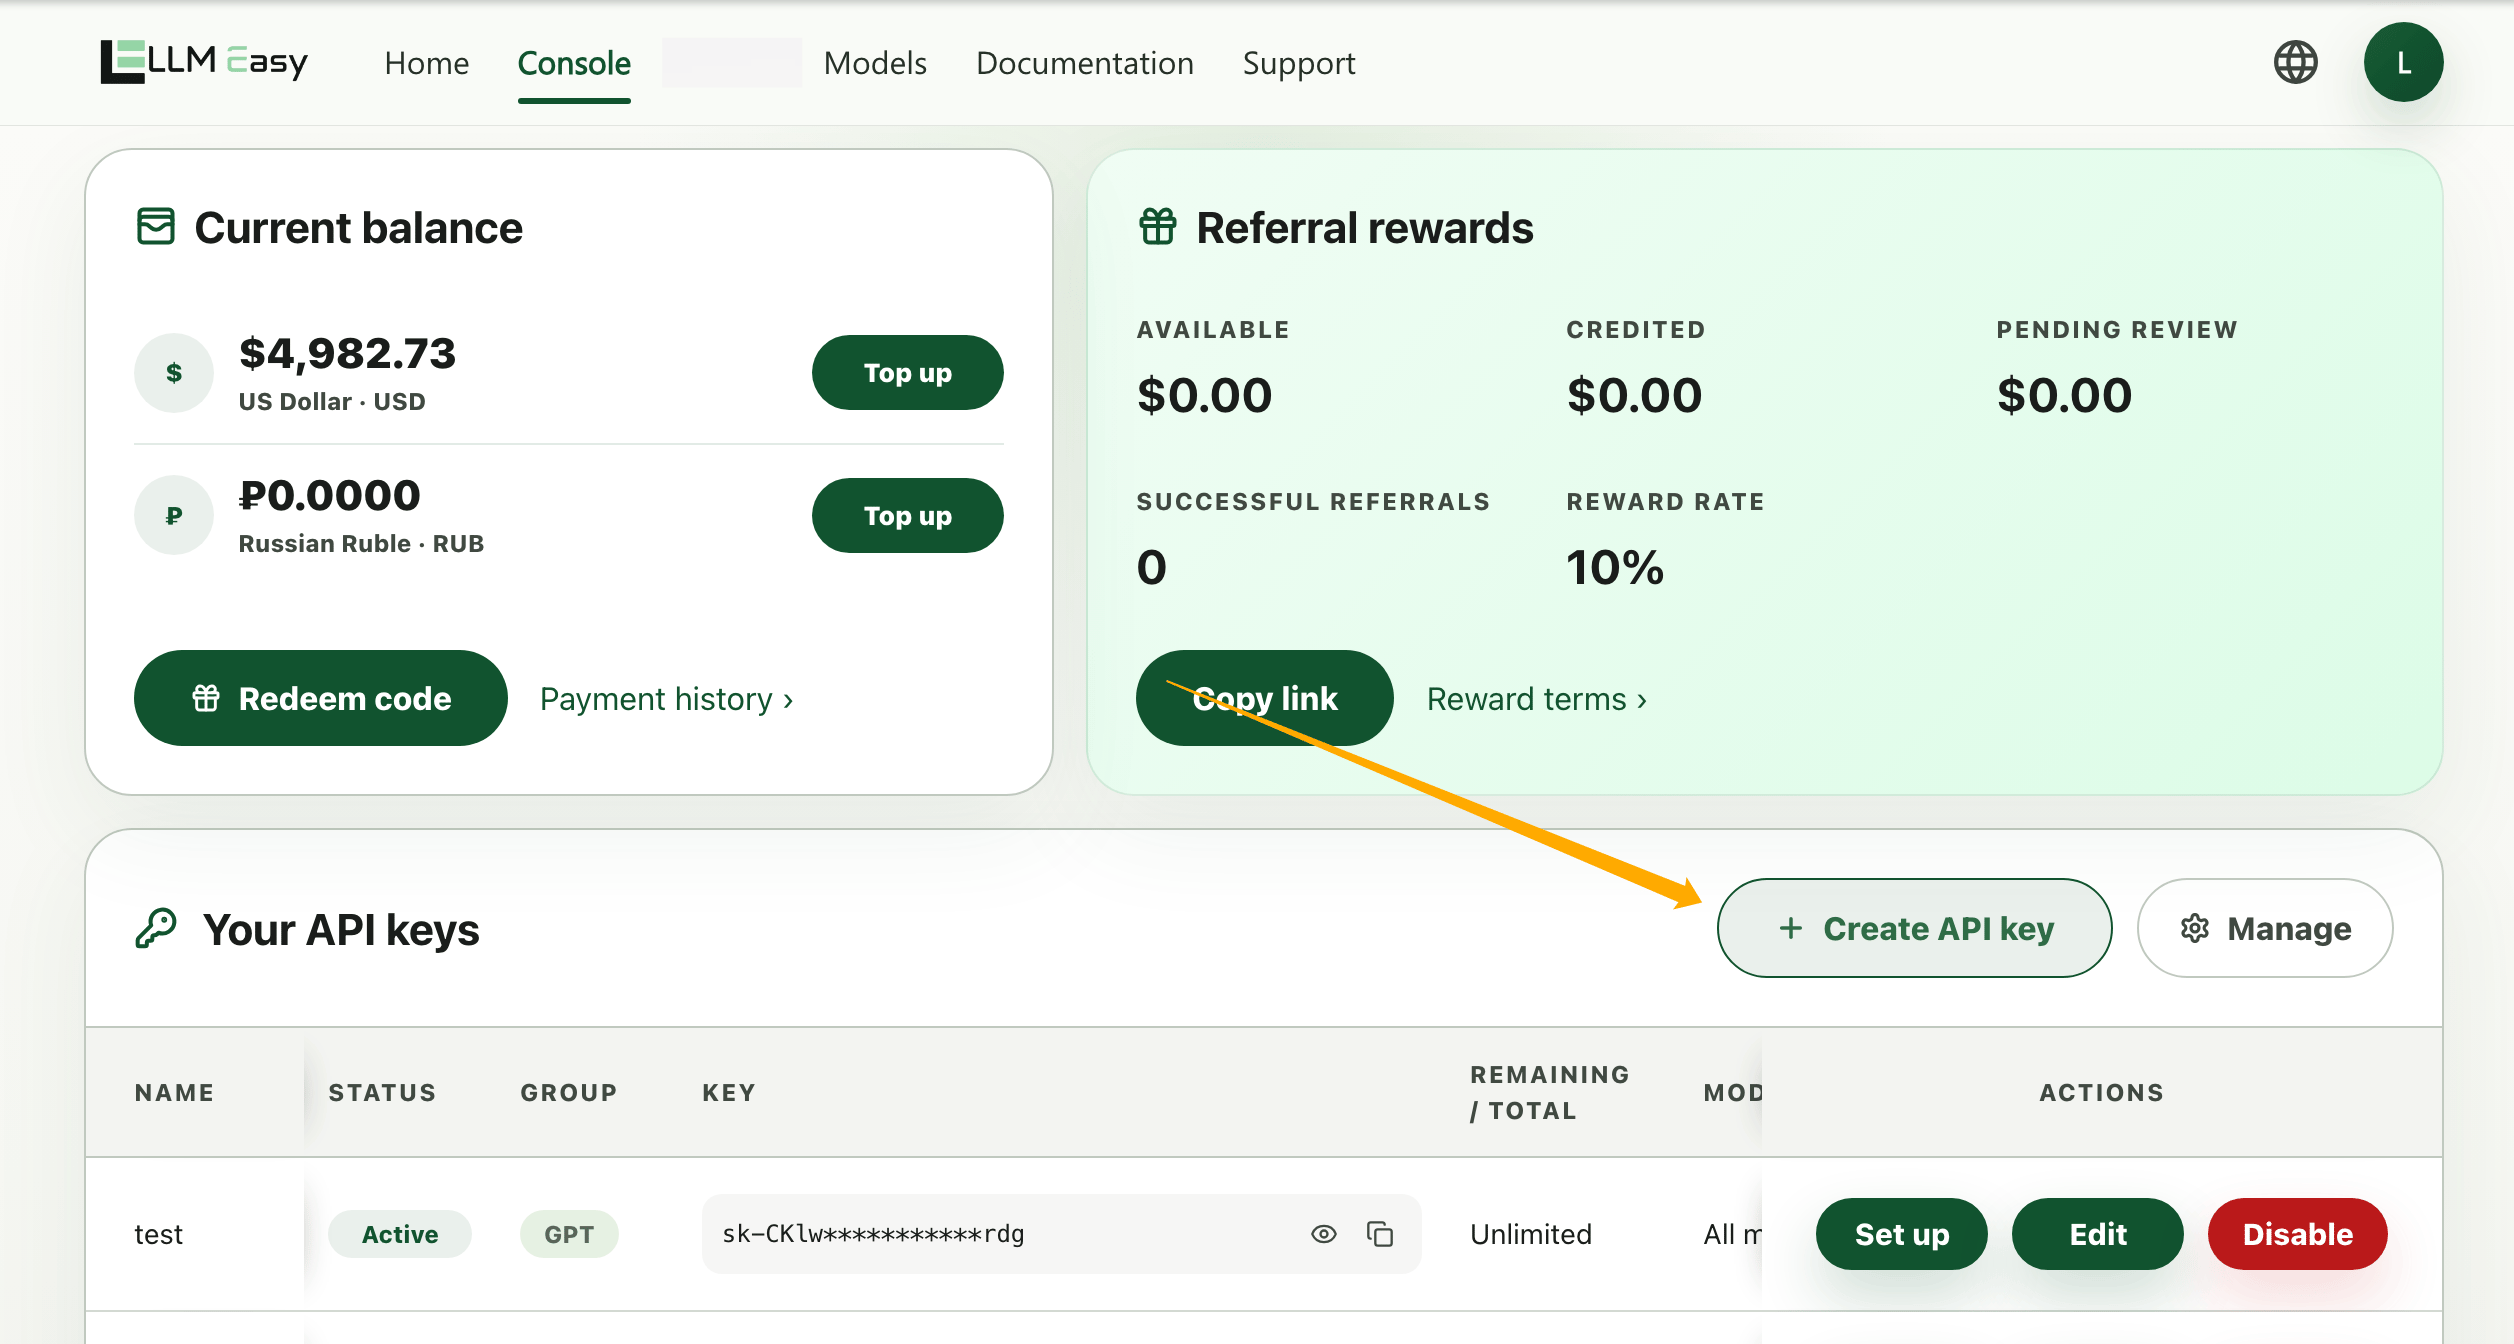
Think of the API Key name as the intended use of this key. If you pick the right use case first, the rest of the setup is much easier.
Choose the Key group by tool type
In the form, fill in Name, choose the Key group, and confirm the expiration date and optional spending limit.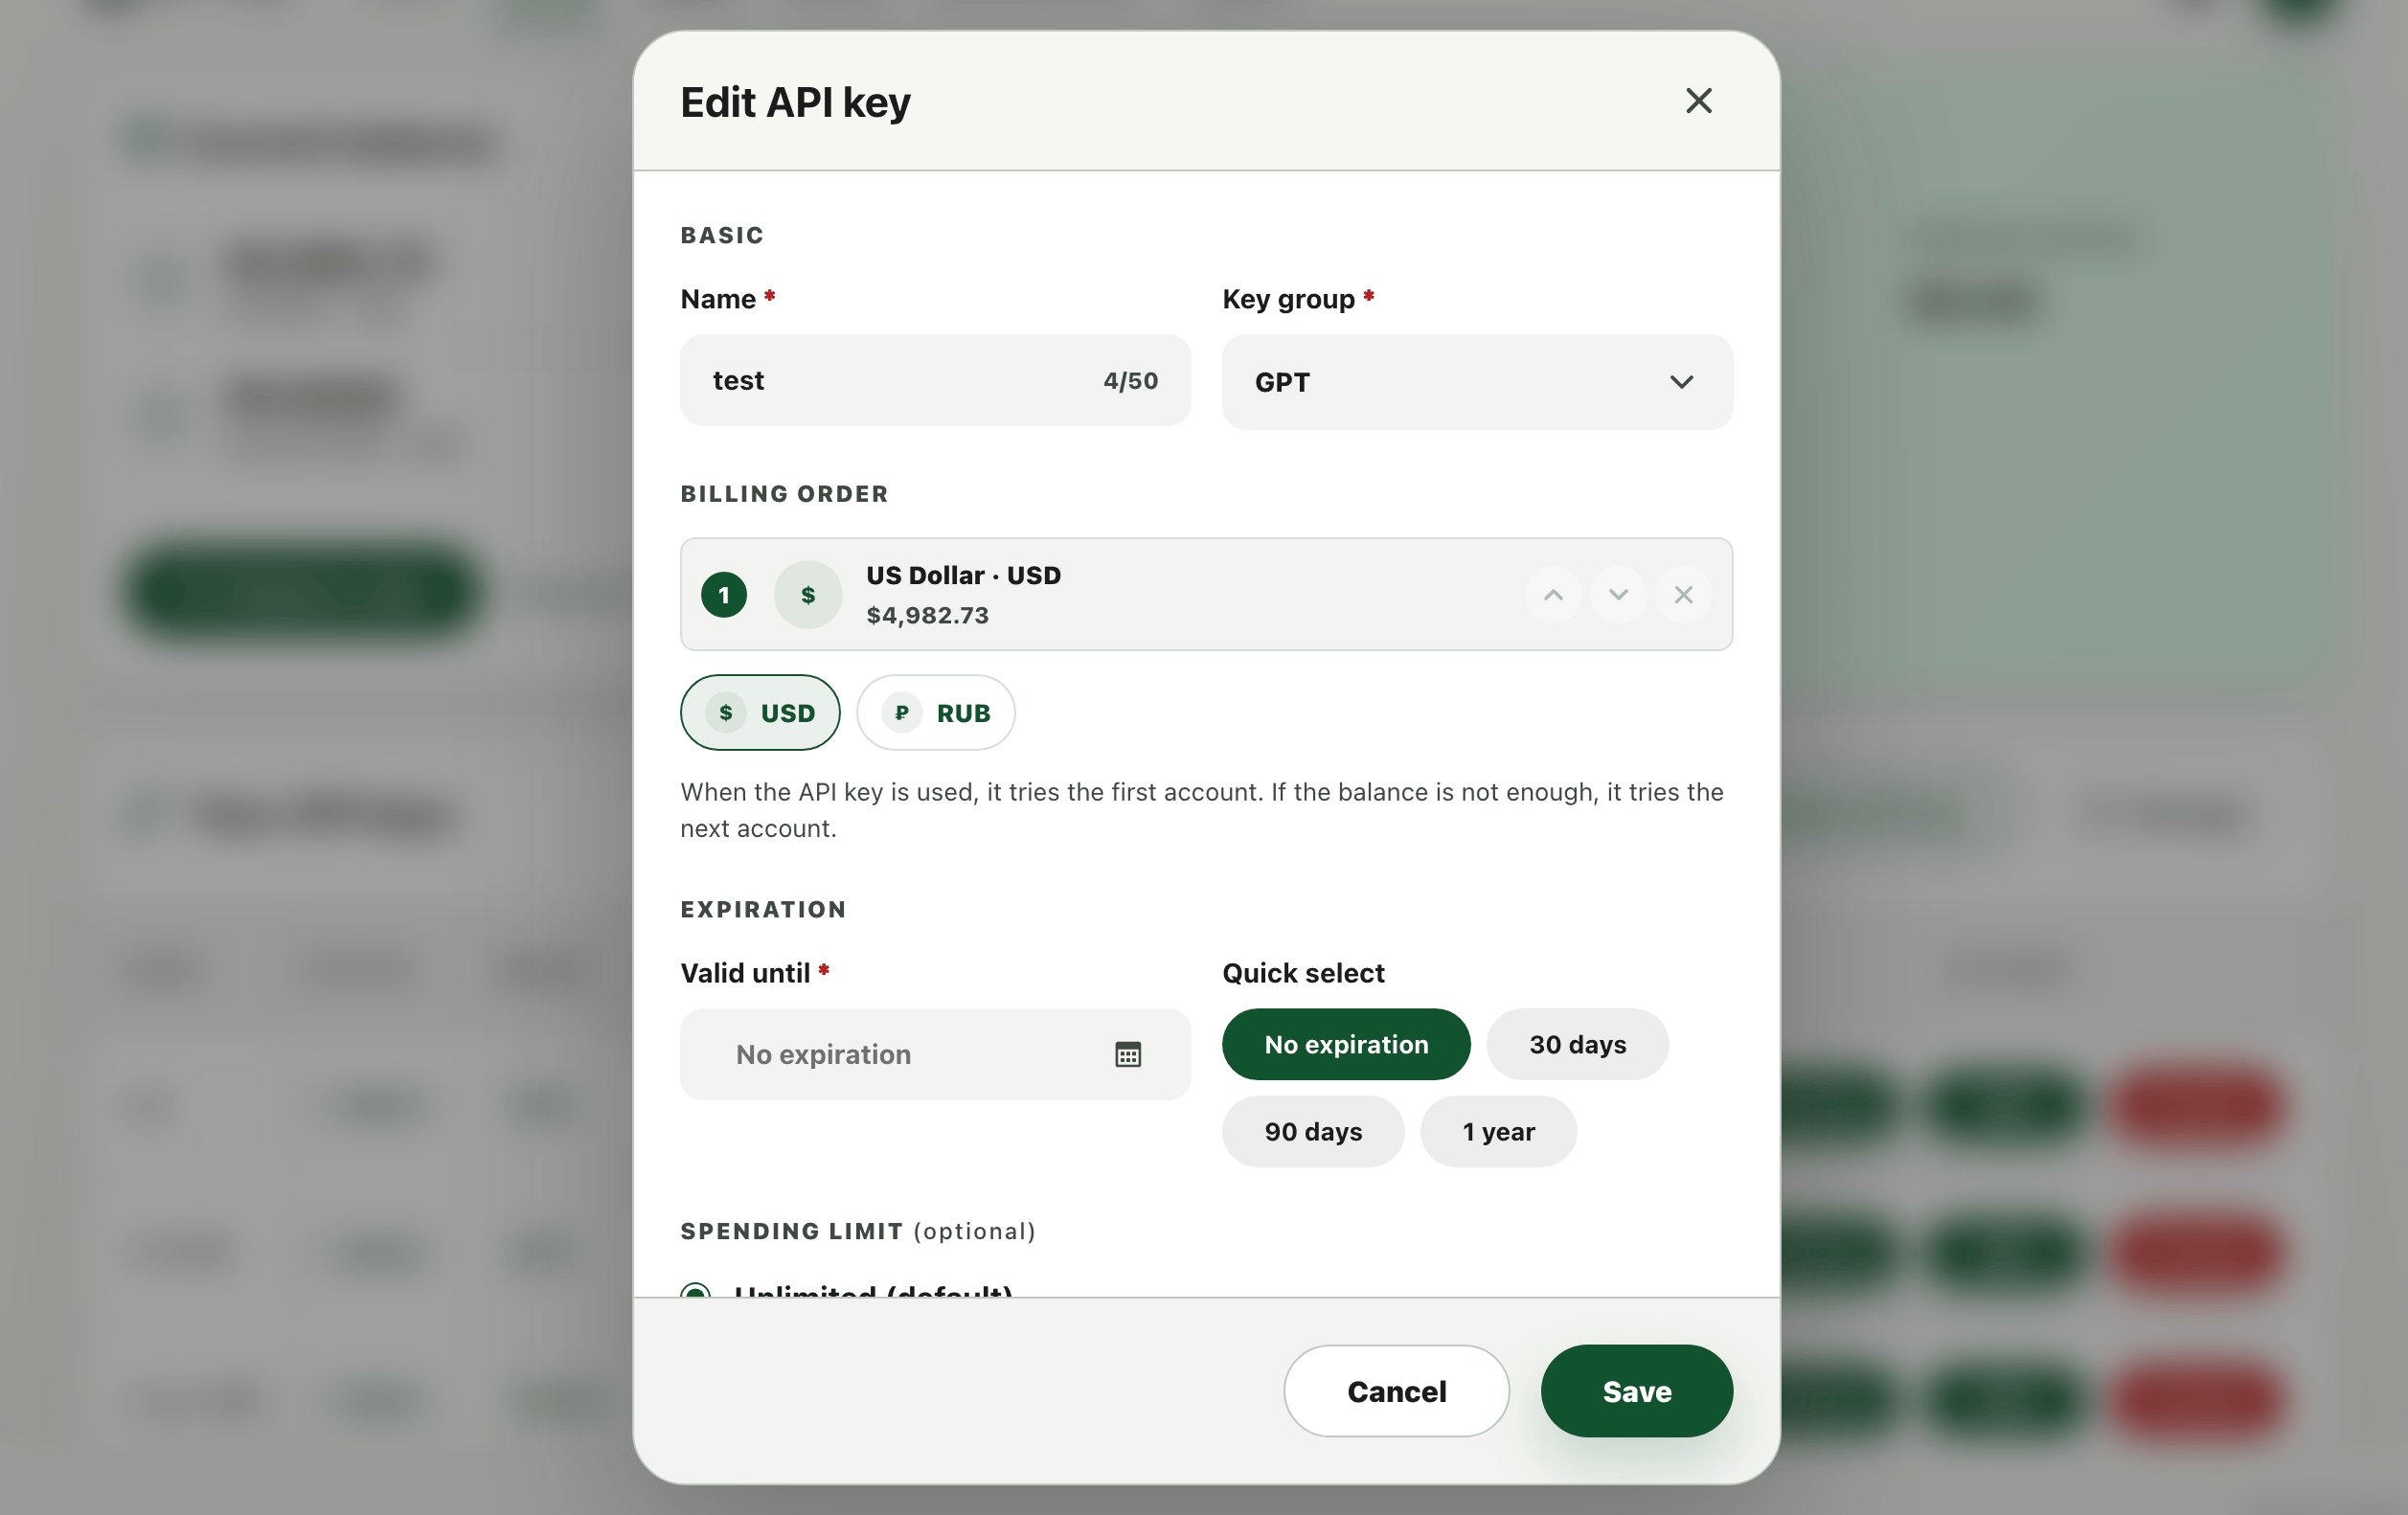
Choose a setup method
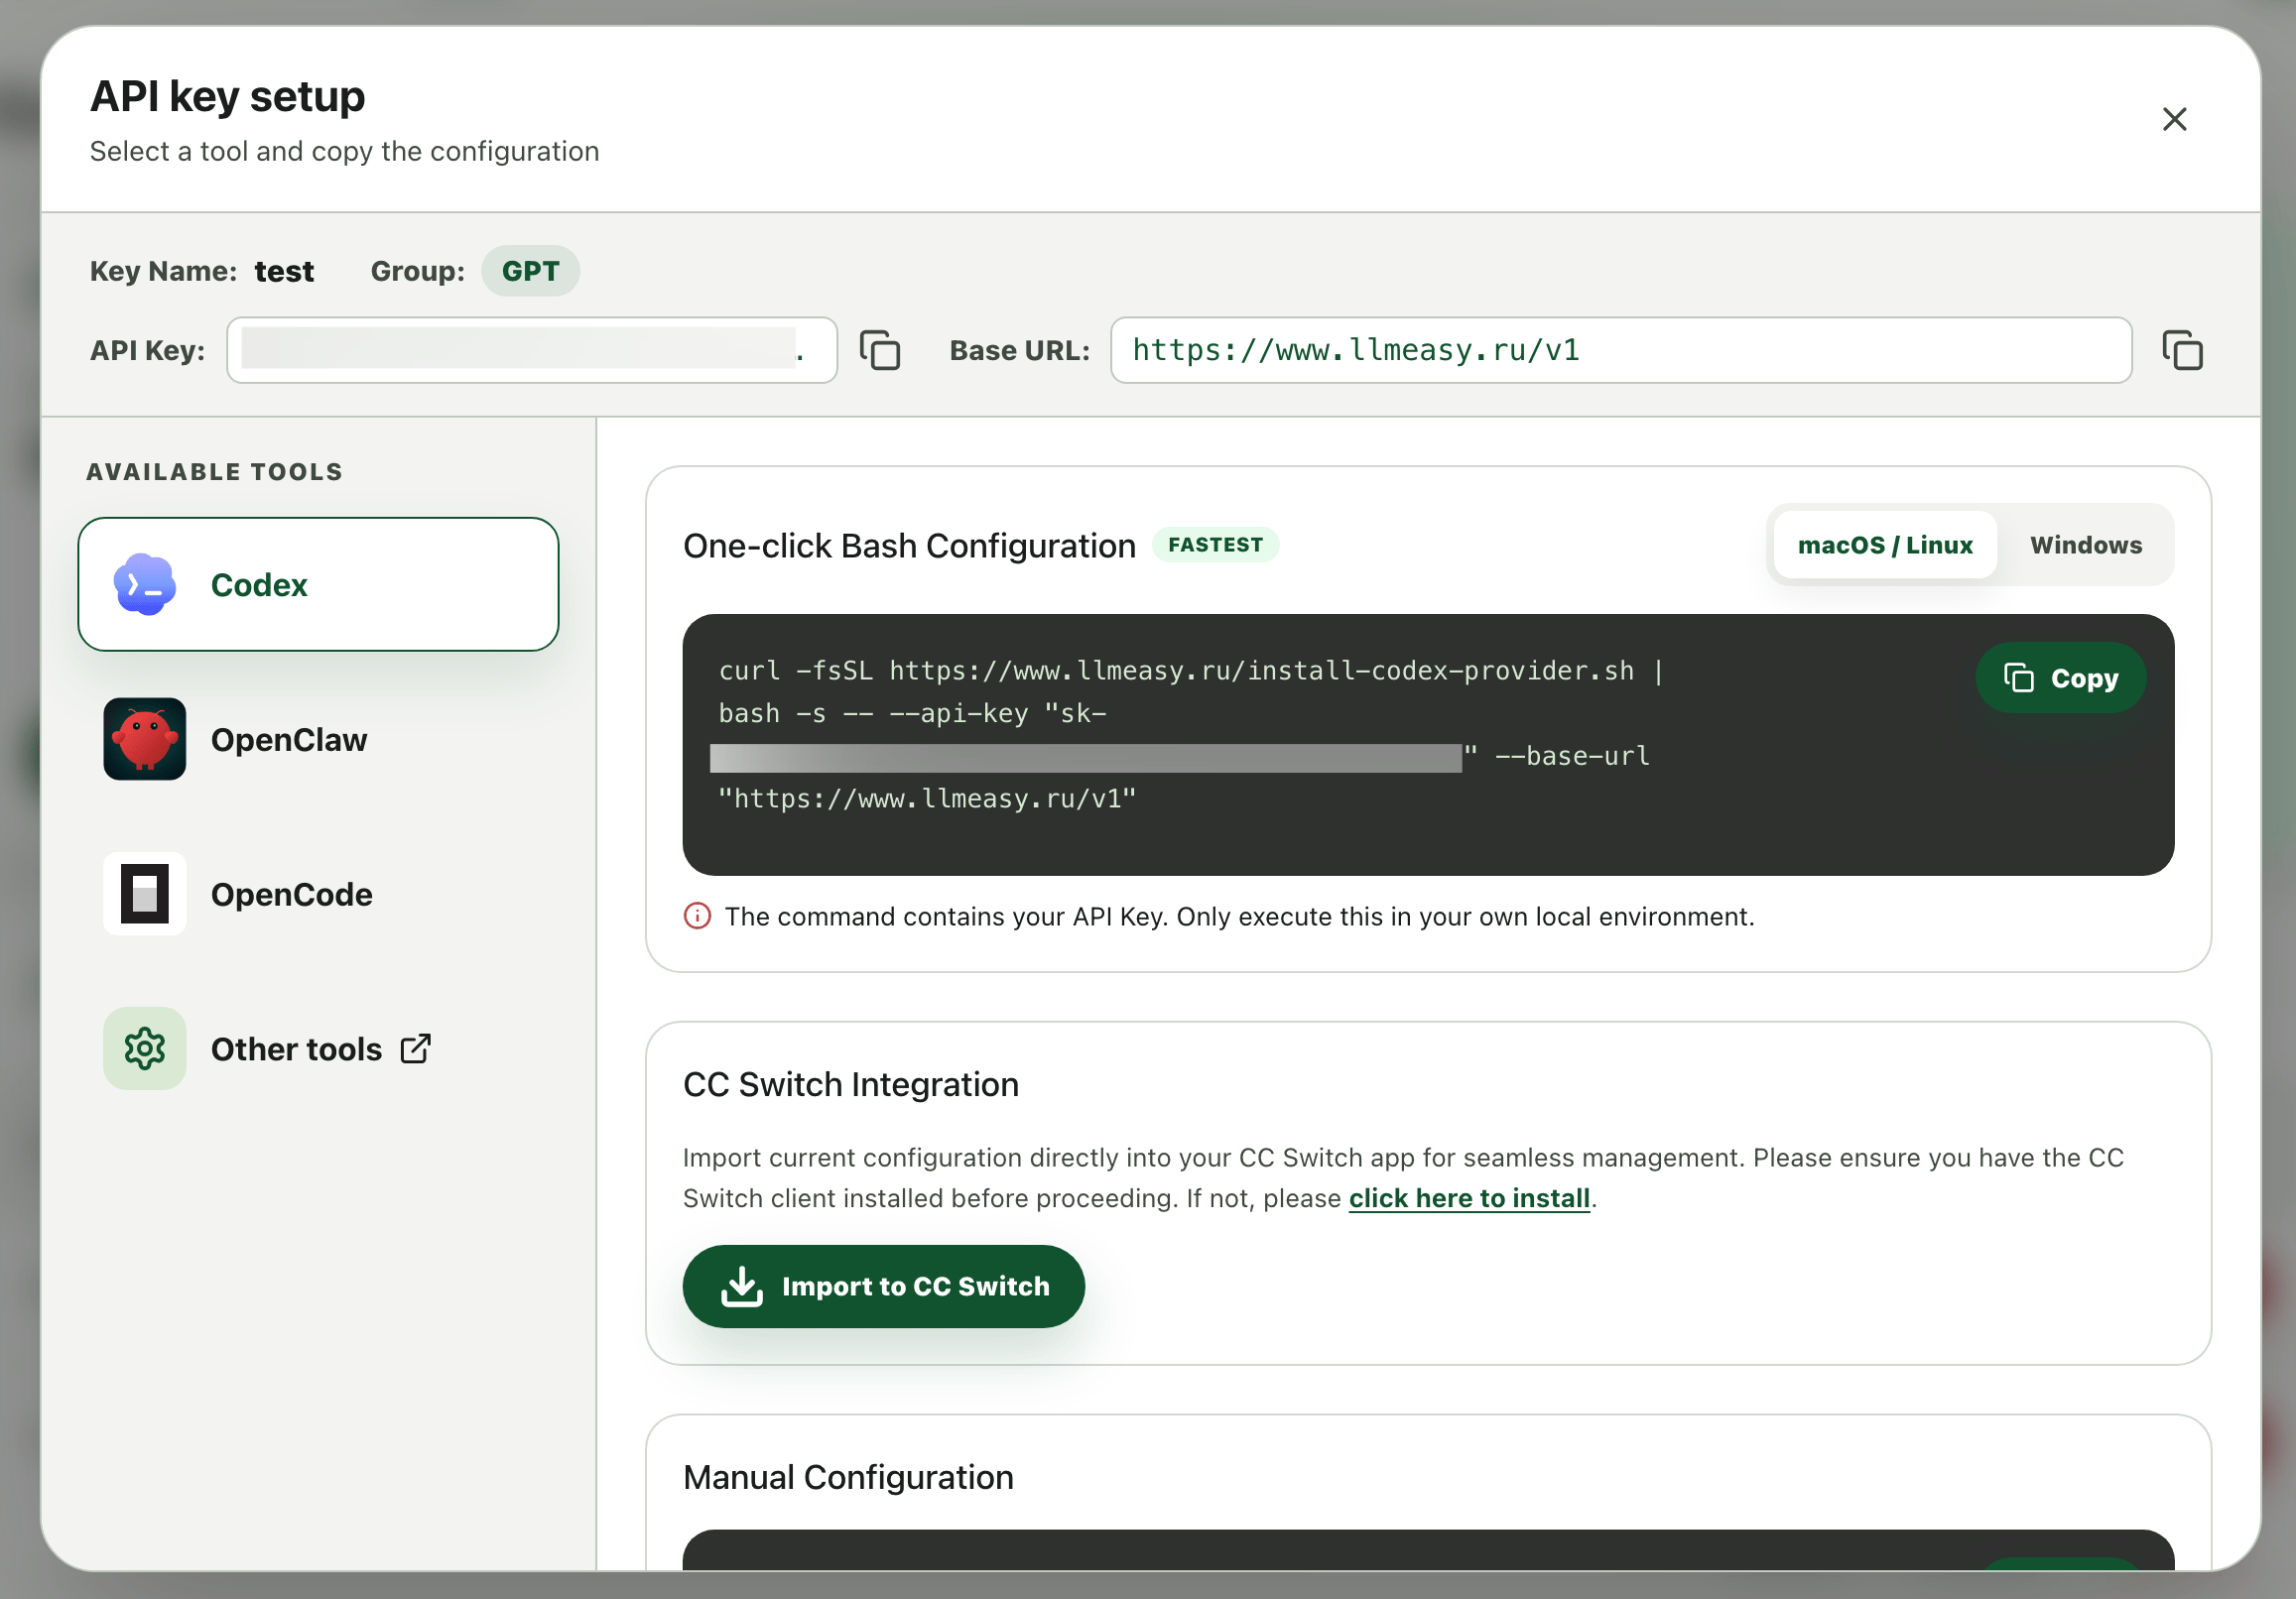
In the Setup dialog, choose the tool you want to connect, then choose one setup method.
- One-click script: select the tool and operating system, copy the generated command, and run it in your own local terminal. Use this for quick Codex, OpenClaw, or OpenCode setup.
- CC Switch integration: click Import to CC Switch to import the current API Key and Base URL into CC Switch. Use this when you manage multiple tools and providers in one app.
- Manual configuration: copy API Key and Base URL, then paste them into the target tool’s setup flow. Use this for Cursor, Cline, Roo Code, Zed, and other clients.
Different tools use different auth fields, model selectors, and config file locations. Continue with the dedicated tool guide before you finish the setup.
Next steps
Continue with the guide that matches your tool:Connect CC Switch
Start here if you want to manage Claude Code, Codex CLI, OpenCode, and OpenClaw providers in one place.
Connect Claude Code
Use the Claude Key group and follow the full Claude Code setup guide.
Connect Codex
Use the GPT Key group and follow the full Codex setup guide.