
Documentation Index

Fetch the complete documentation index at: https://docs.llmeasy.ru/llms.txt

Use this file to discover all available pages before exploring further.

When connecting LLMEasy to Cursor, use the OpenAI-compatible endpoint. External tools use the Codex group, so copy the current model ID from the model plaza (https://www.llmeasy.ru/pricing).
Cursor only lets users on a paid advanced tier or higher configure custom models. If your account or client version does not show custom model, API Key, or Base URL options, check your Cursor plan and client version first.
Known issue: Override OpenAI Base URL is a global setting. When enabled, it affects all API keys configured in Cursor, including the Anthropic / GPT keys used by Cursor’s built-in models. Cursor’s official community has confirmed this behavior: setting a Base URL affects all API keys and models (community thread).If Cursor’s built-in Claude / GPT models stop working after you enable Override OpenAI Base URL, turn Override OpenAI Base URL off when you are not using LLMEasy. Cursor currently does not support a different Base URL per model; that capability is still tracked as a feature request (feature request).

Prerequisites

  • Cursor installed (download Cursor)
  • LLMEasy API Key (register here (https://www.llmeasy.ru/register))
  • The API Key belongs to the Codex group, and you plan to select a model from the same group

Setup

1

Open the model settings page

In Cursor, click Settings in the lower-left corner, then go to Models. Scroll down to API Keys.
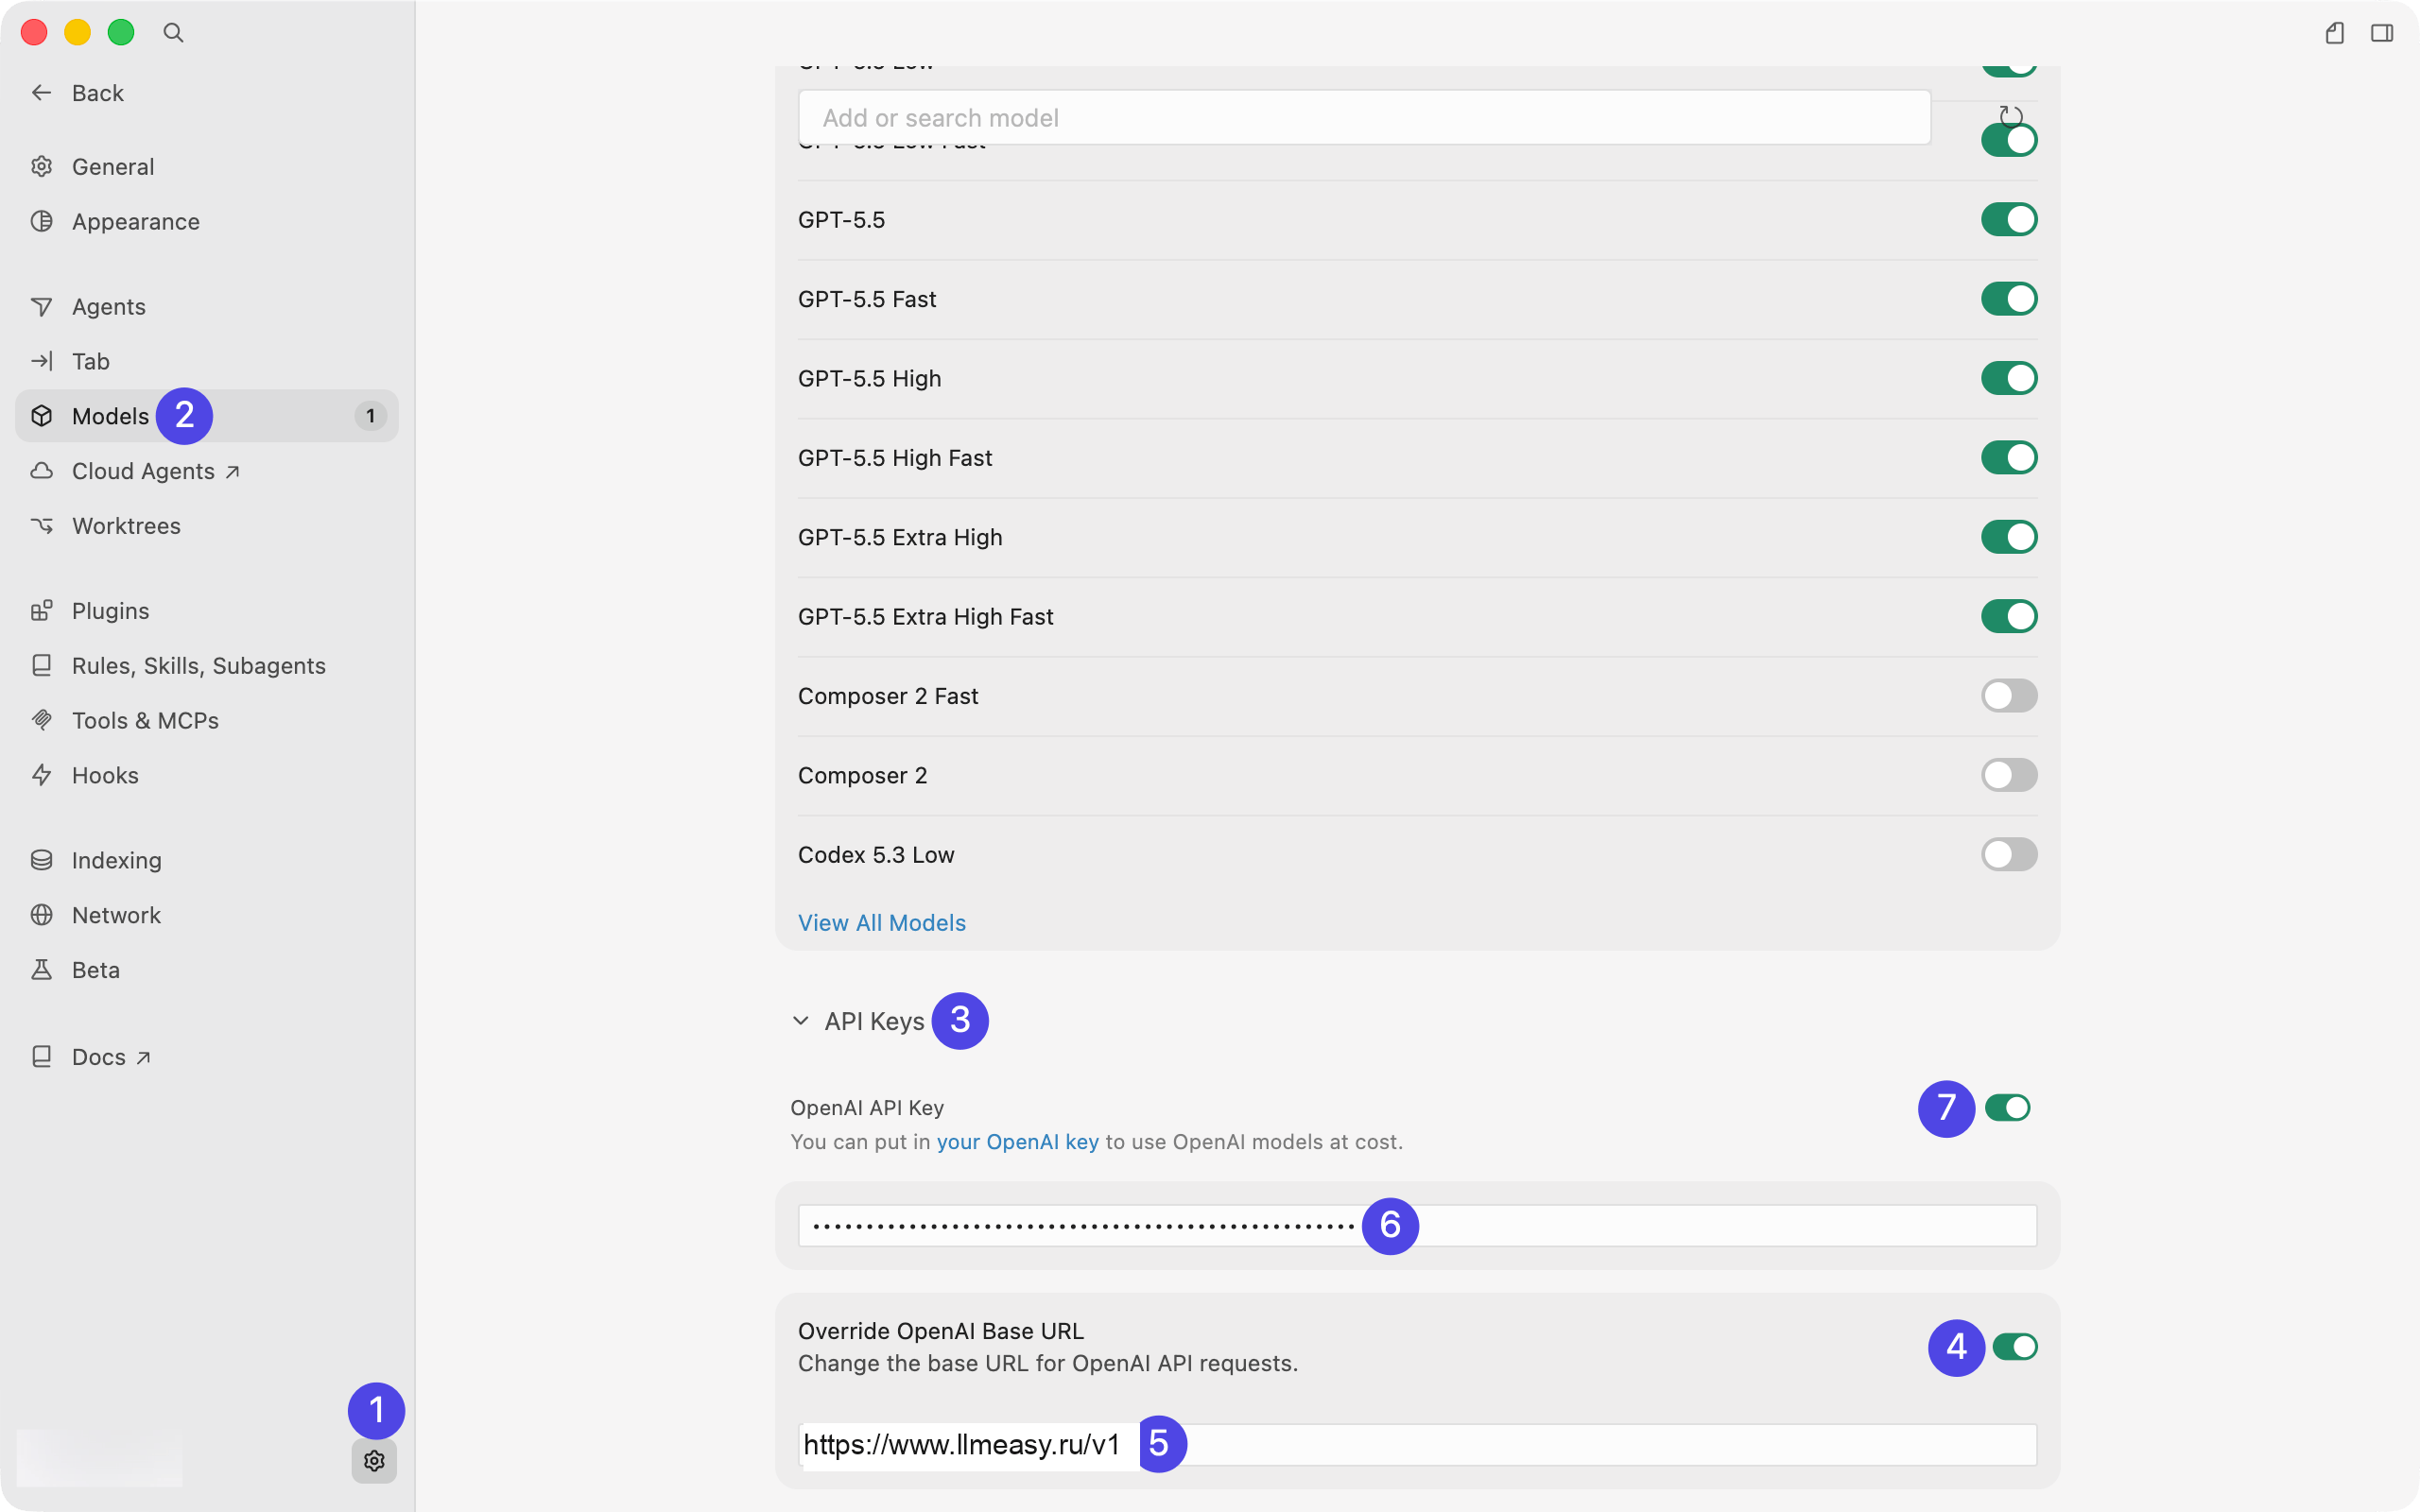
Cursor settings page showing Settings, Models, API Keys, OpenAI API Key, and Override OpenAI Base URL fields.
2

Enter the Base URL and API Key

In API Keys, configure the fields in this order:
  1. Enable Override OpenAI Base URL
  2. Enter https://www.llmeasy.ru/v1 in the Base URL field
  3. Paste your LLMEasy API Key into OpenAI API Key
  4. After the URL and key are filled in, enable the OpenAI API Key toggle
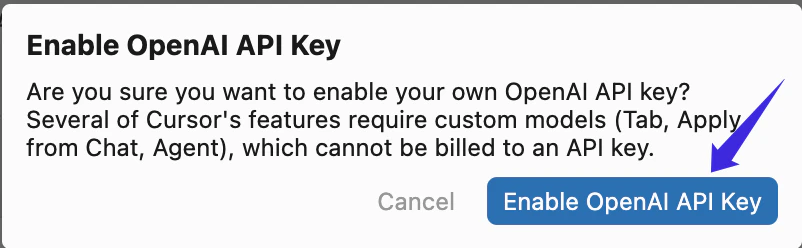
Enter the key before turning on the toggle. This makes Cursor show the authentication confirmation dialog.
3

Enable the OpenAI API Key

In the confirmation dialog, click Enable OpenAI API Key.
Cursor confirmation dialog asking you to enable your own OpenAI API key.
4

Refresh the model list and enable models

Back in Models, click the refresh button on the right before selecting a model. Wait until the model list finishes refreshing.Only select models that belong to the same LLMEasy group as your API Key. When using a Codex group API Key, choose a model ID from the Codex group in the model plaza, then turn on the toggle for that model.
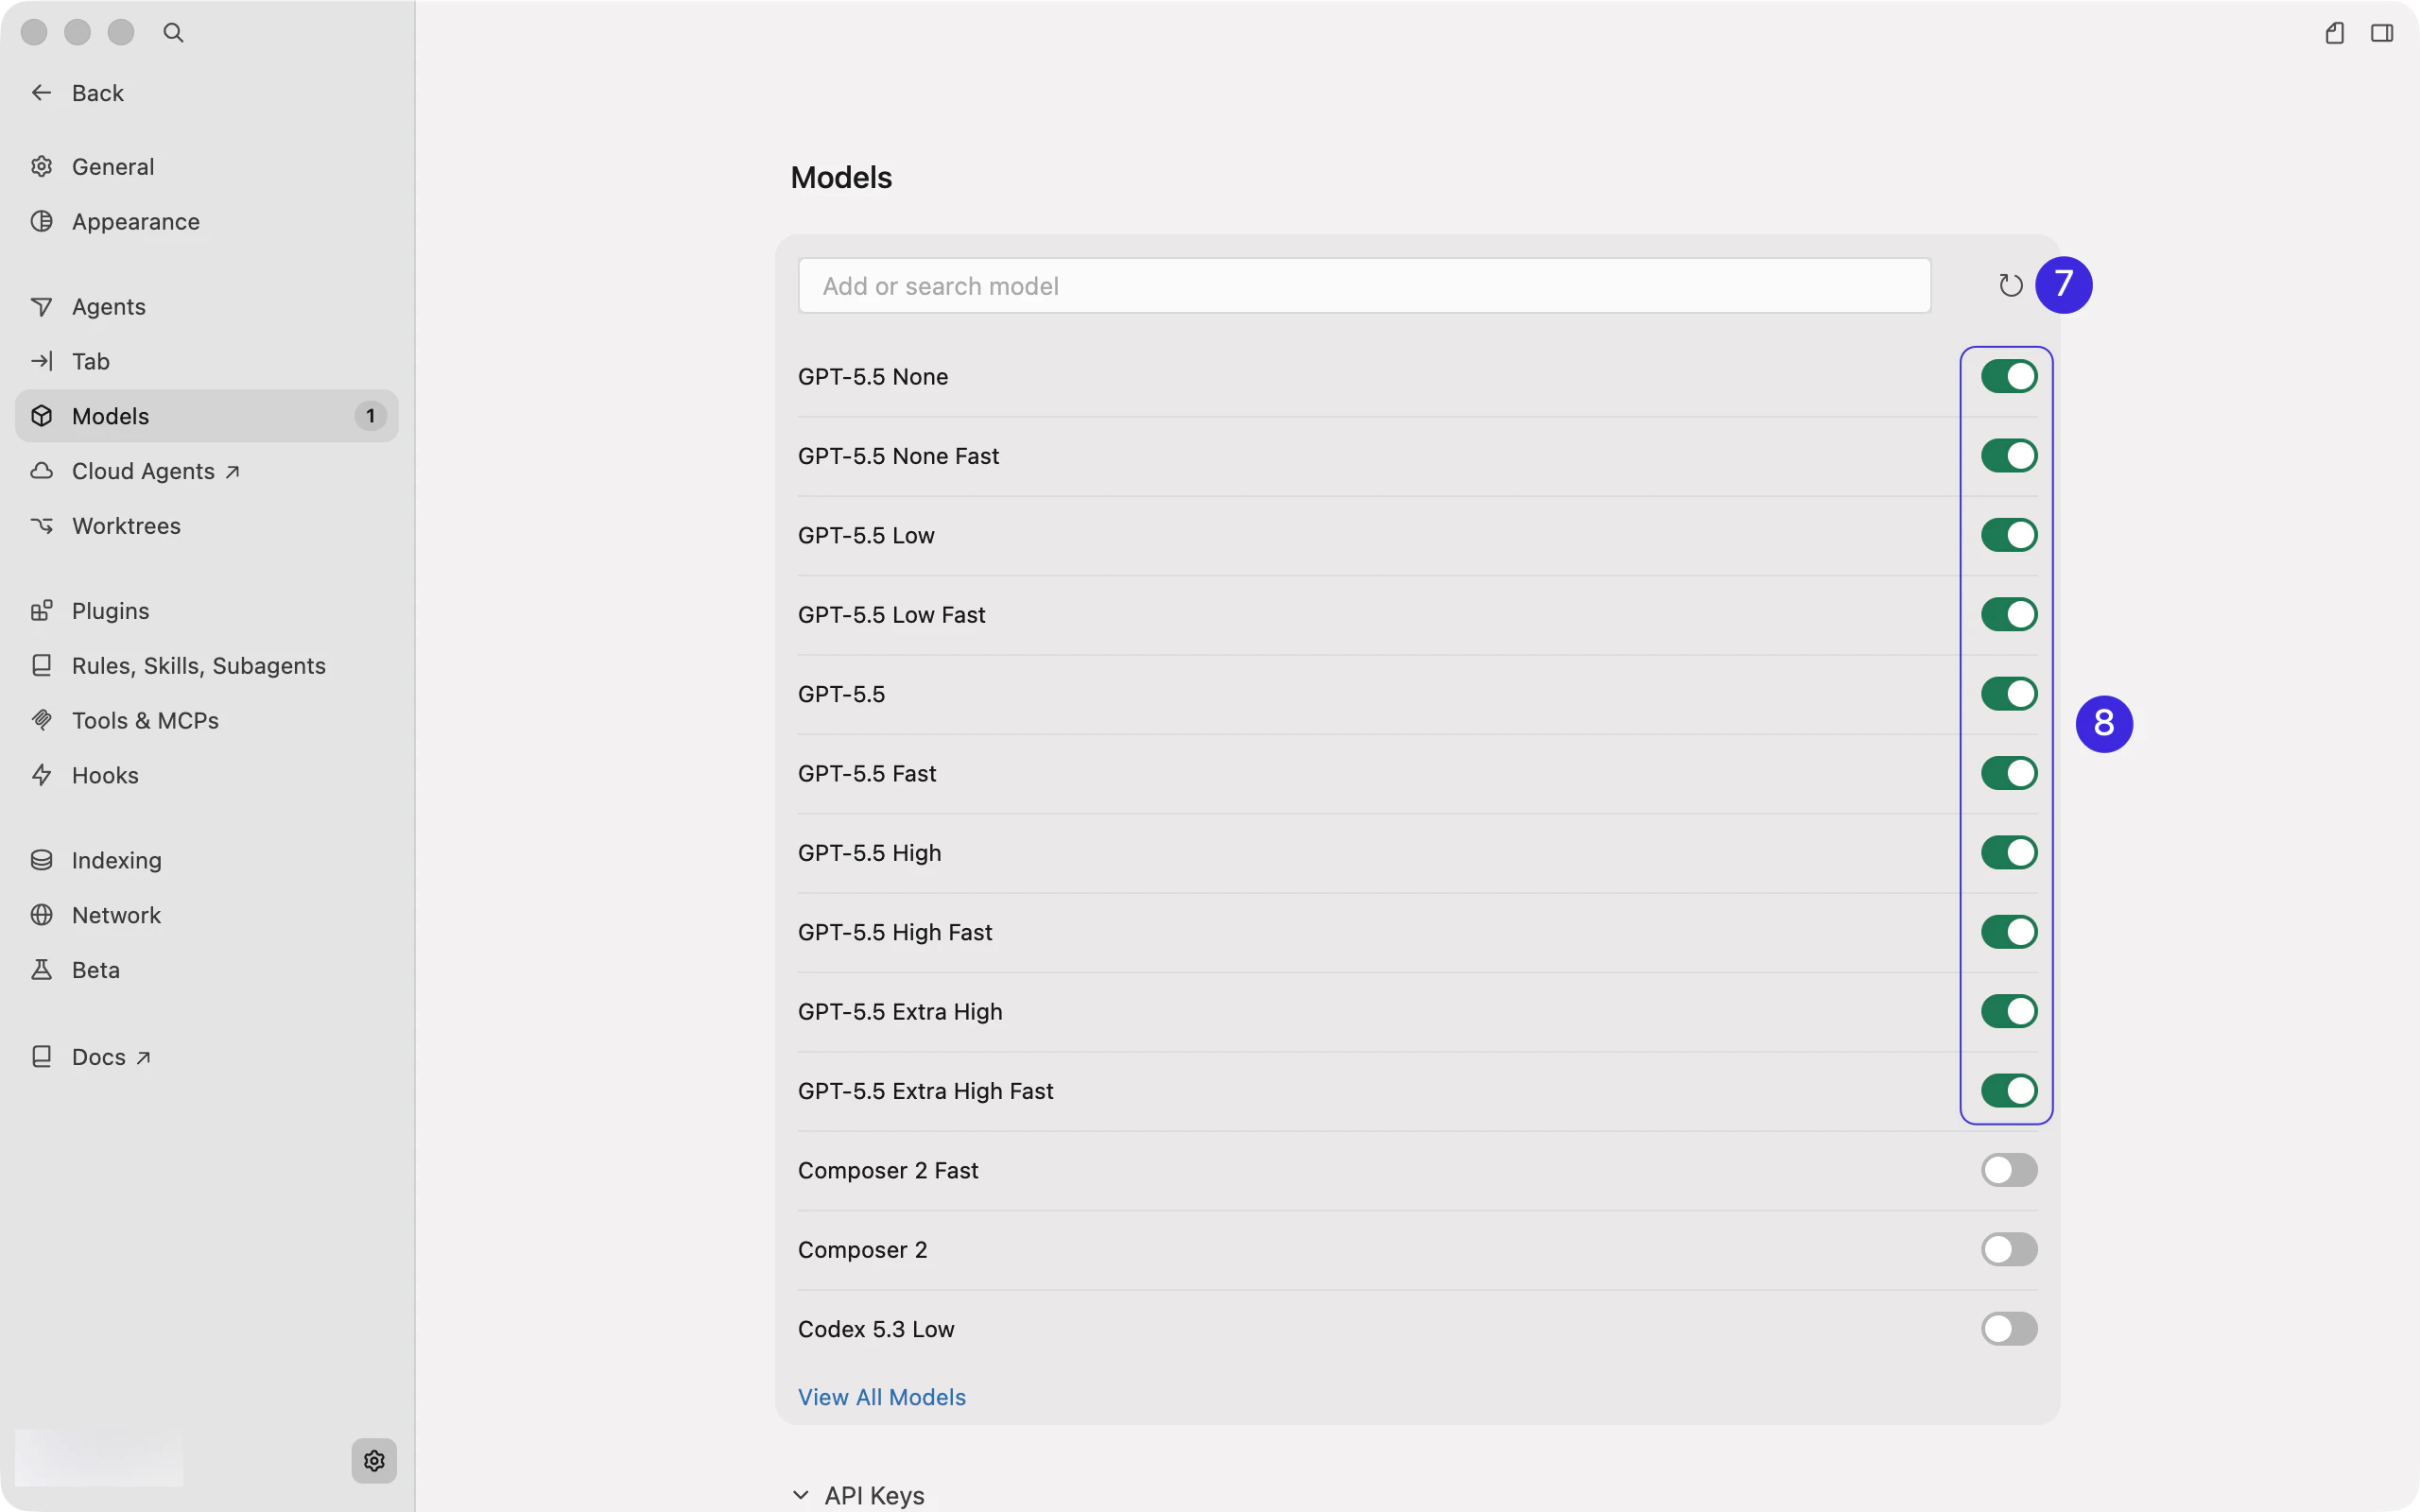
Cursor Models section showing the refresh button and model toggles.
5

Return to chat and turn off Auto

After setup, return to the Cursor chat screen and open the model picker below the input box. If Auto is enabled, turn Auto off first.
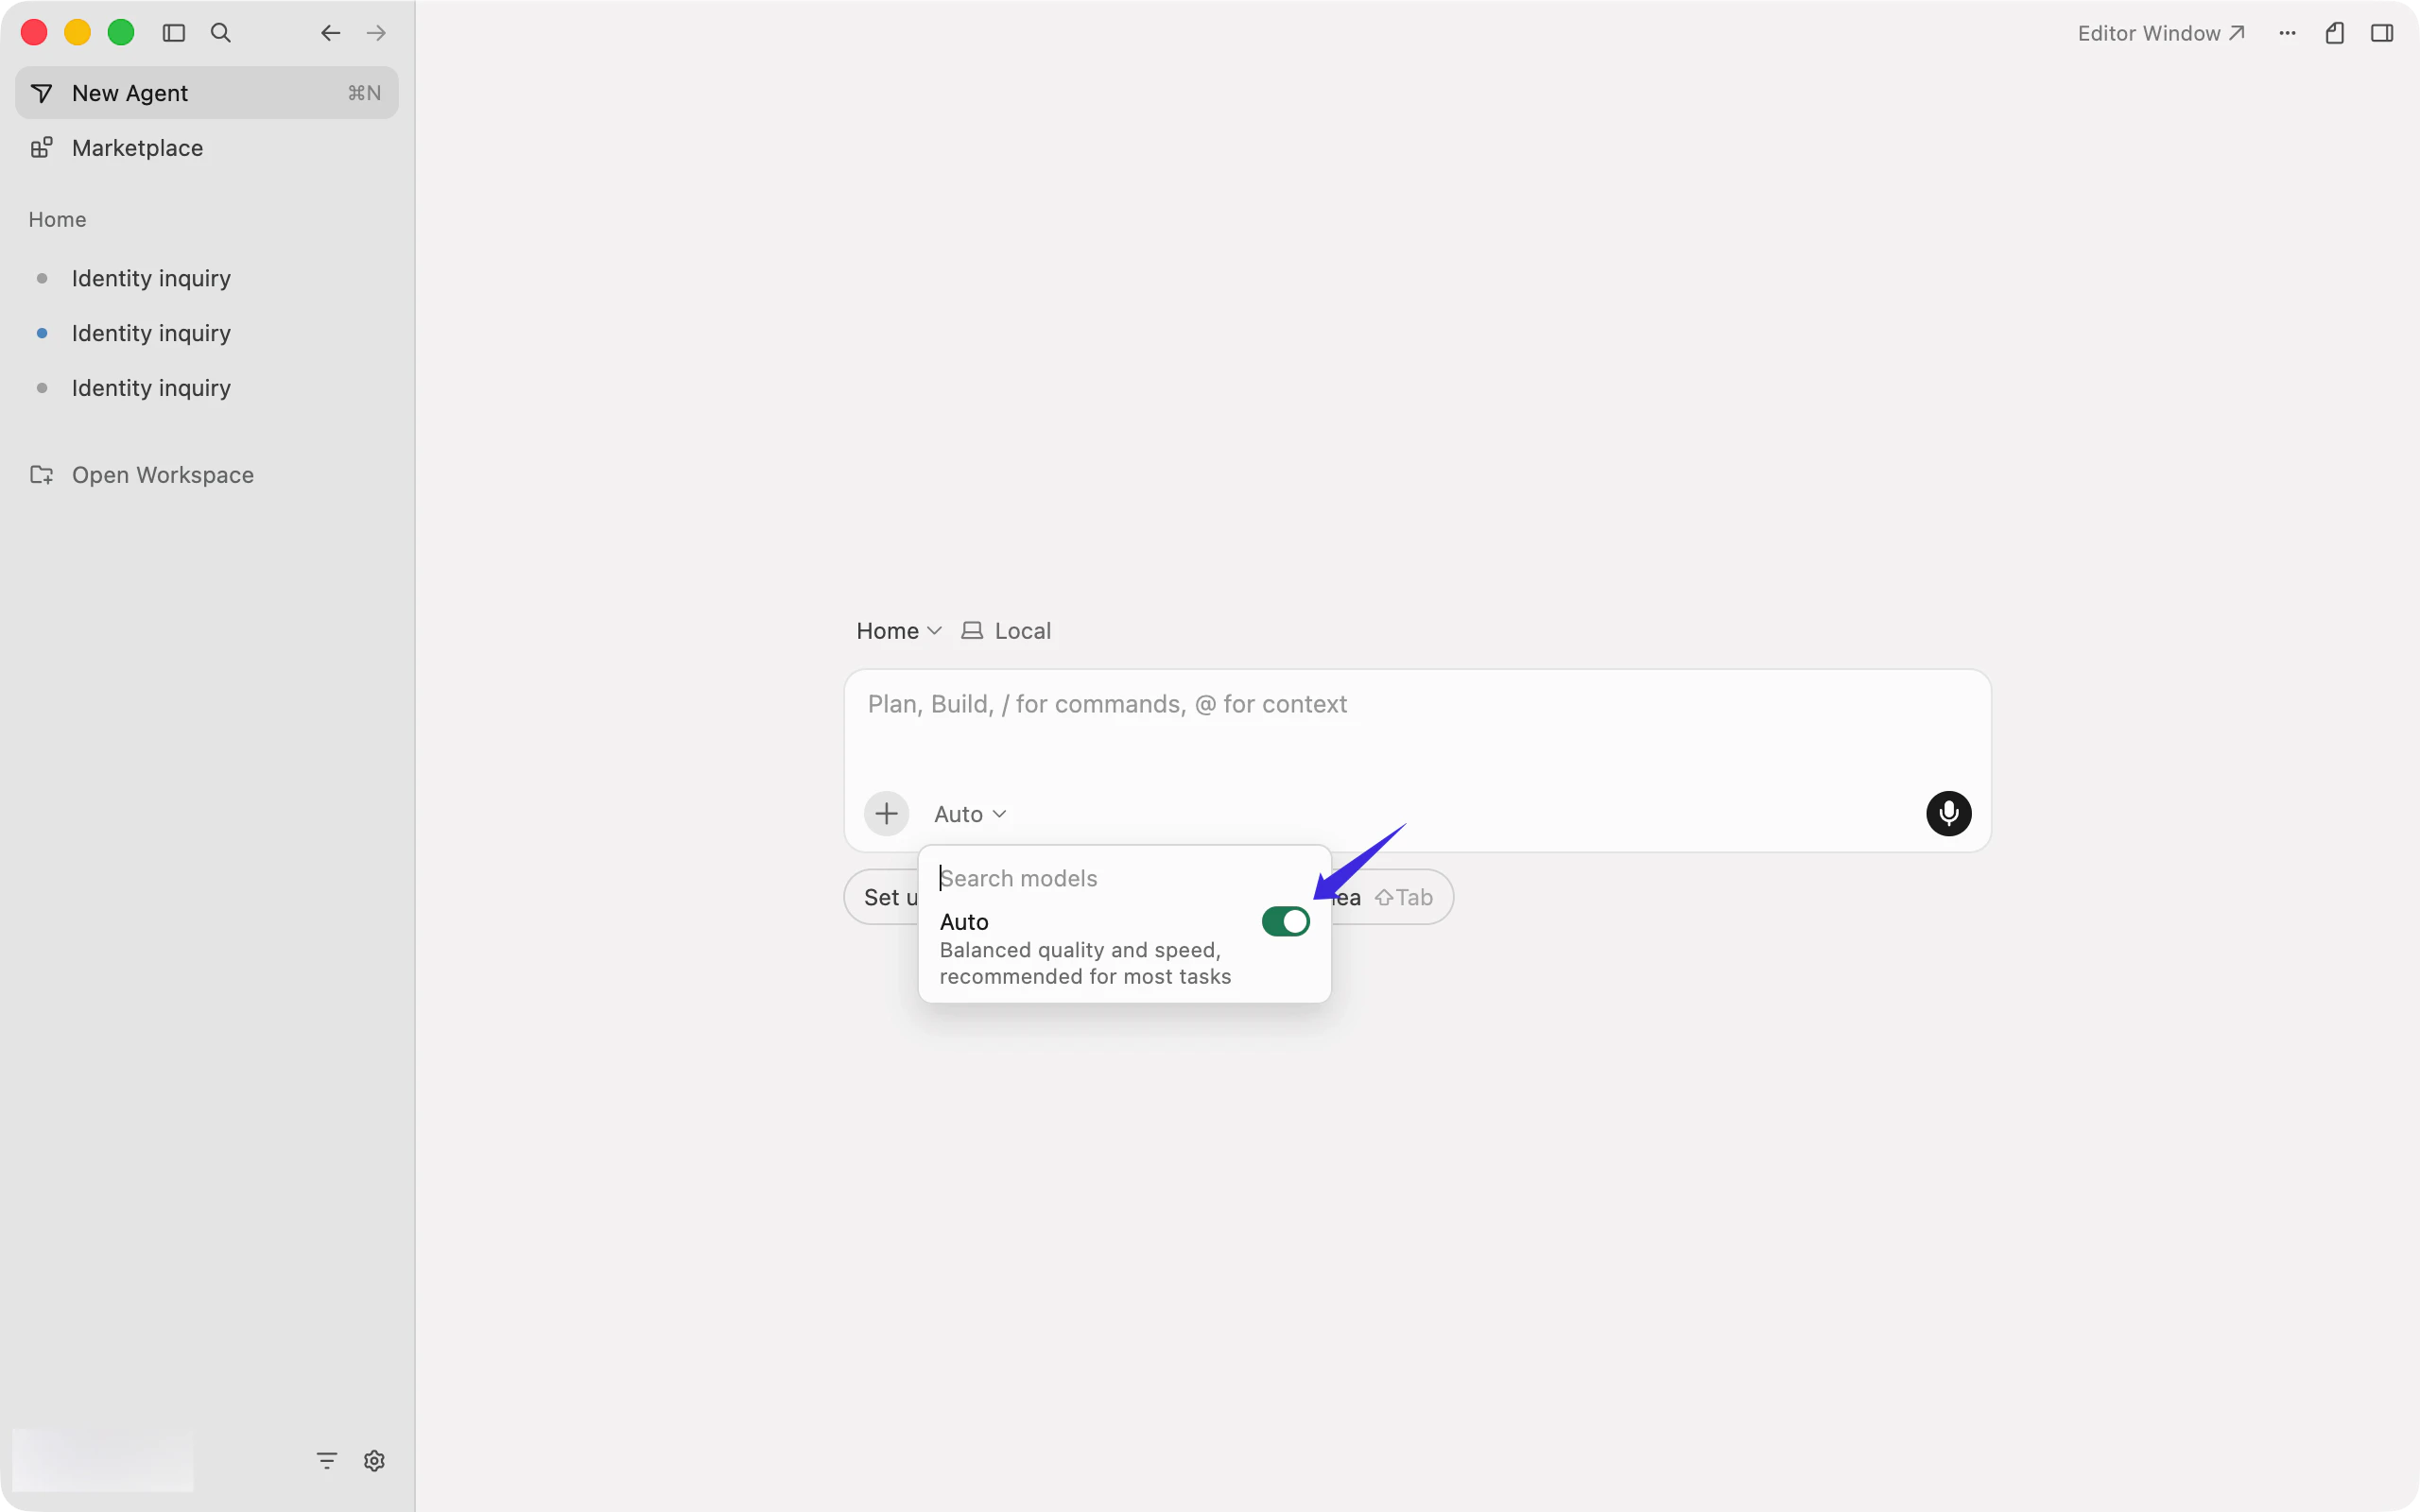
Cursor chat model picker showing the Auto toggle that should be turned off.
6

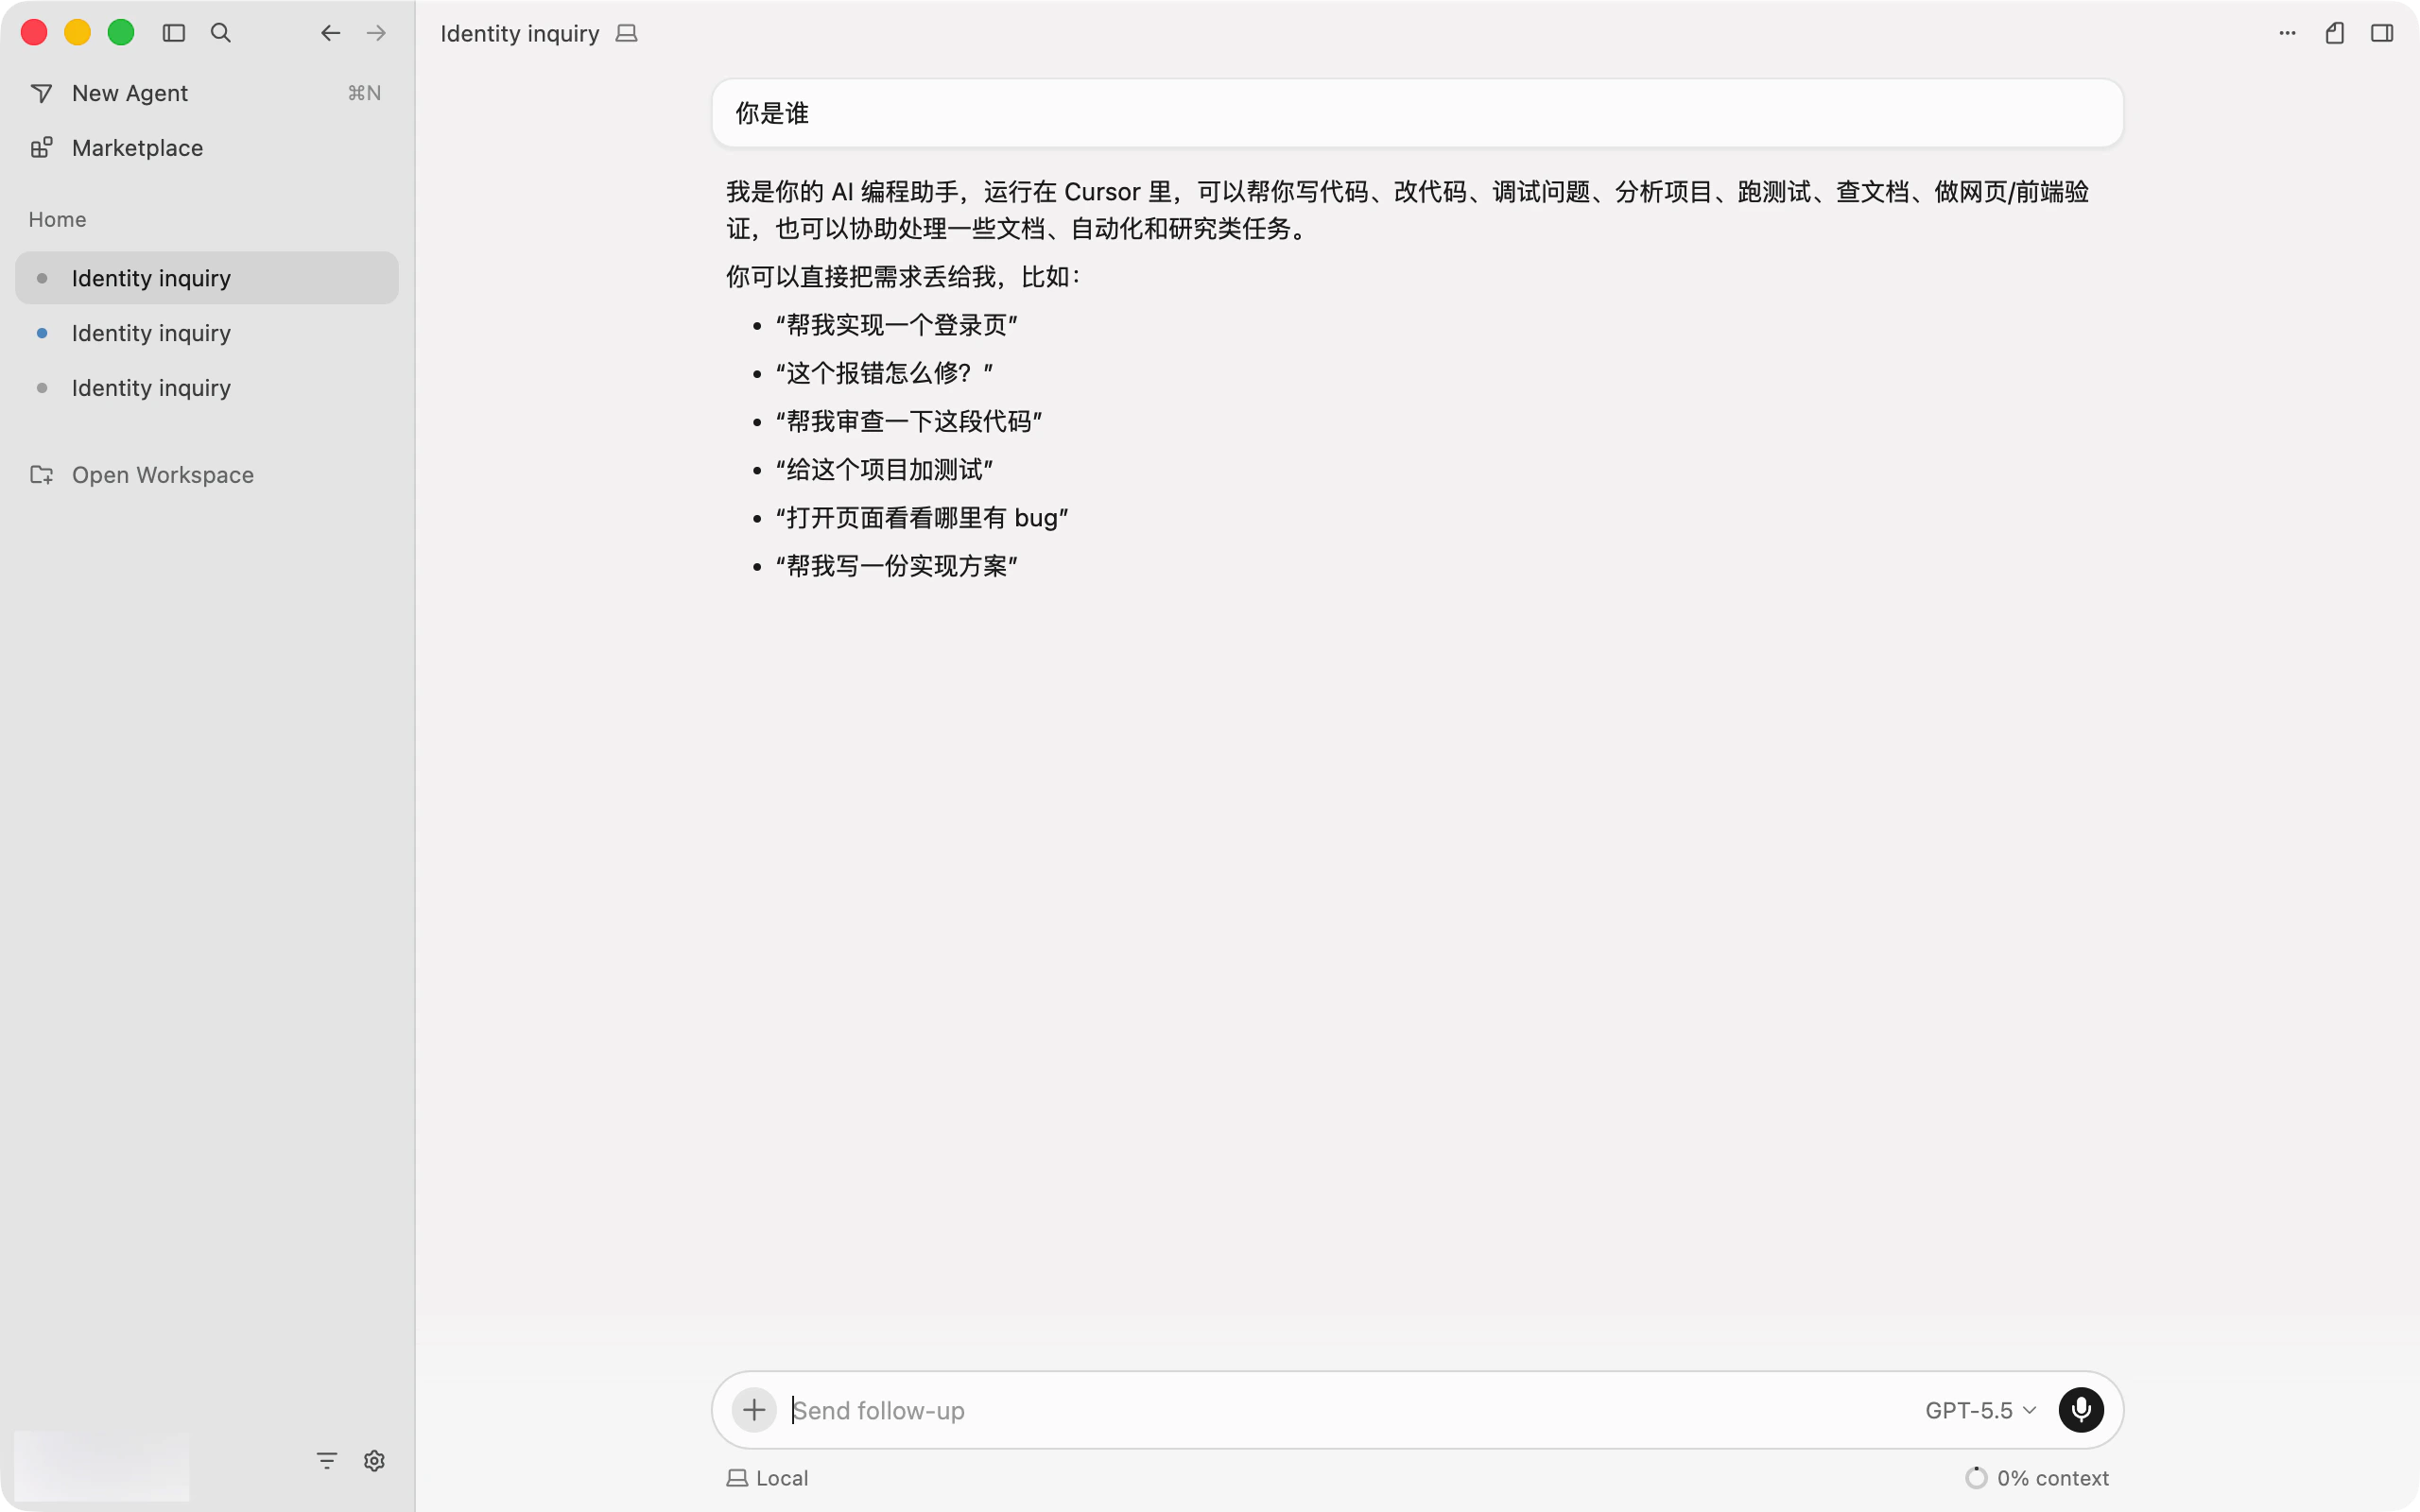
Select the model and start chatting

Choose the Codex group model you enabled, then start chatting.
Cursor chat input with an enabled model selected from the model picker.

Notes

  • Do not use Claude group model IDs in the Codex / OpenAI-compatible flow
  • Do not keep using hardcoded Claude model names; use a current Codex group model ID from the model plaza (https://www.llmeasy.ru/pricing)