> ## Documentation Index
> Fetch the complete documentation index at: https://docs.llmeasy.ru/llms.txt
> Use this file to discover all available pages before exploring further.
# 快速接入
> 新用户用 4 步注册账号、为账户充值、创建 API Key,并进入对应工具的接入文档。
访问 LLMEasy 注册页面,创建账号。
注册成功后自动获得 **\$3 体验额度**,无需绑卡,按量计费,支持退款。
你可以选择 **在线充值** 或 **兑换码充值**。充值完成后,回到控制台确认 **当前余额** 已更新,再继续创建 API Key。
登录后进入 **控制台**,在 **账户** 卡片中点击 **充值**。
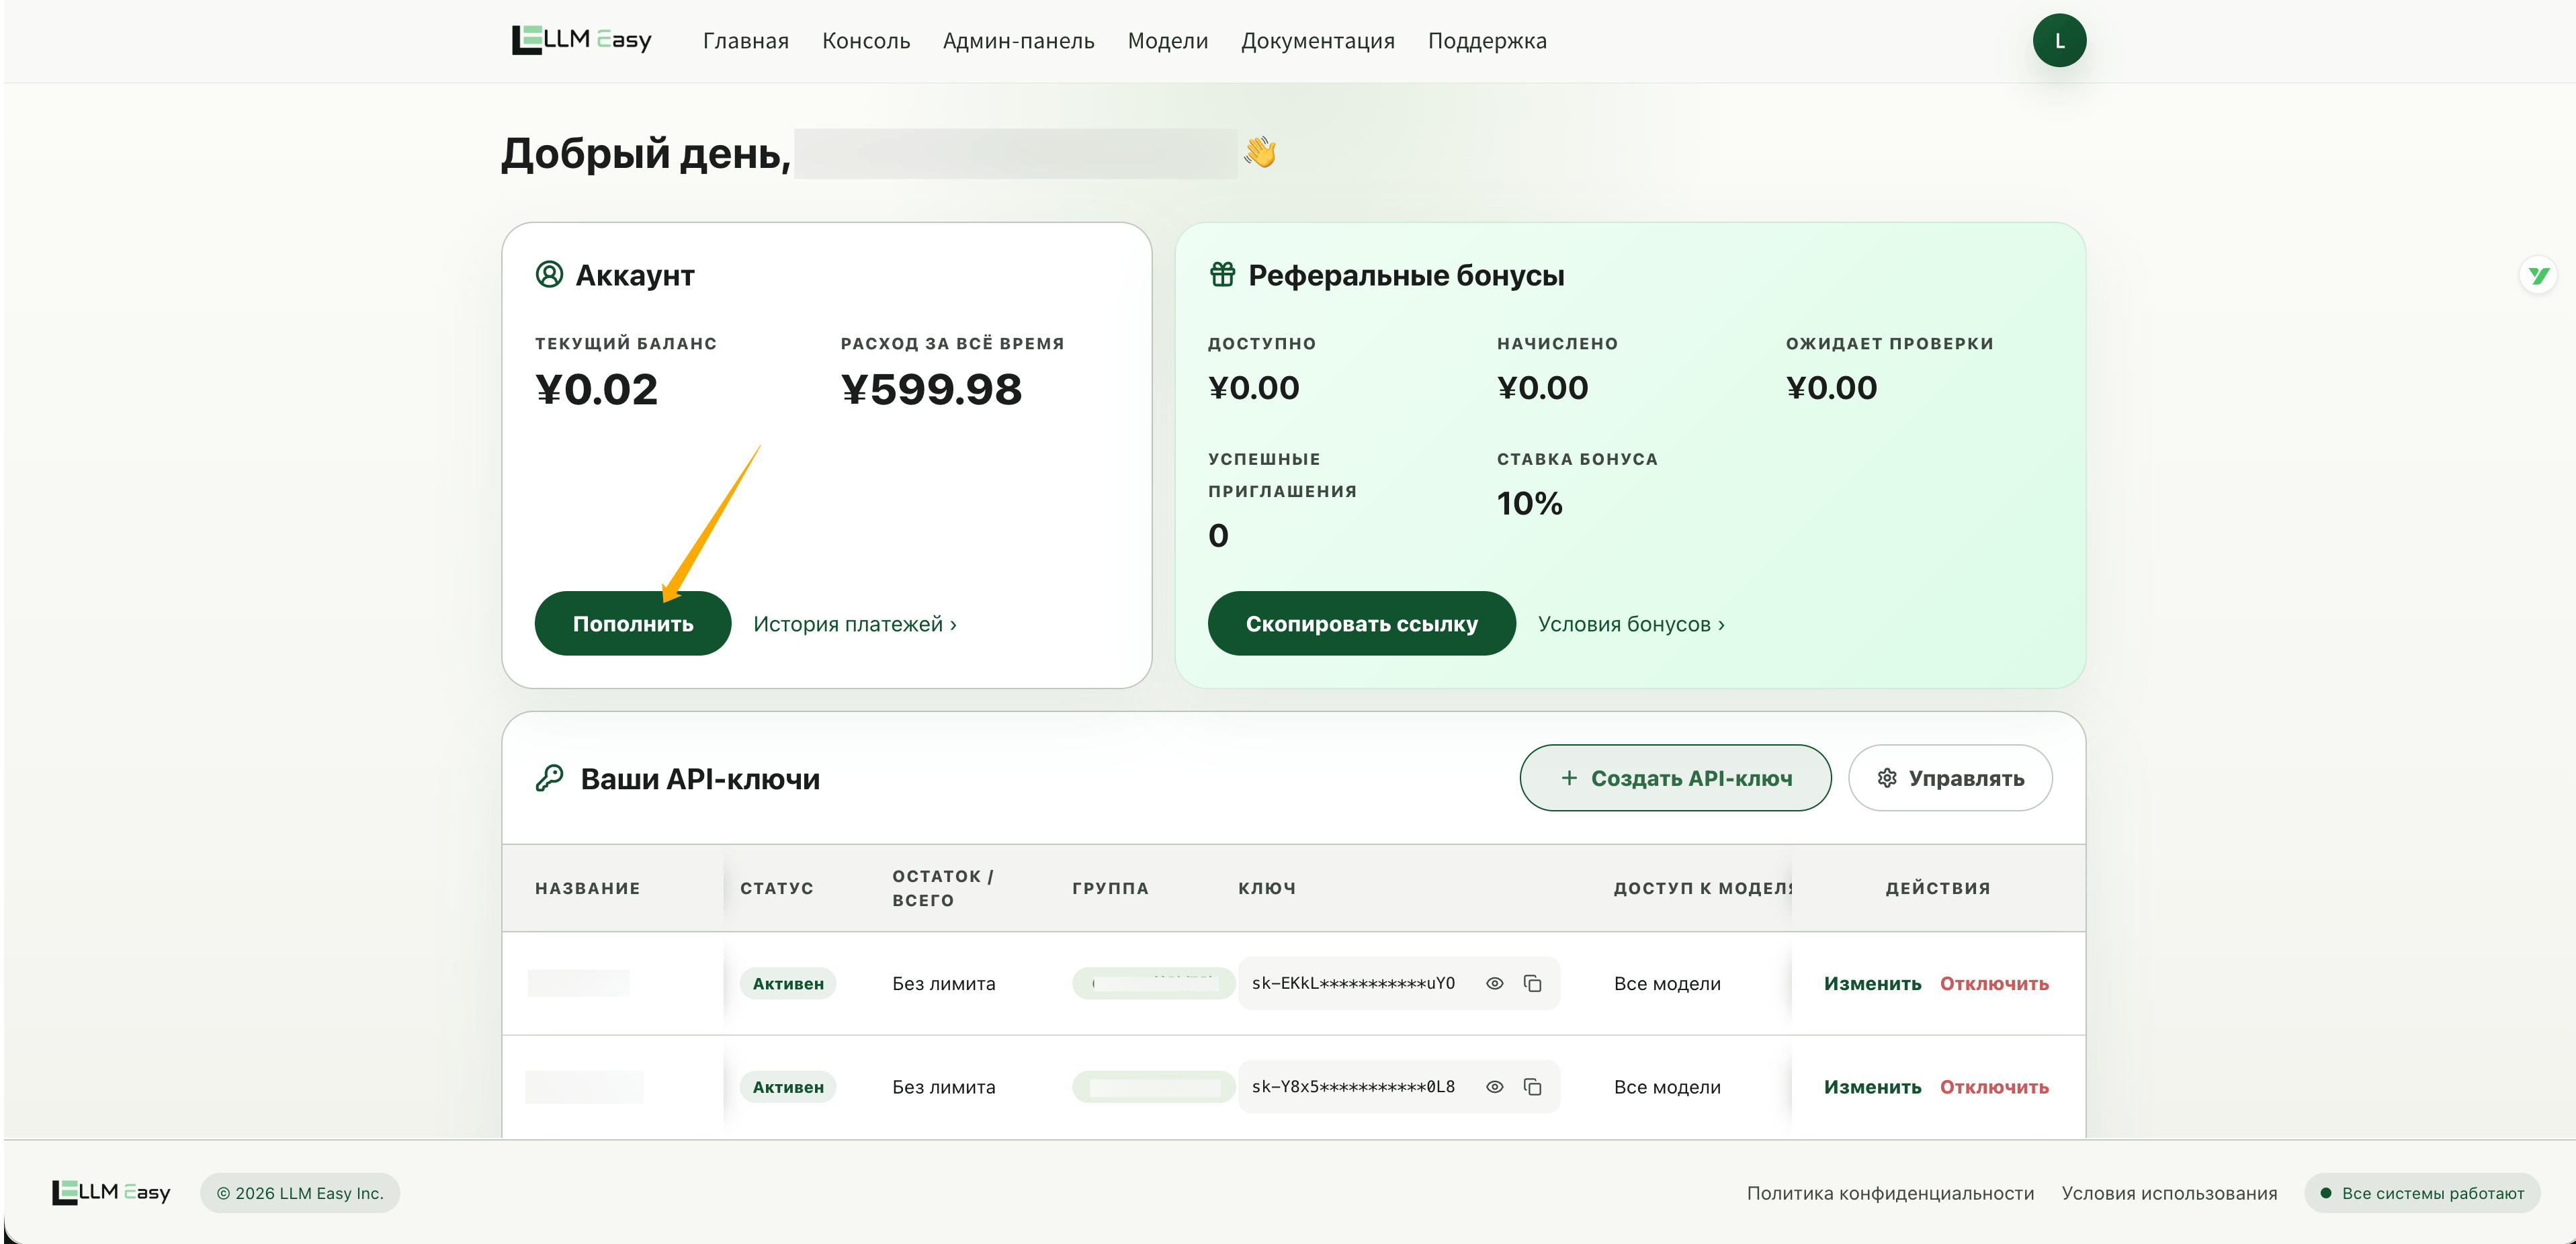 按页面提示完成支付。支付成功后,回到控制台确认 **当前余额** 已更新。
登录后进入 **控制台**,在 **账户** 卡片右上角点击 **兑换码**。
按页面提示完成支付。支付成功后,回到控制台确认 **当前余额** 已更新。
登录后进入 **控制台**,在 **账户** 卡片右上角点击 **兑换码**。
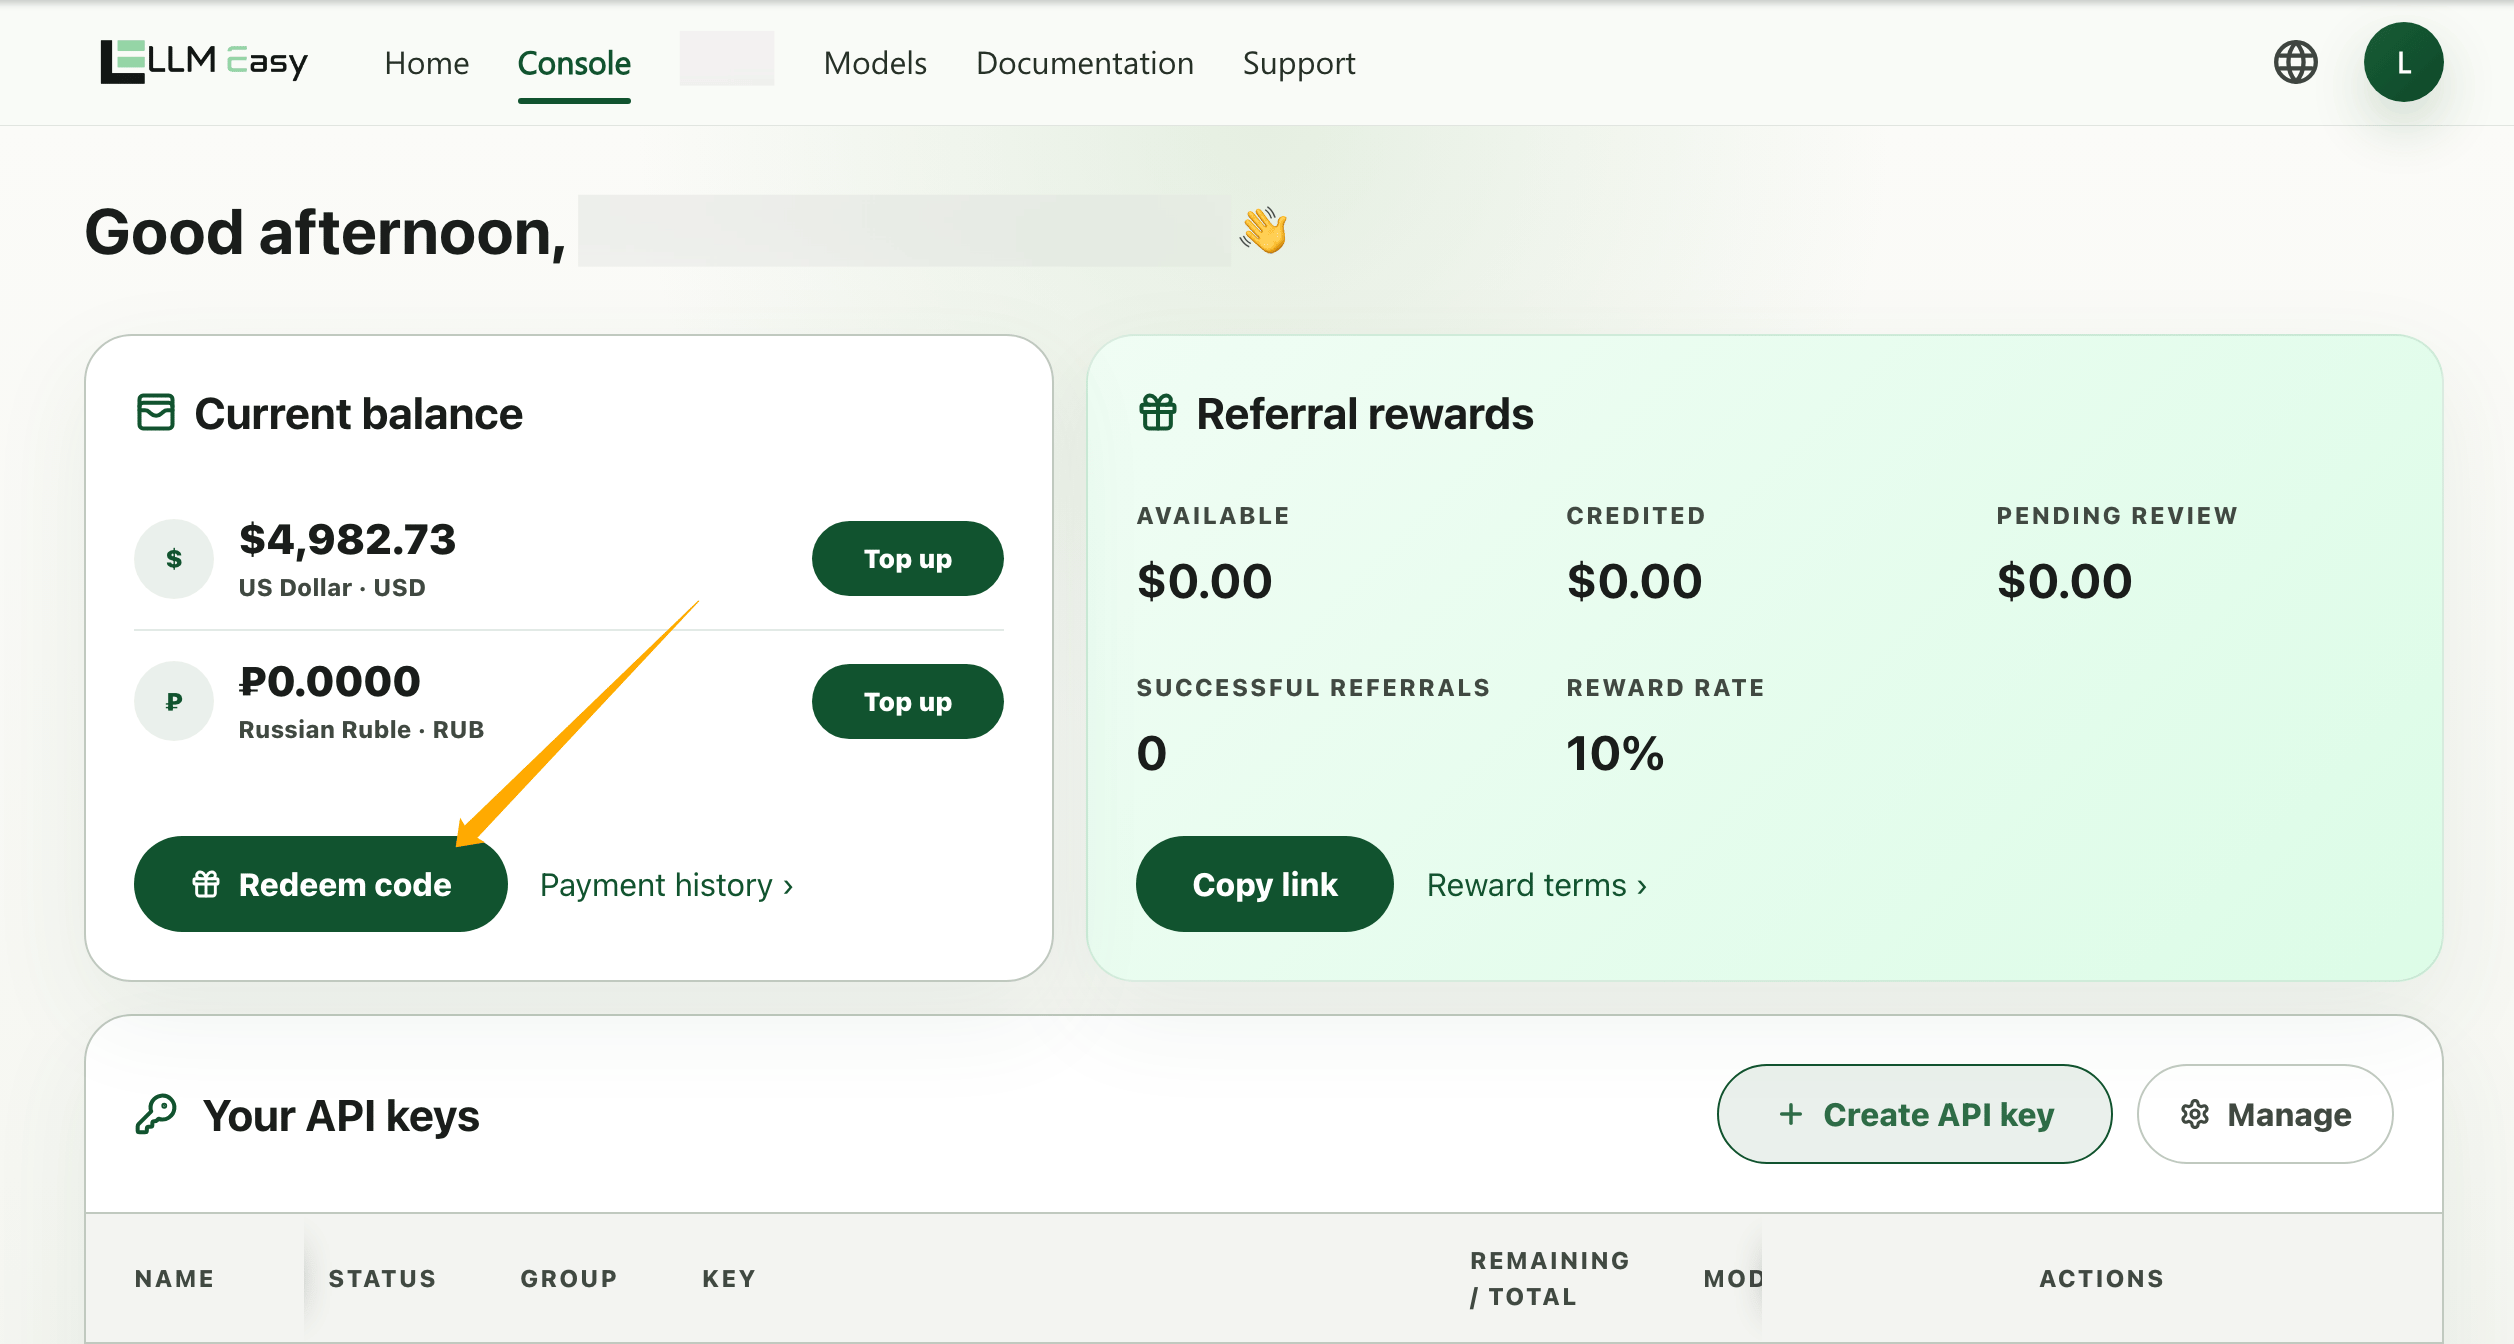 在弹窗中输入兑换码,然后点击 **兑换**。
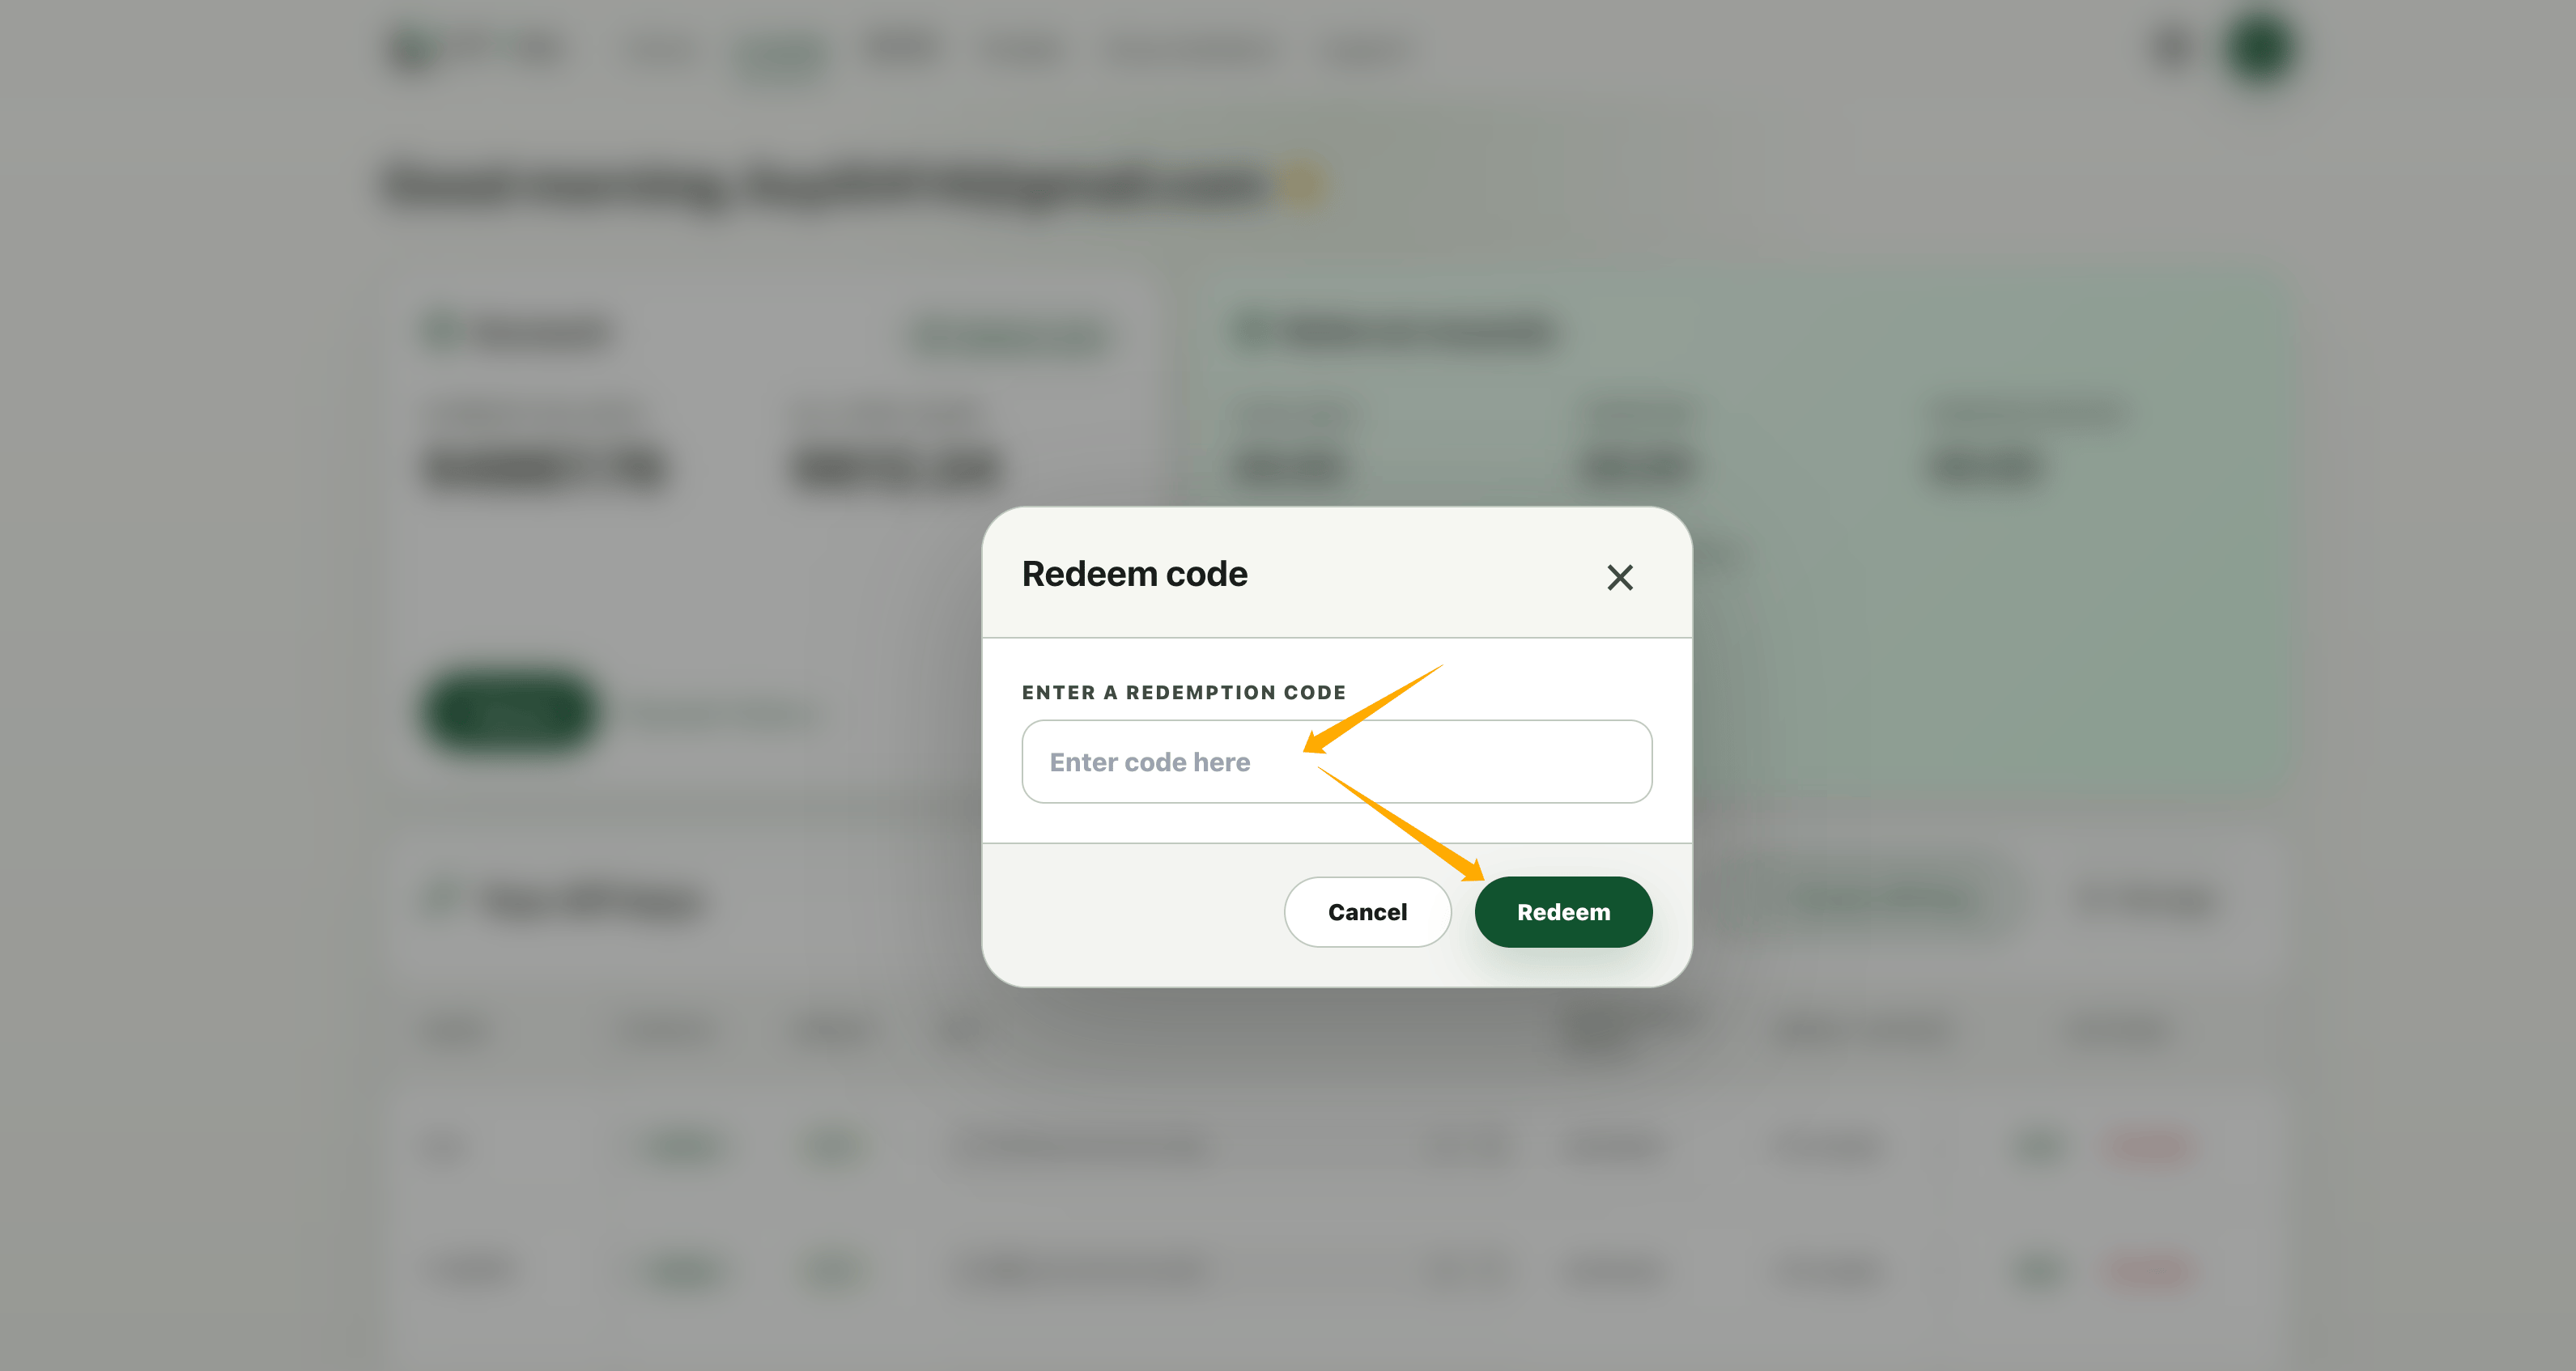 兑换成功后,回到控制台确认 **当前余额** 已更新。
有了可用额度后,在控制台的 **你的 API Key** 区域点击 **创建 API Key**。
兑换成功后,回到控制台确认 **当前余额** 已更新。
有了可用额度后,在控制台的 **你的 API Key** 区域点击 **创建 API Key**。
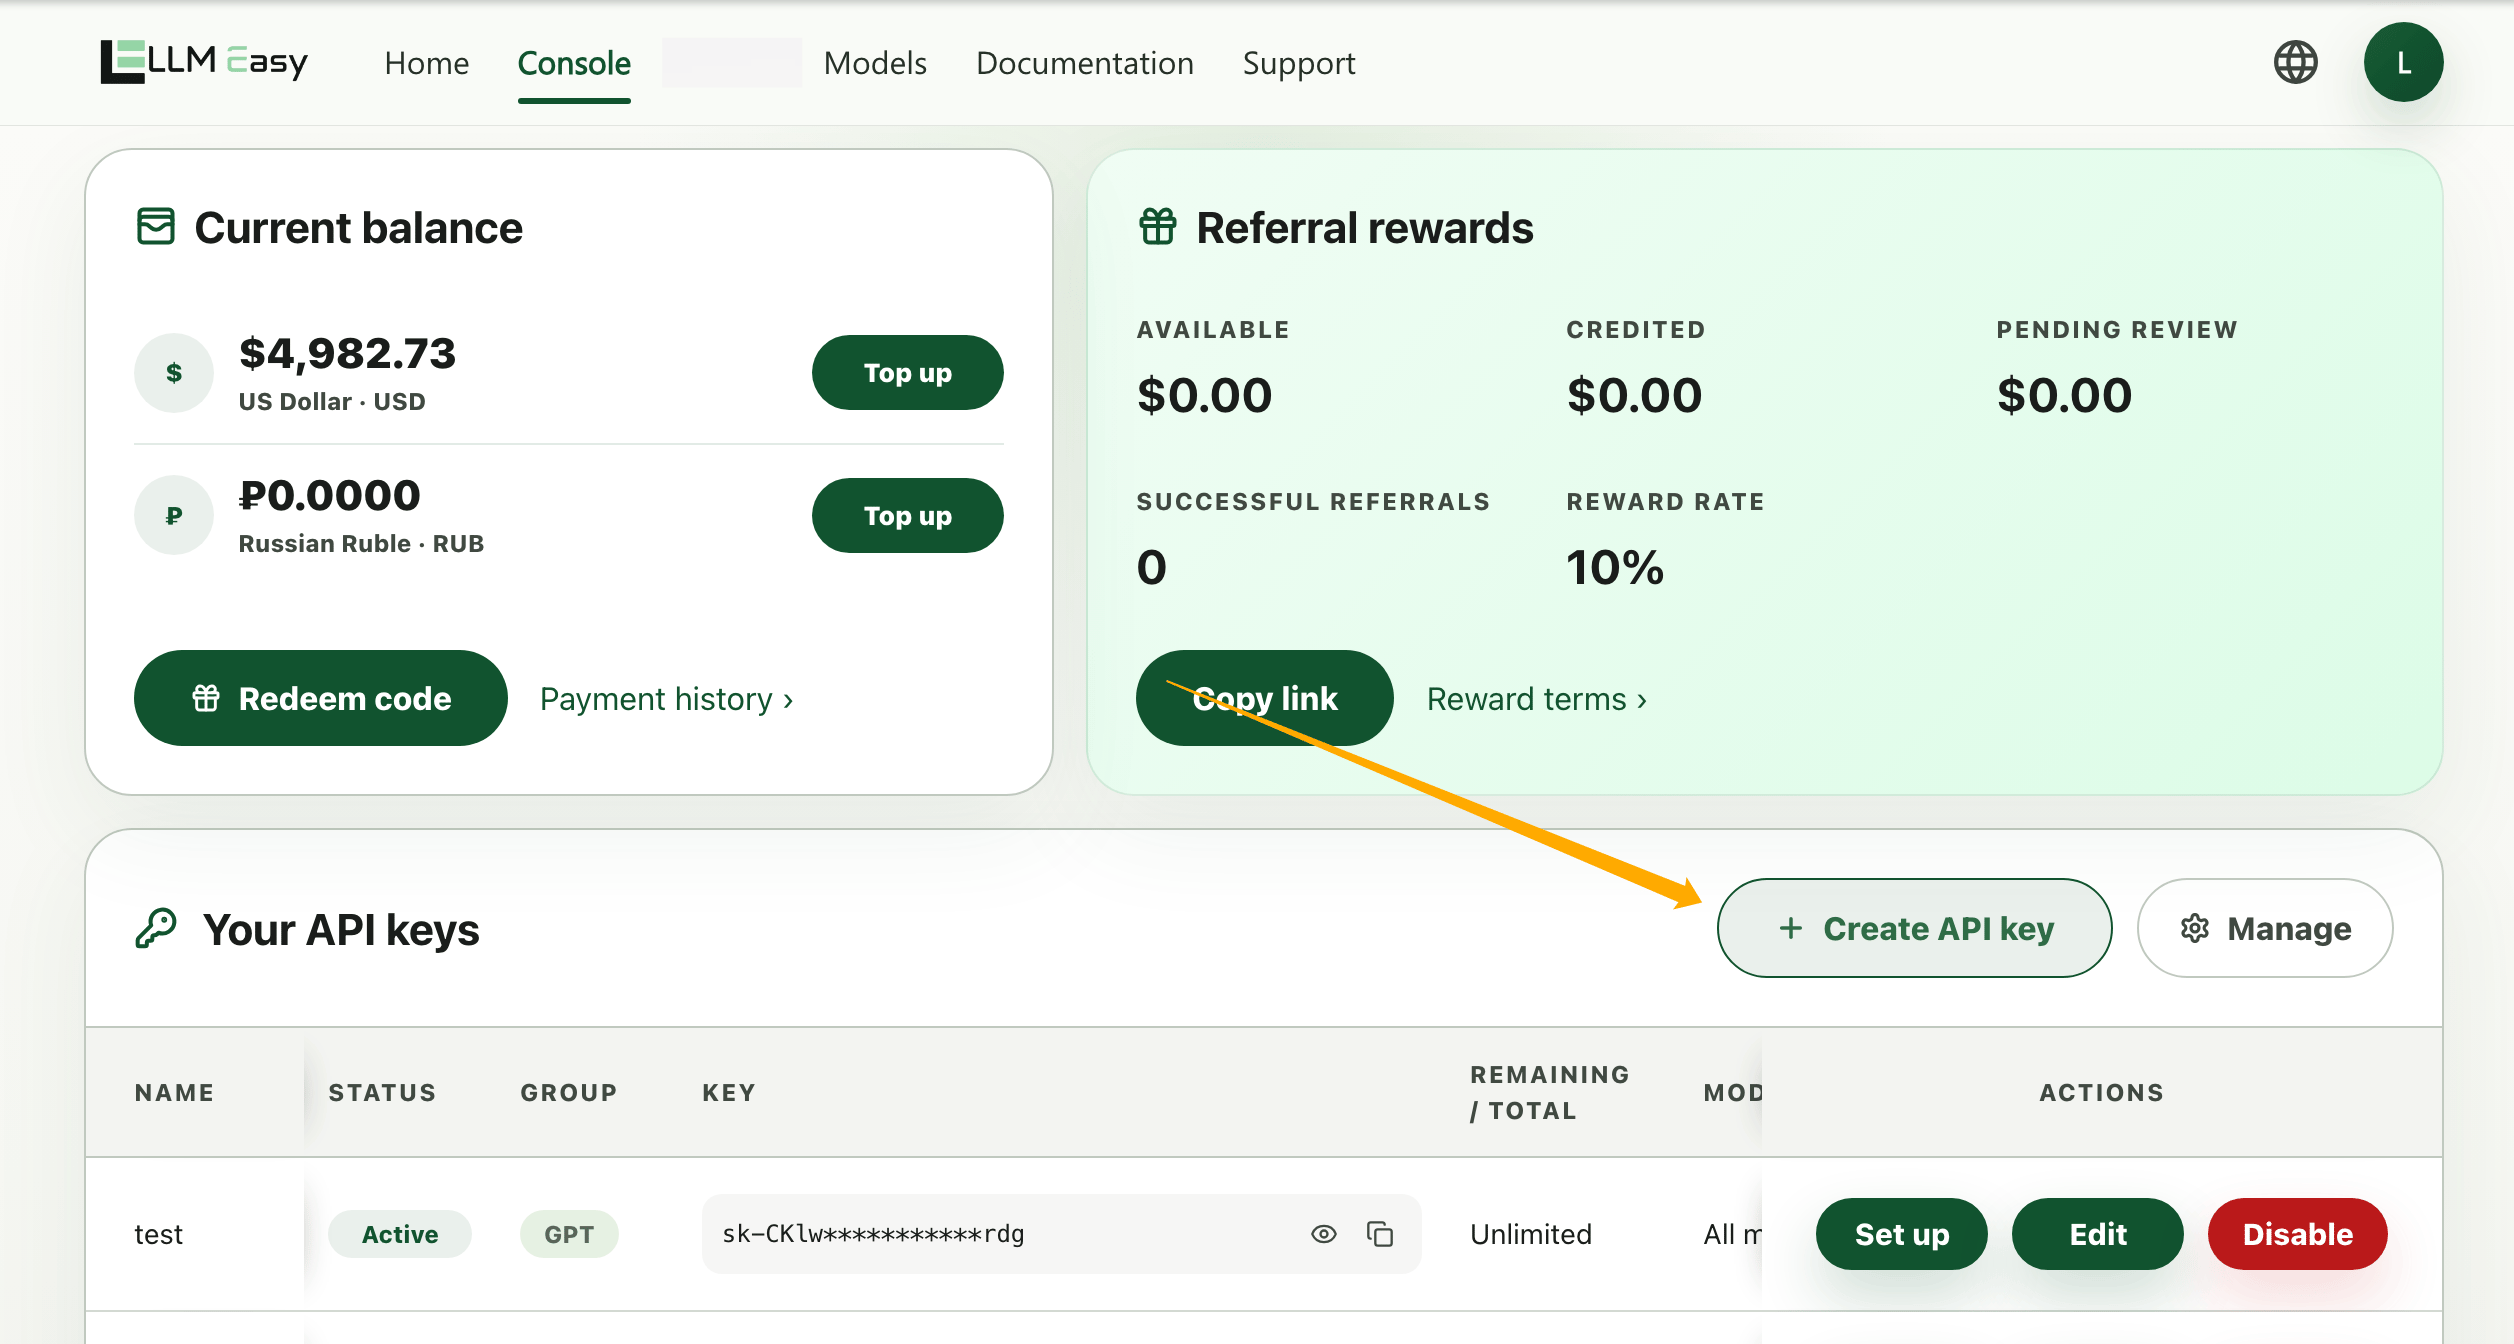 点击后会弹出创建 API Key 表单。
你可以把 API Key 名称理解成“这把 Key 准备给谁用”。先分清用途,后面配置工具时会少踩很多坑。
在创建表单里填写 **名称**,选择 **Key 分组**,并确认有效期和可选的额度限制。
点击后会弹出创建 API Key 表单。
你可以把 API Key 名称理解成“这把 Key 准备给谁用”。先分清用途,后面配置工具时会少踩很多坑。
在创建表单里填写 **名称**,选择 **Key 分组**,并确认有效期和可选的额度限制。
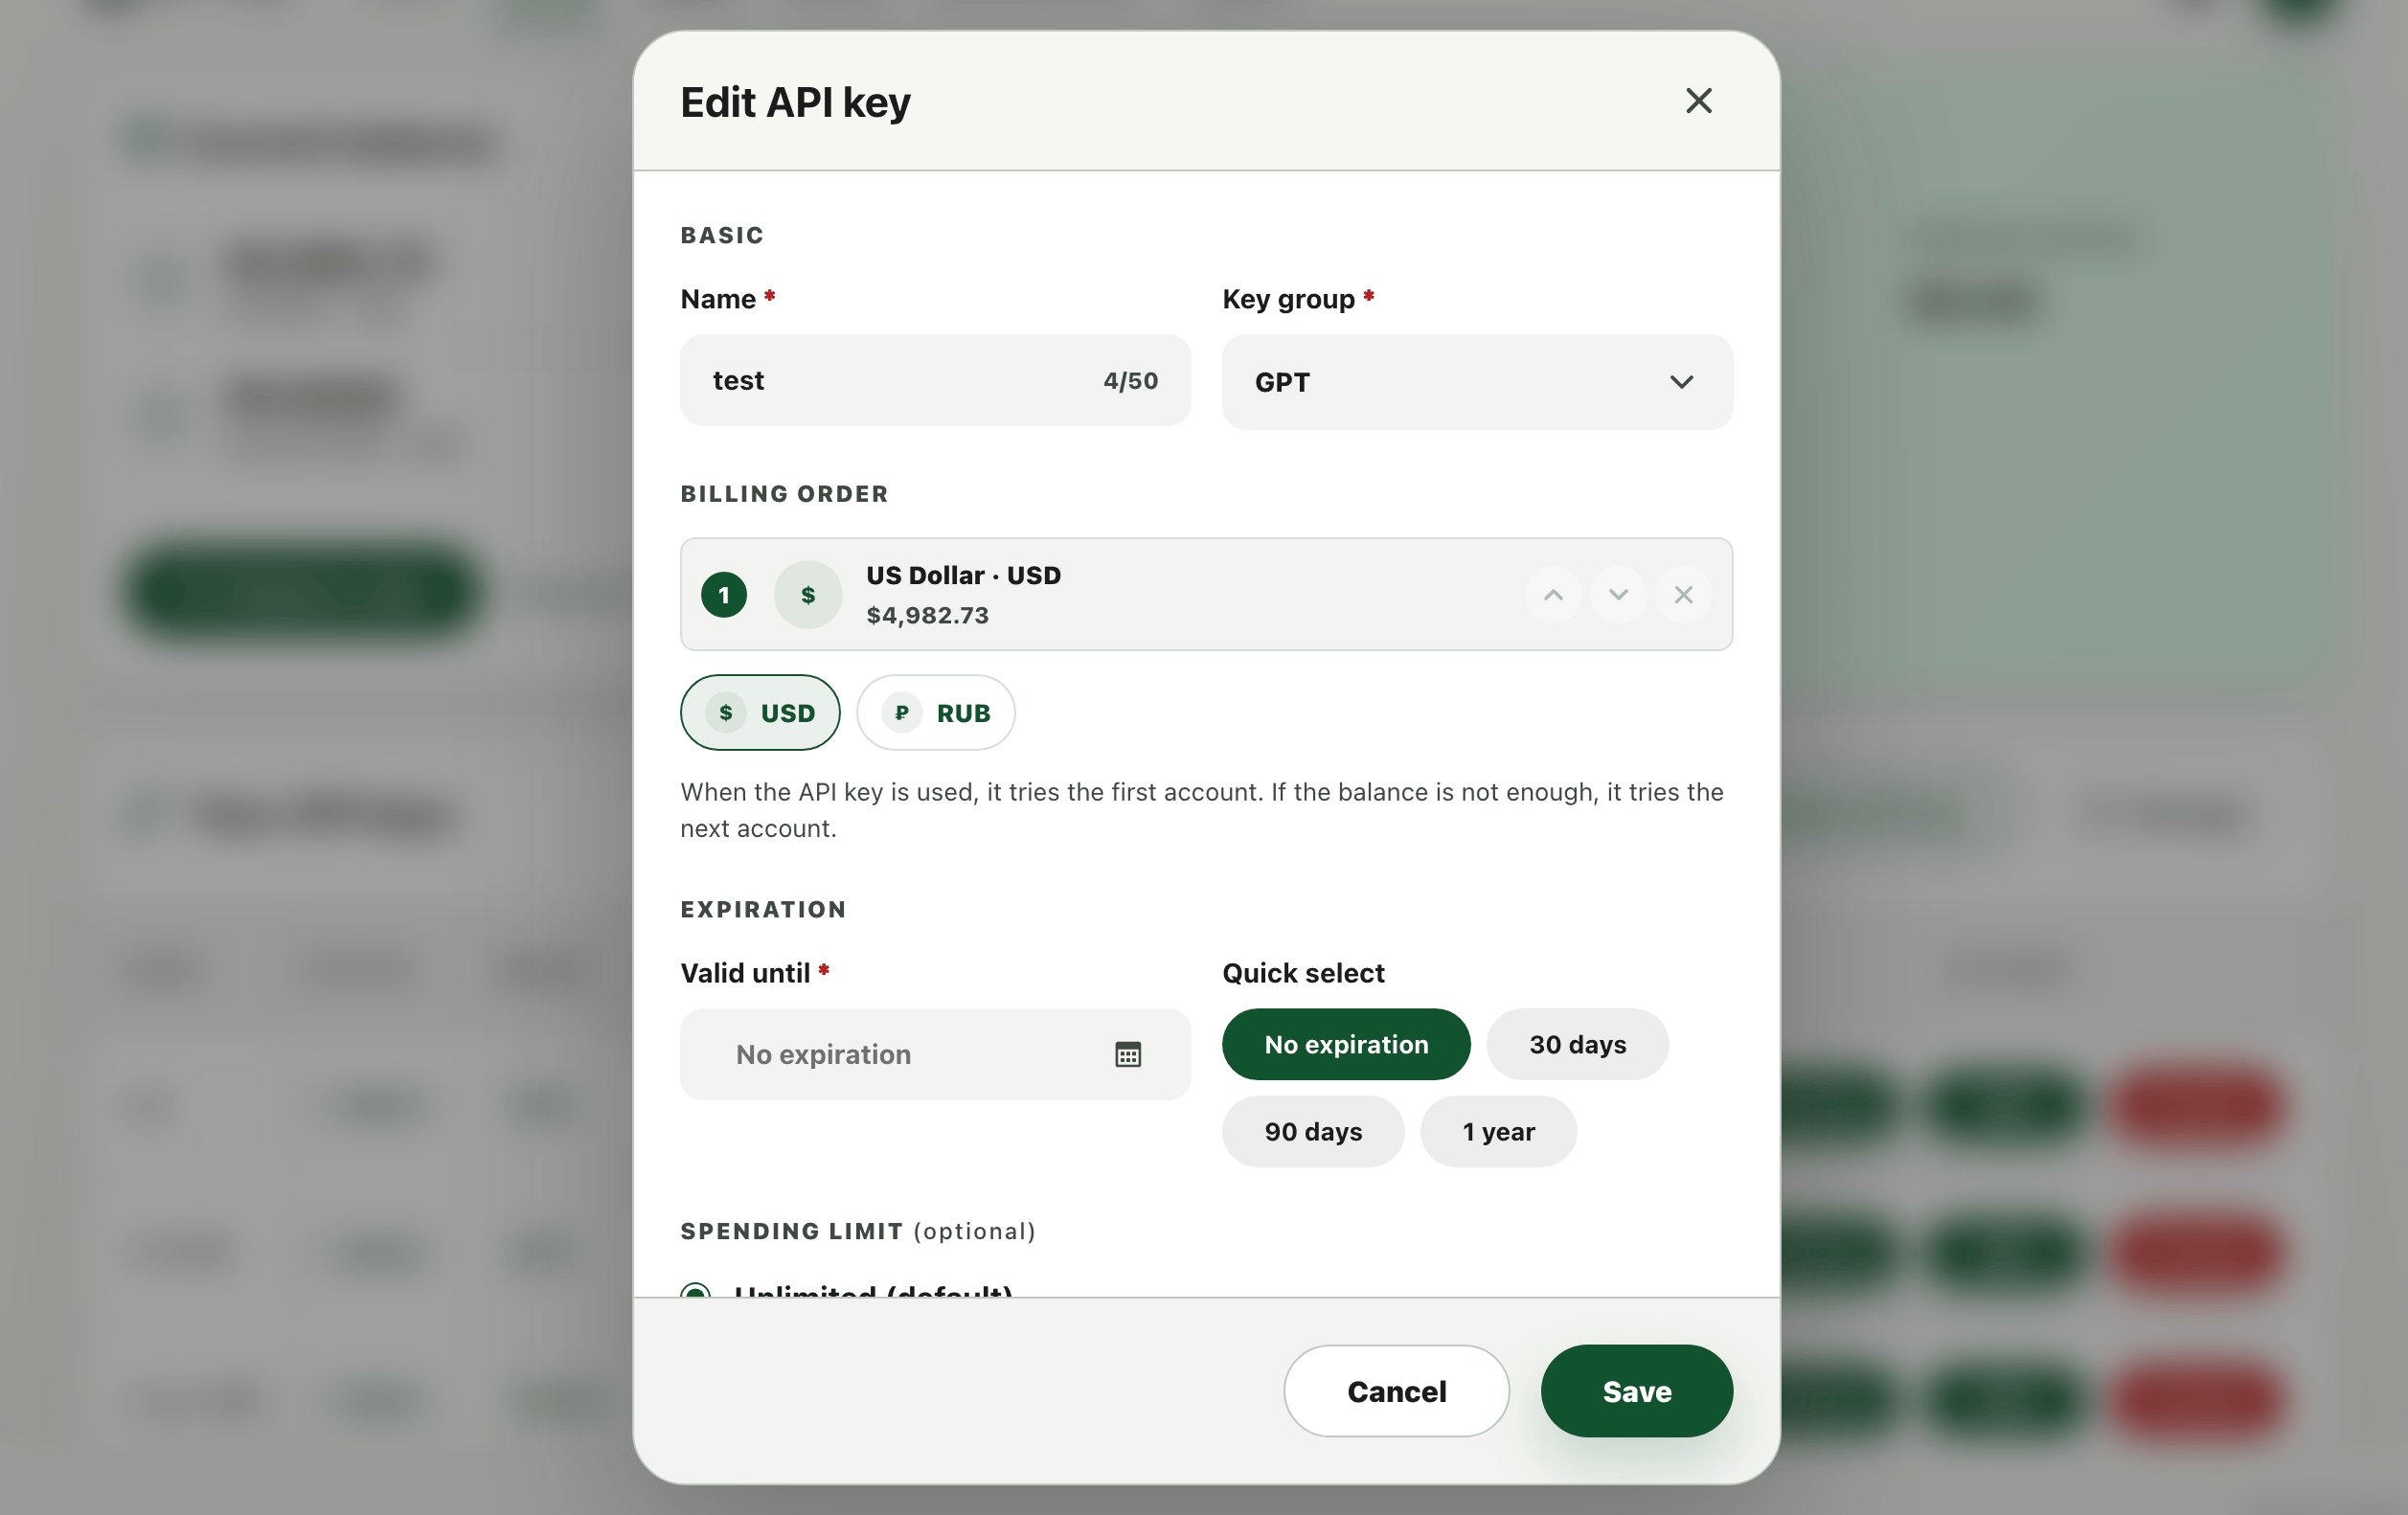 按你要接入的工具选择分组。
**Claude 分组**只能用于 Claude Code。
**GPT 分组**可以用于 Codex,也可以用于 OpenClaw、OpenCode、Cursor 等外部工具。
直接选择对应分组:
```text theme={null}
Claude
GPT
```
创建完成后会弹出 **Setup** 弹窗。在这里可以复制 **API Key** 和 **Base URL**。
按你要接入的工具选择分组。
**Claude 分组**只能用于 Claude Code。
**GPT 分组**可以用于 Codex,也可以用于 OpenClaw、OpenCode、Cursor 等外部工具。
直接选择对应分组:
```text theme={null}
Claude
GPT
```
创建完成后会弹出 **Setup** 弹窗。在这里可以复制 **API Key** 和 **Base URL**。
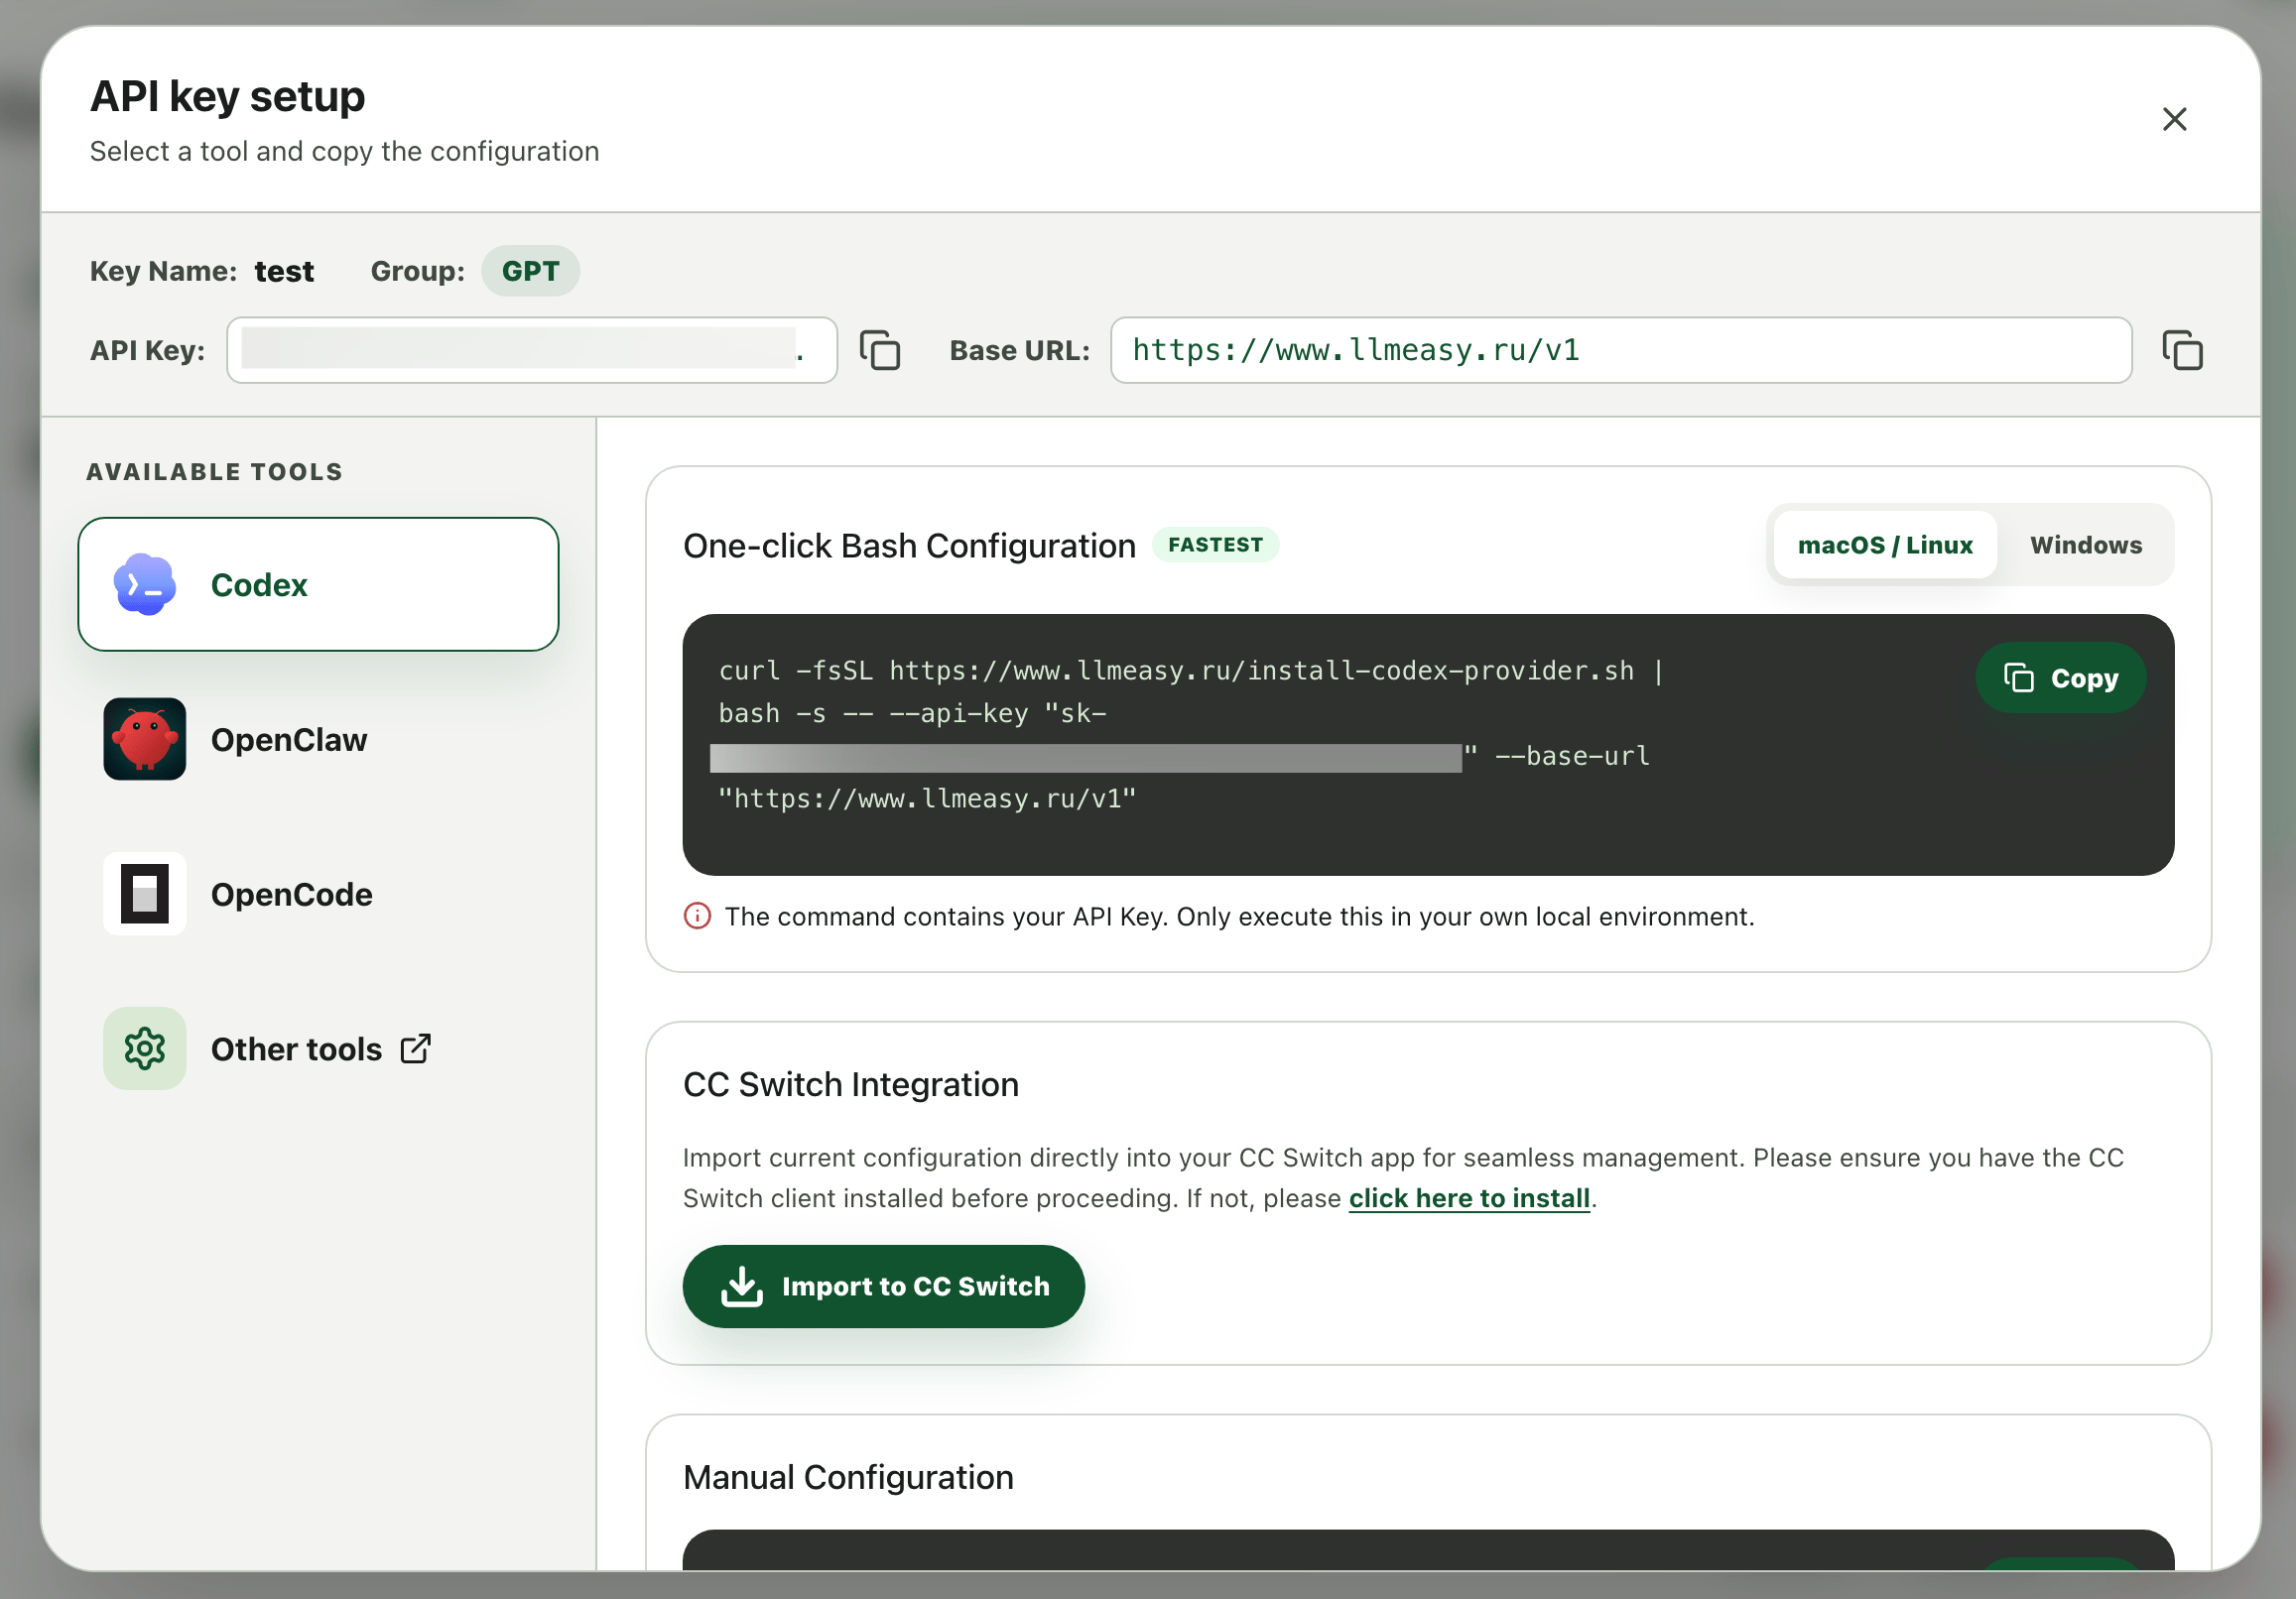 在 **Setup** 弹窗里选择你要接入的工具,然后选择一种配置方式。
* **一键脚本配置**:在弹窗中选择工具和系统,复制生成的命令,并在自己的本机终端执行。适合快速配置 Codex、OpenClaw 或 OpenCode。
* **CC Switch 集成**:点击 **Import to CC Switch**,把当前 **API Key** 和 **Base URL** 导入 CC Switch。适合统一管理多个工具和 provider。
* **手动配置**:复制 **API Key** 和 **Base URL**,再按对应工具文档填入。适合 Cursor、Cline、Roo Code、Zed 等其他客户端。
不同工具的认证字段、模型选择和配置文件位置不一样。进入具体工具文档后,请按该工具的步骤继续配置。
## 接下来
按你的工具类型继续:
如果你想统一管理 Claude Code、Codex CLI、OpenCode 和 OpenClaw,请从 CC Switch 开始配置。
使用 **Claude 分组**,并查看 Claude Code 的完整配置步骤。
使用 **GPT 分组**,并查看 Codex 的完整配置步骤。
在 **Setup** 弹窗里选择你要接入的工具,然后选择一种配置方式。
* **一键脚本配置**:在弹窗中选择工具和系统,复制生成的命令,并在自己的本机终端执行。适合快速配置 Codex、OpenClaw 或 OpenCode。
* **CC Switch 集成**:点击 **Import to CC Switch**,把当前 **API Key** 和 **Base URL** 导入 CC Switch。适合统一管理多个工具和 provider。
* **手动配置**:复制 **API Key** 和 **Base URL**,再按对应工具文档填入。适合 Cursor、Cline、Roo Code、Zed 等其他客户端。
不同工具的认证字段、模型选择和配置文件位置不一样。进入具体工具文档后,请按该工具的步骤继续配置。
## 接下来
按你的工具类型继续:
如果你想统一管理 Claude Code、Codex CLI、OpenCode 和 OpenClaw,请从 CC Switch 开始配置。
使用 **Claude 分组**,并查看 Claude Code 的完整配置步骤。
使用 **GPT 分组**,并查看 Codex 的完整配置步骤。