> ## Documentation Index
> Fetch the complete documentation index at: https://docs.llmeasy.ru/llms.txt
> Use this file to discover all available pages before exploring further.
# Connect TRAE to LLMEasy with a custom model
> Connect LLMEasy to TRAE with GPT Key group model IDs.
When connecting LLMEasy to TRAE, choose an OpenAI-style provider and use a model ID from the GPT Key group.
## Prerequisites
* LLMEasy API Key (register here)
## Setup
In **IDE** mode, click the **Settings** icon in the upper-right corner to open the settings center.
You can also open **SOLO** mode and click the **Settings** icon in the upper-right corner of the chat panel.
In the left navigation, choose **Model** to open the **Model** panel.
Click **+ Add model**.
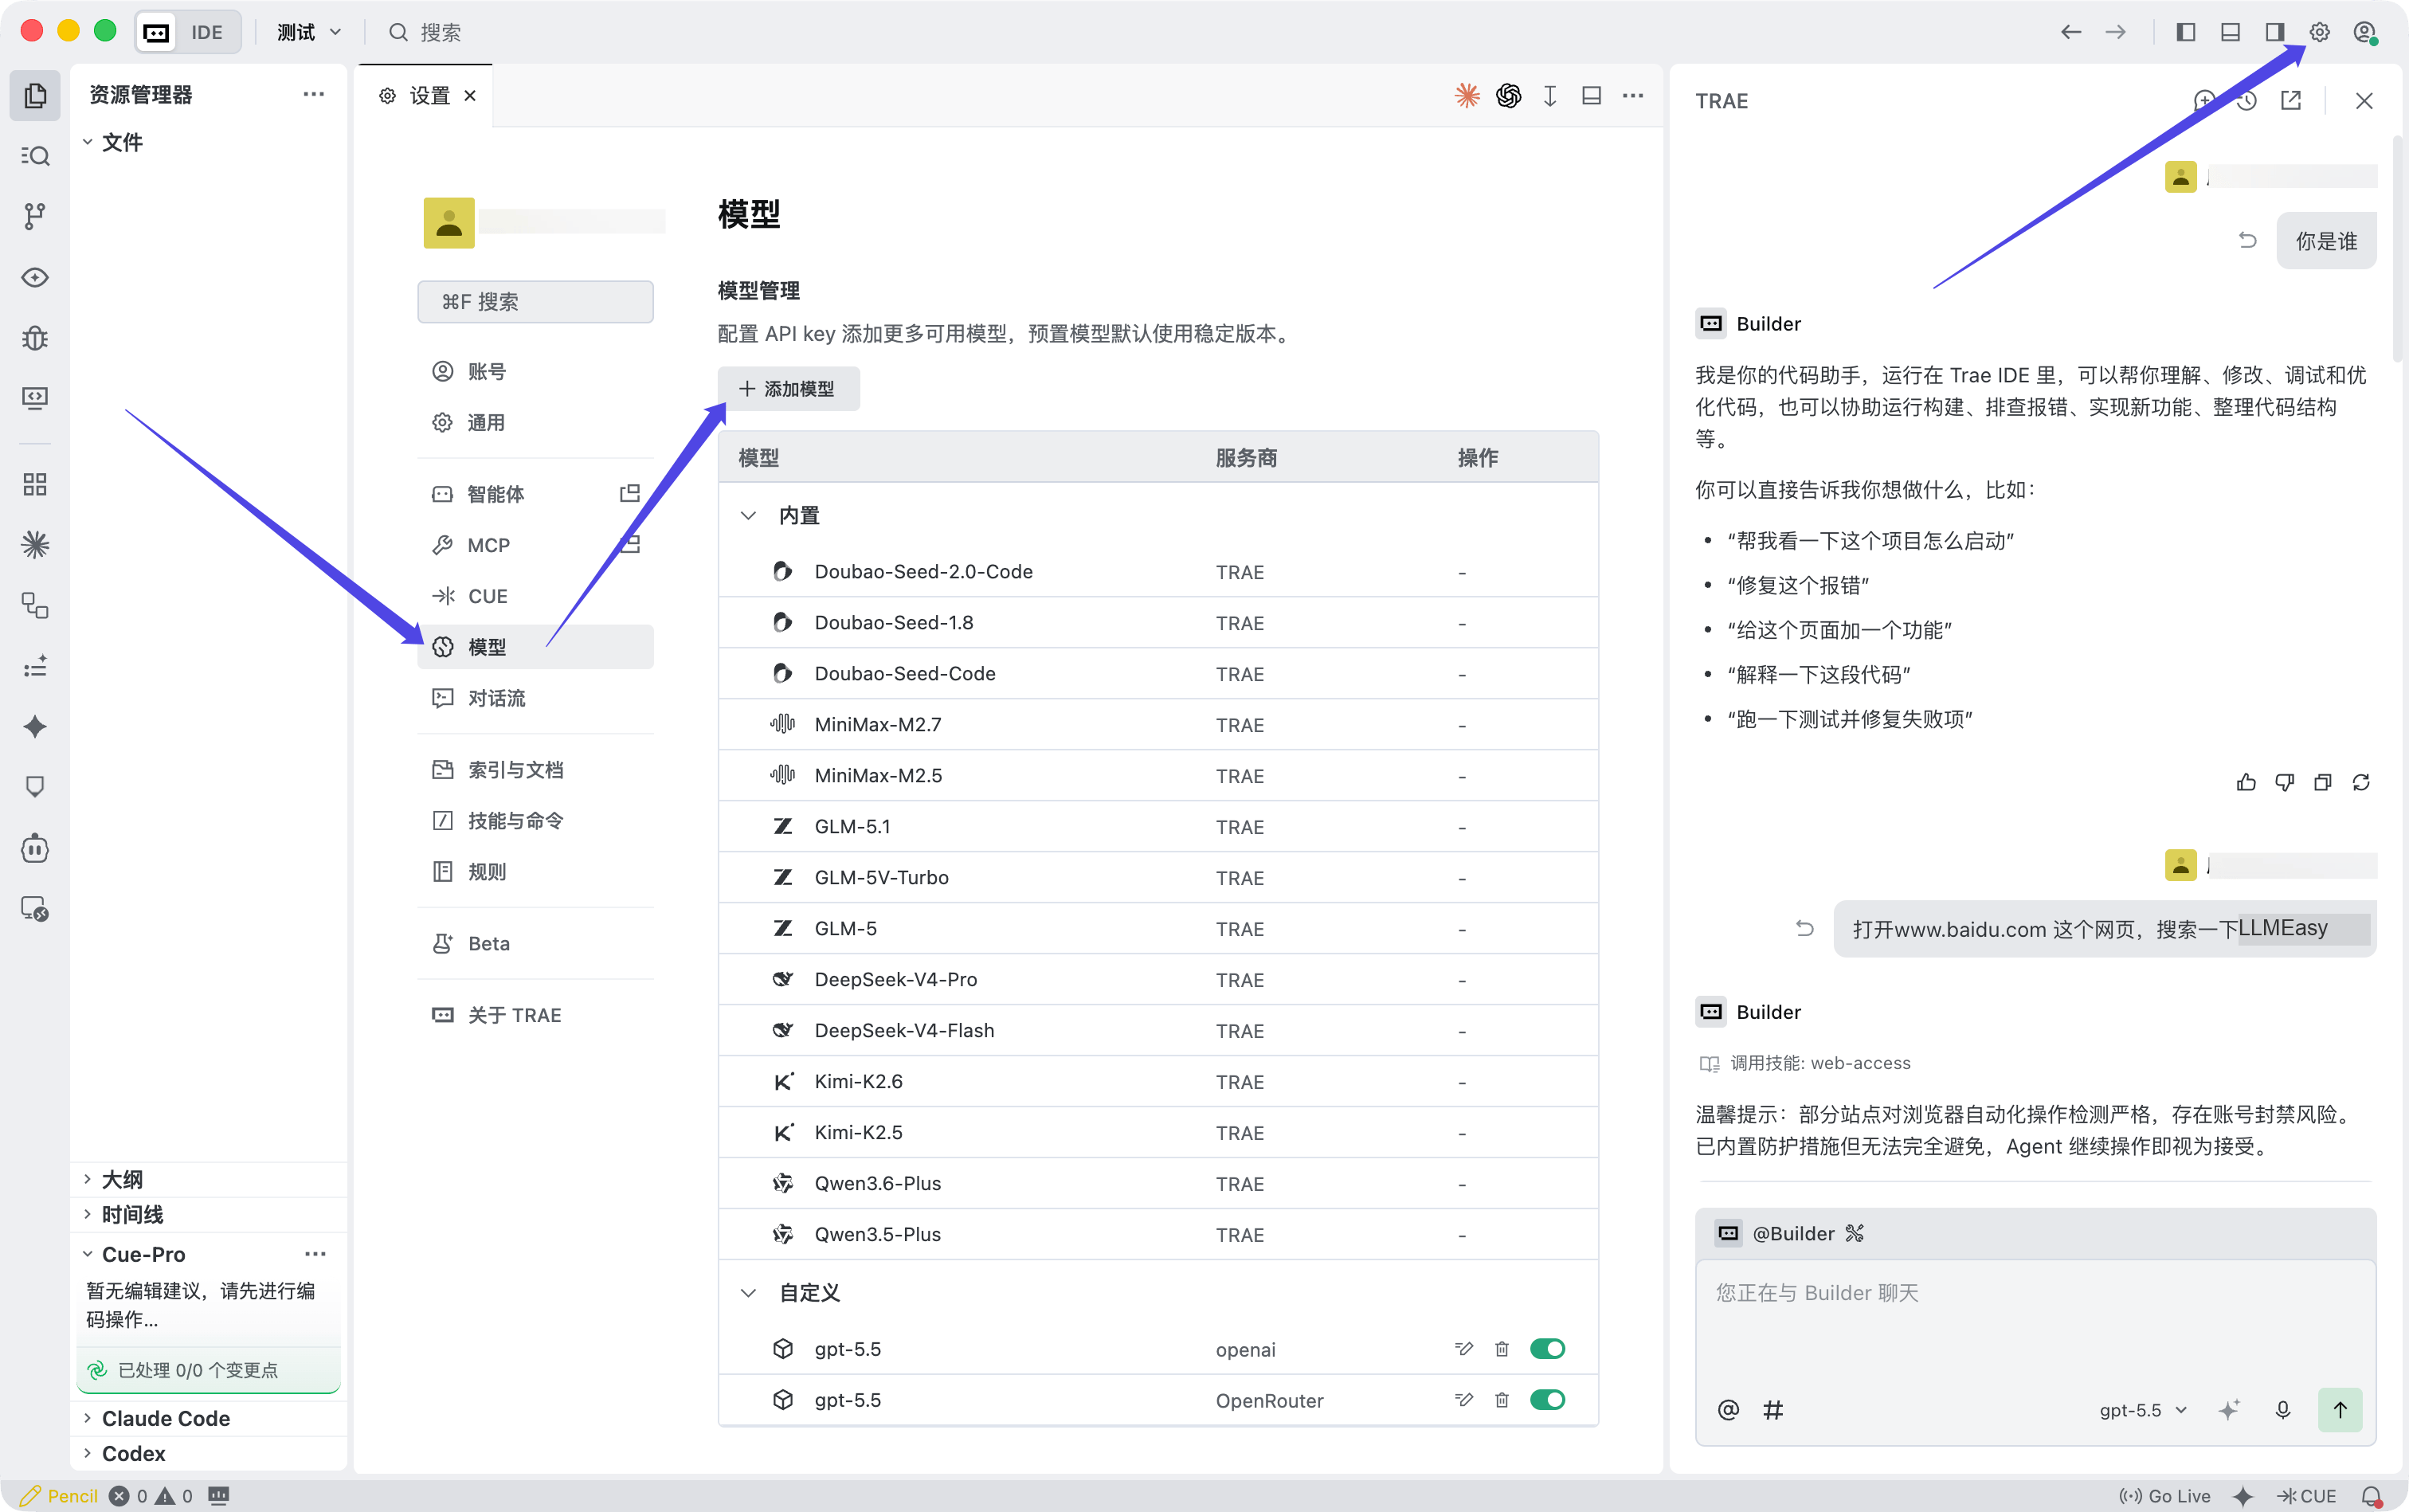 When the **Add model** window appears, fill in the fields as follows:
| Field | Value |
| ------------------ | ------------------------------------------------------------------------------------------------------- |
| Provider | `OpenAI` |
| Model | `Custom model` |
| Model ID | a **GPT Key group** model ID copied from the model plaza |
| API key | your API Key copied from the LLMEasy console |
| Custom request URL | `https://www.llmeasy.ru/v1/chat/completions` |
When the **Add model** window appears, fill in the fields as follows:
| Field | Value |
| ------------------ | ------------------------------------------------------------------------------------------------------- |
| Provider | `OpenAI` |
| Model | `Custom model` |
| Model ID | a **GPT Key group** model ID copied from the model plaza |
| API key | your API Key copied from the LLMEasy console |
| Custom request URL | `https://www.llmeasy.ru/v1/chat/completions` |
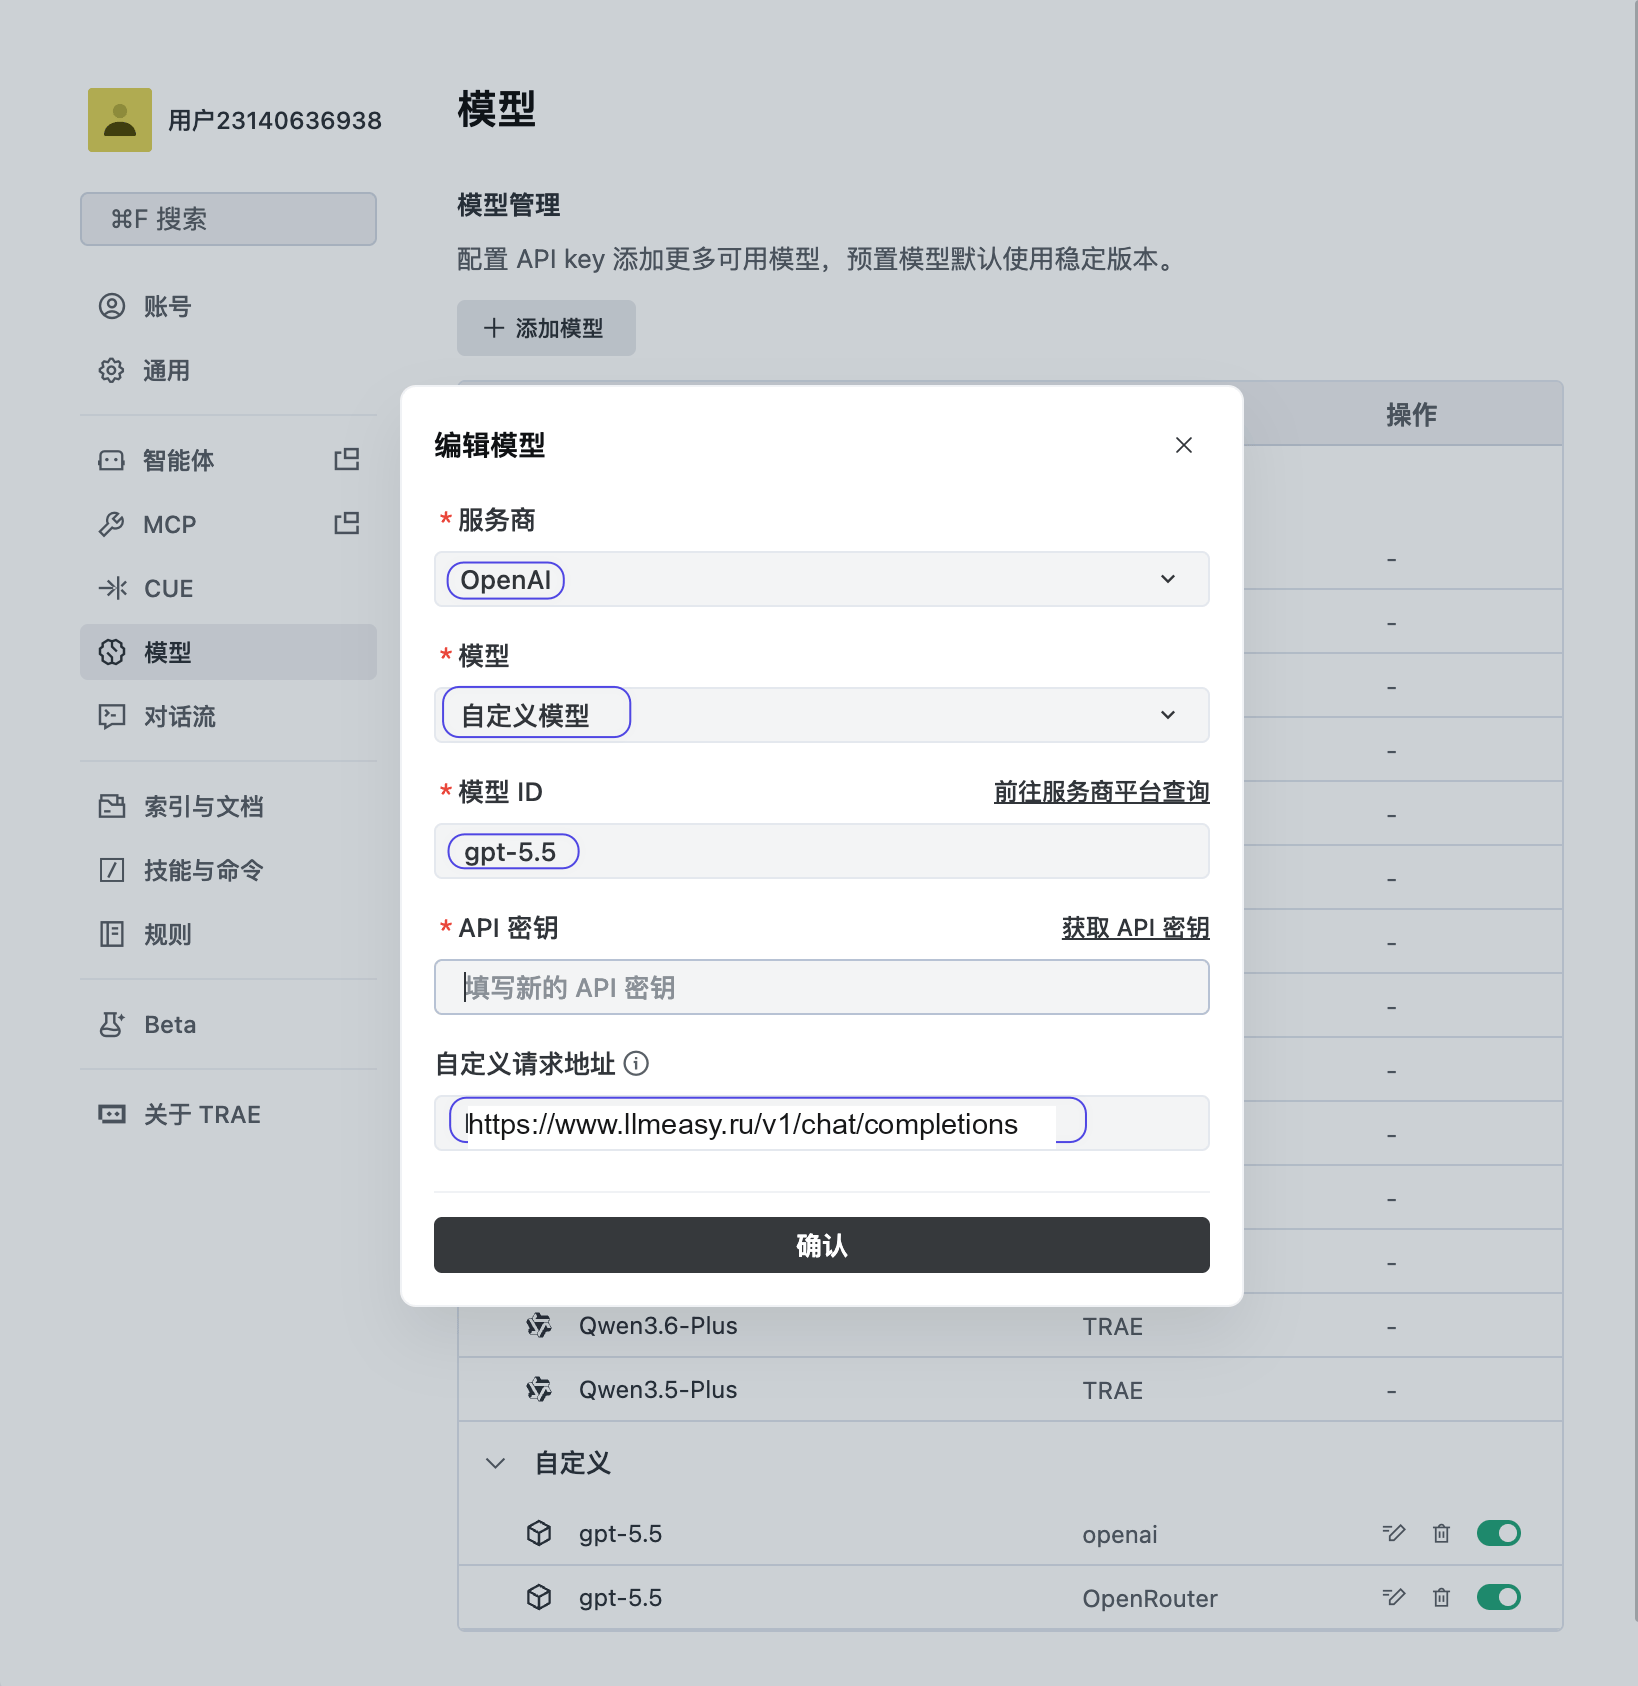 Click **Confirm** to save the configuration, then choose the new GPT Key group model.
LLMEasy only supports TRAE through **GPT Key group** models. Do not use fixed Claude model names, and do not set the custom request URL to `https://www.llmeasy.ru/v1`.
## Related FAQ
* [OpenAI-compatible API vs Anthropic-compatible API](/en/faq/concepts/openai-compatible-vs-anthropic-compatible)
* [MCP vs API Key and Base URL](/en/faq/concepts/mcp-vs-api-key-base-url)
* [What are model\_provider, base\_url, and wire\_api?](/en/faq/codex/model-provider-base-url-wire-api)
* [How to configure an OpenAI-compatible API in Cline](/en/faq/cline/openai-compatible-api)
Click **Confirm** to save the configuration, then choose the new GPT Key group model.
LLMEasy only supports TRAE through **GPT Key group** models. Do not use fixed Claude model names, and do not set the custom request URL to `https://www.llmeasy.ru/v1`.
## Related FAQ
* [OpenAI-compatible API vs Anthropic-compatible API](/en/faq/concepts/openai-compatible-vs-anthropic-compatible)
* [MCP vs API Key and Base URL](/en/faq/concepts/mcp-vs-api-key-base-url)
* [What are model\_provider, base\_url, and wire\_api?](/en/faq/codex/model-provider-base-url-wire-api)
* [How to configure an OpenAI-compatible API in Cline](/en/faq/cline/openai-compatible-api)