> ## Documentation Index
> Fetch the complete documentation index at: https://docs.llmeasy.ru/llms.txt
> Use this file to discover all available pages before exploring further.
# Connect Kodacode to LLMEasy with a custom model
> Configure a custom OpenAI-compatible model in the Kodacode / Koda VS Code extension.
The Kodacode VS Code extension can use models in chat, agent, and edit workflows. To connect LLMEasy, add an **Any OpenAI-compatible API** model and use a GPT Key group API Key.
This guide uses the VS Code extension as the example. The Kodacode installation docs list VS Code `1.75` or newer as the minimum version, and the extension ID is `Koda.koda`.
## Prerequisites
* VS Code is installed
* The Kodacode / Koda extension is installed
* LLMEasy API Key (register here)
* The API Key belongs to the **GPT Key group**
* A GPT Key group model ID copied from the model plaza, for example `gpt-5.5`
## Setup
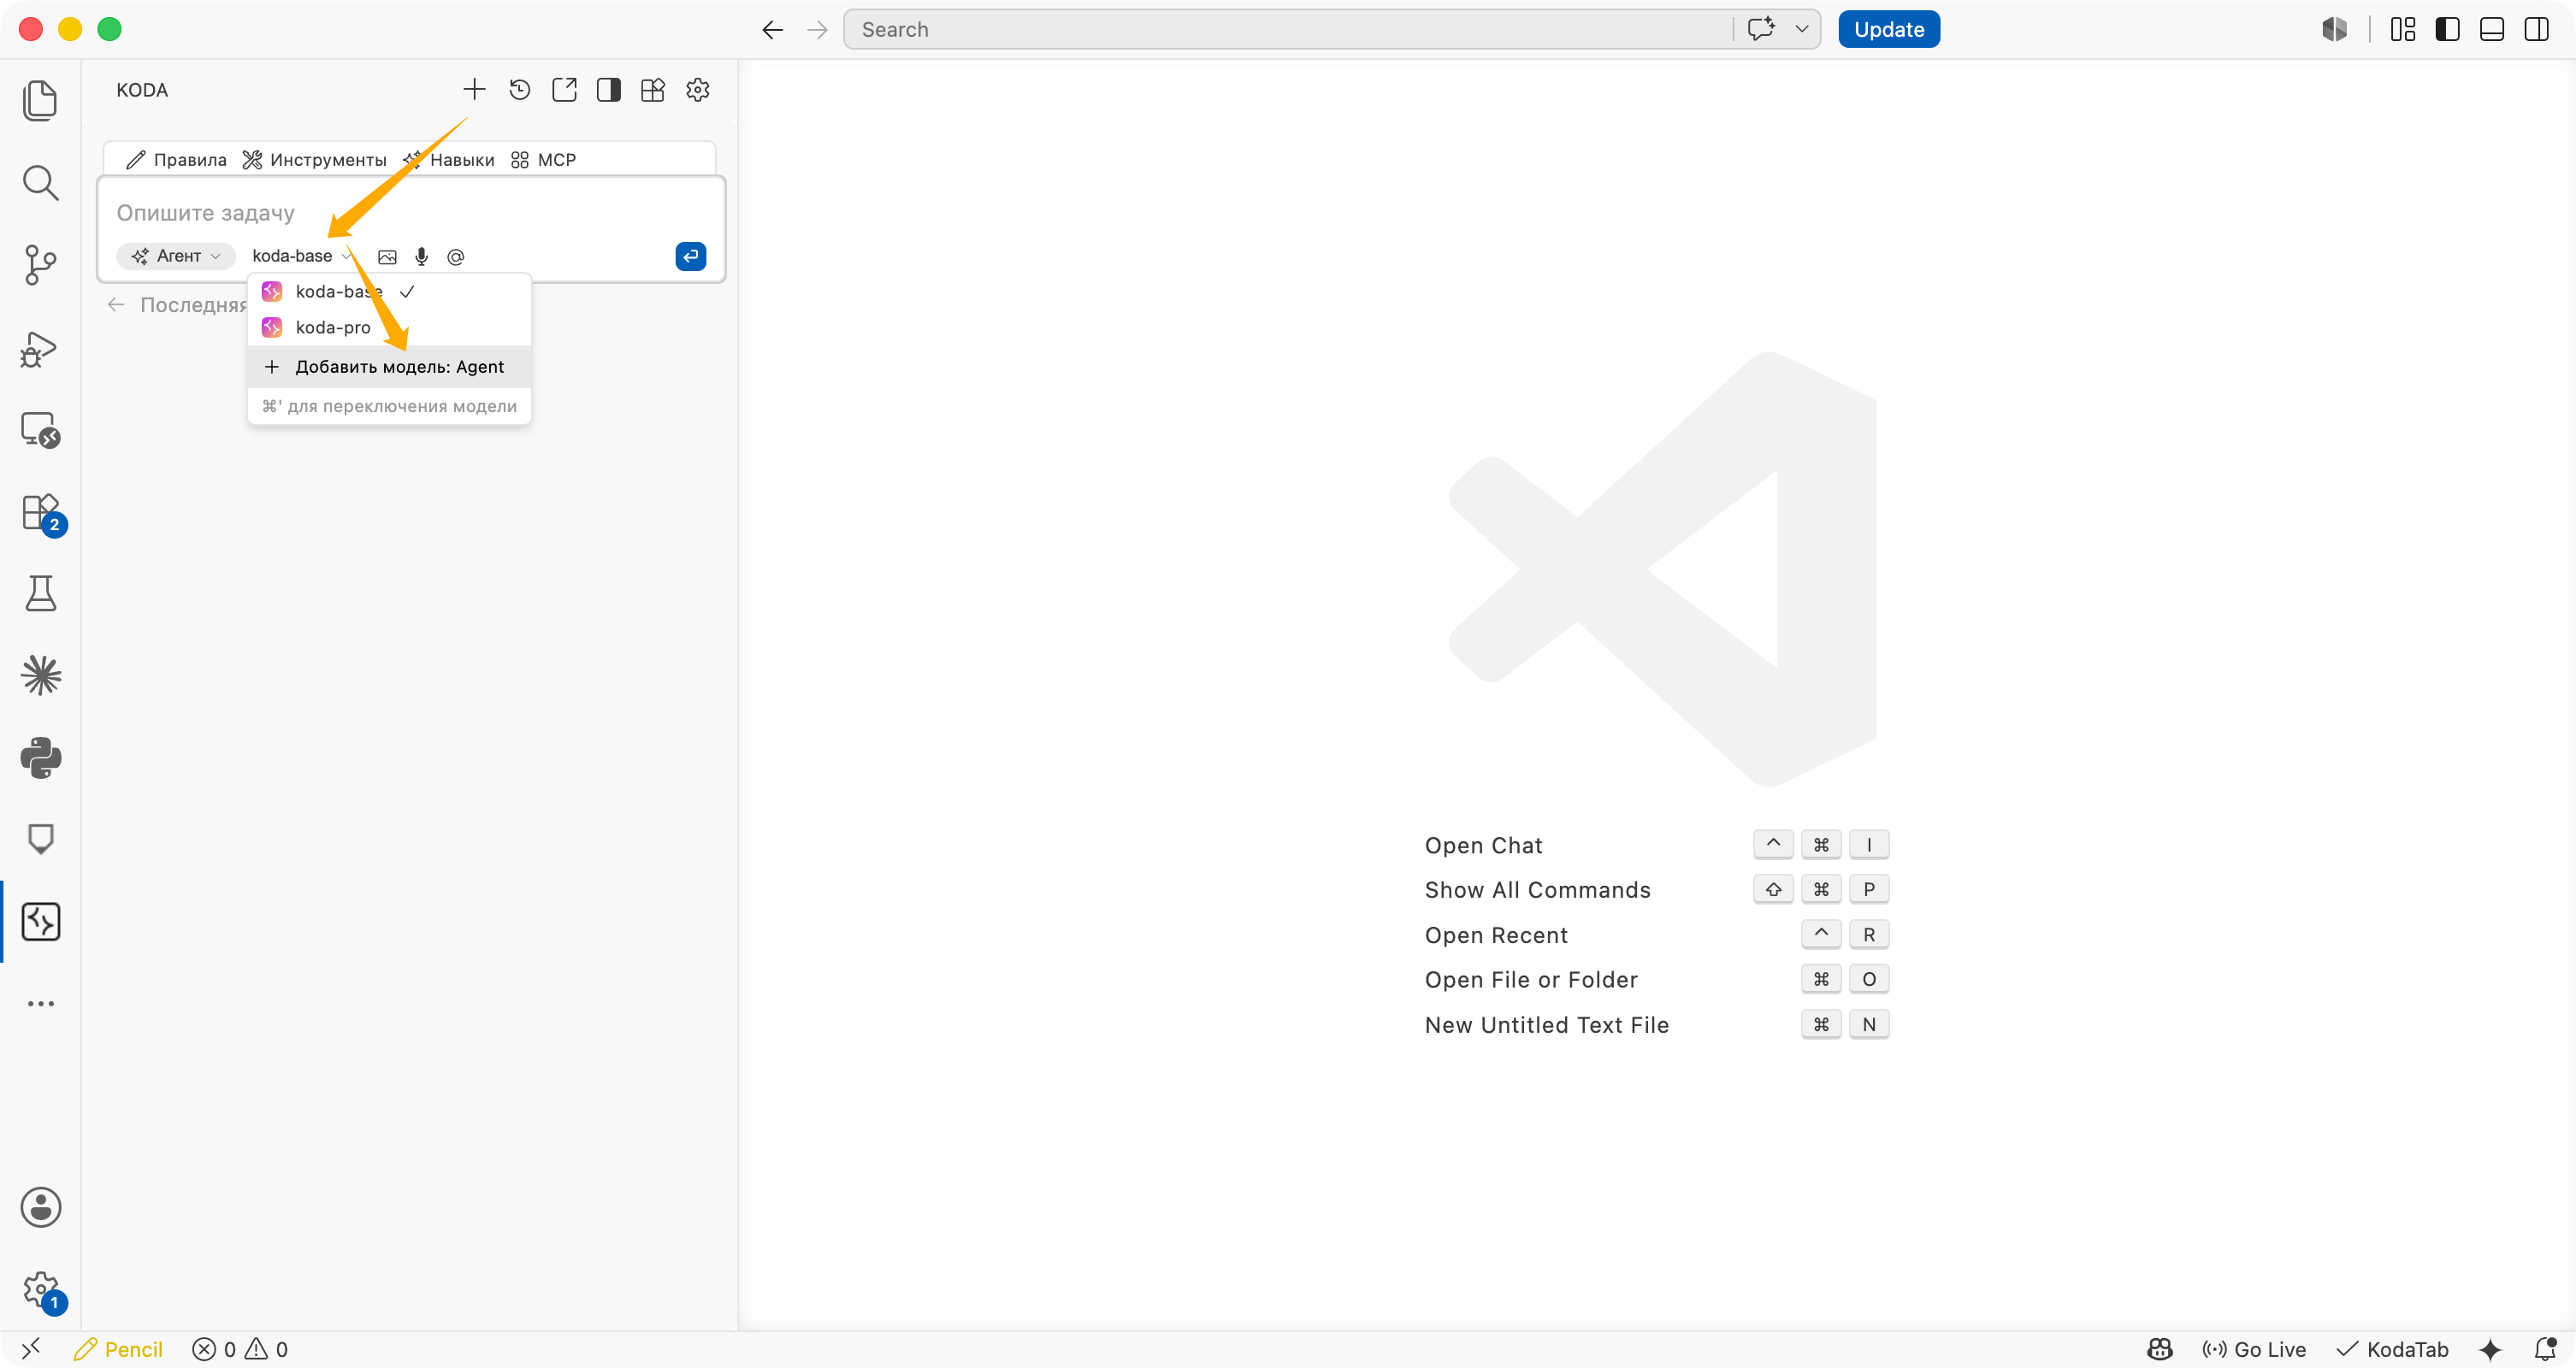
Open the **KODA** panel in the VS Code sidebar, click the model selector below the input box, and choose **Добавить модель: Agent** / **Add model: Agent**.
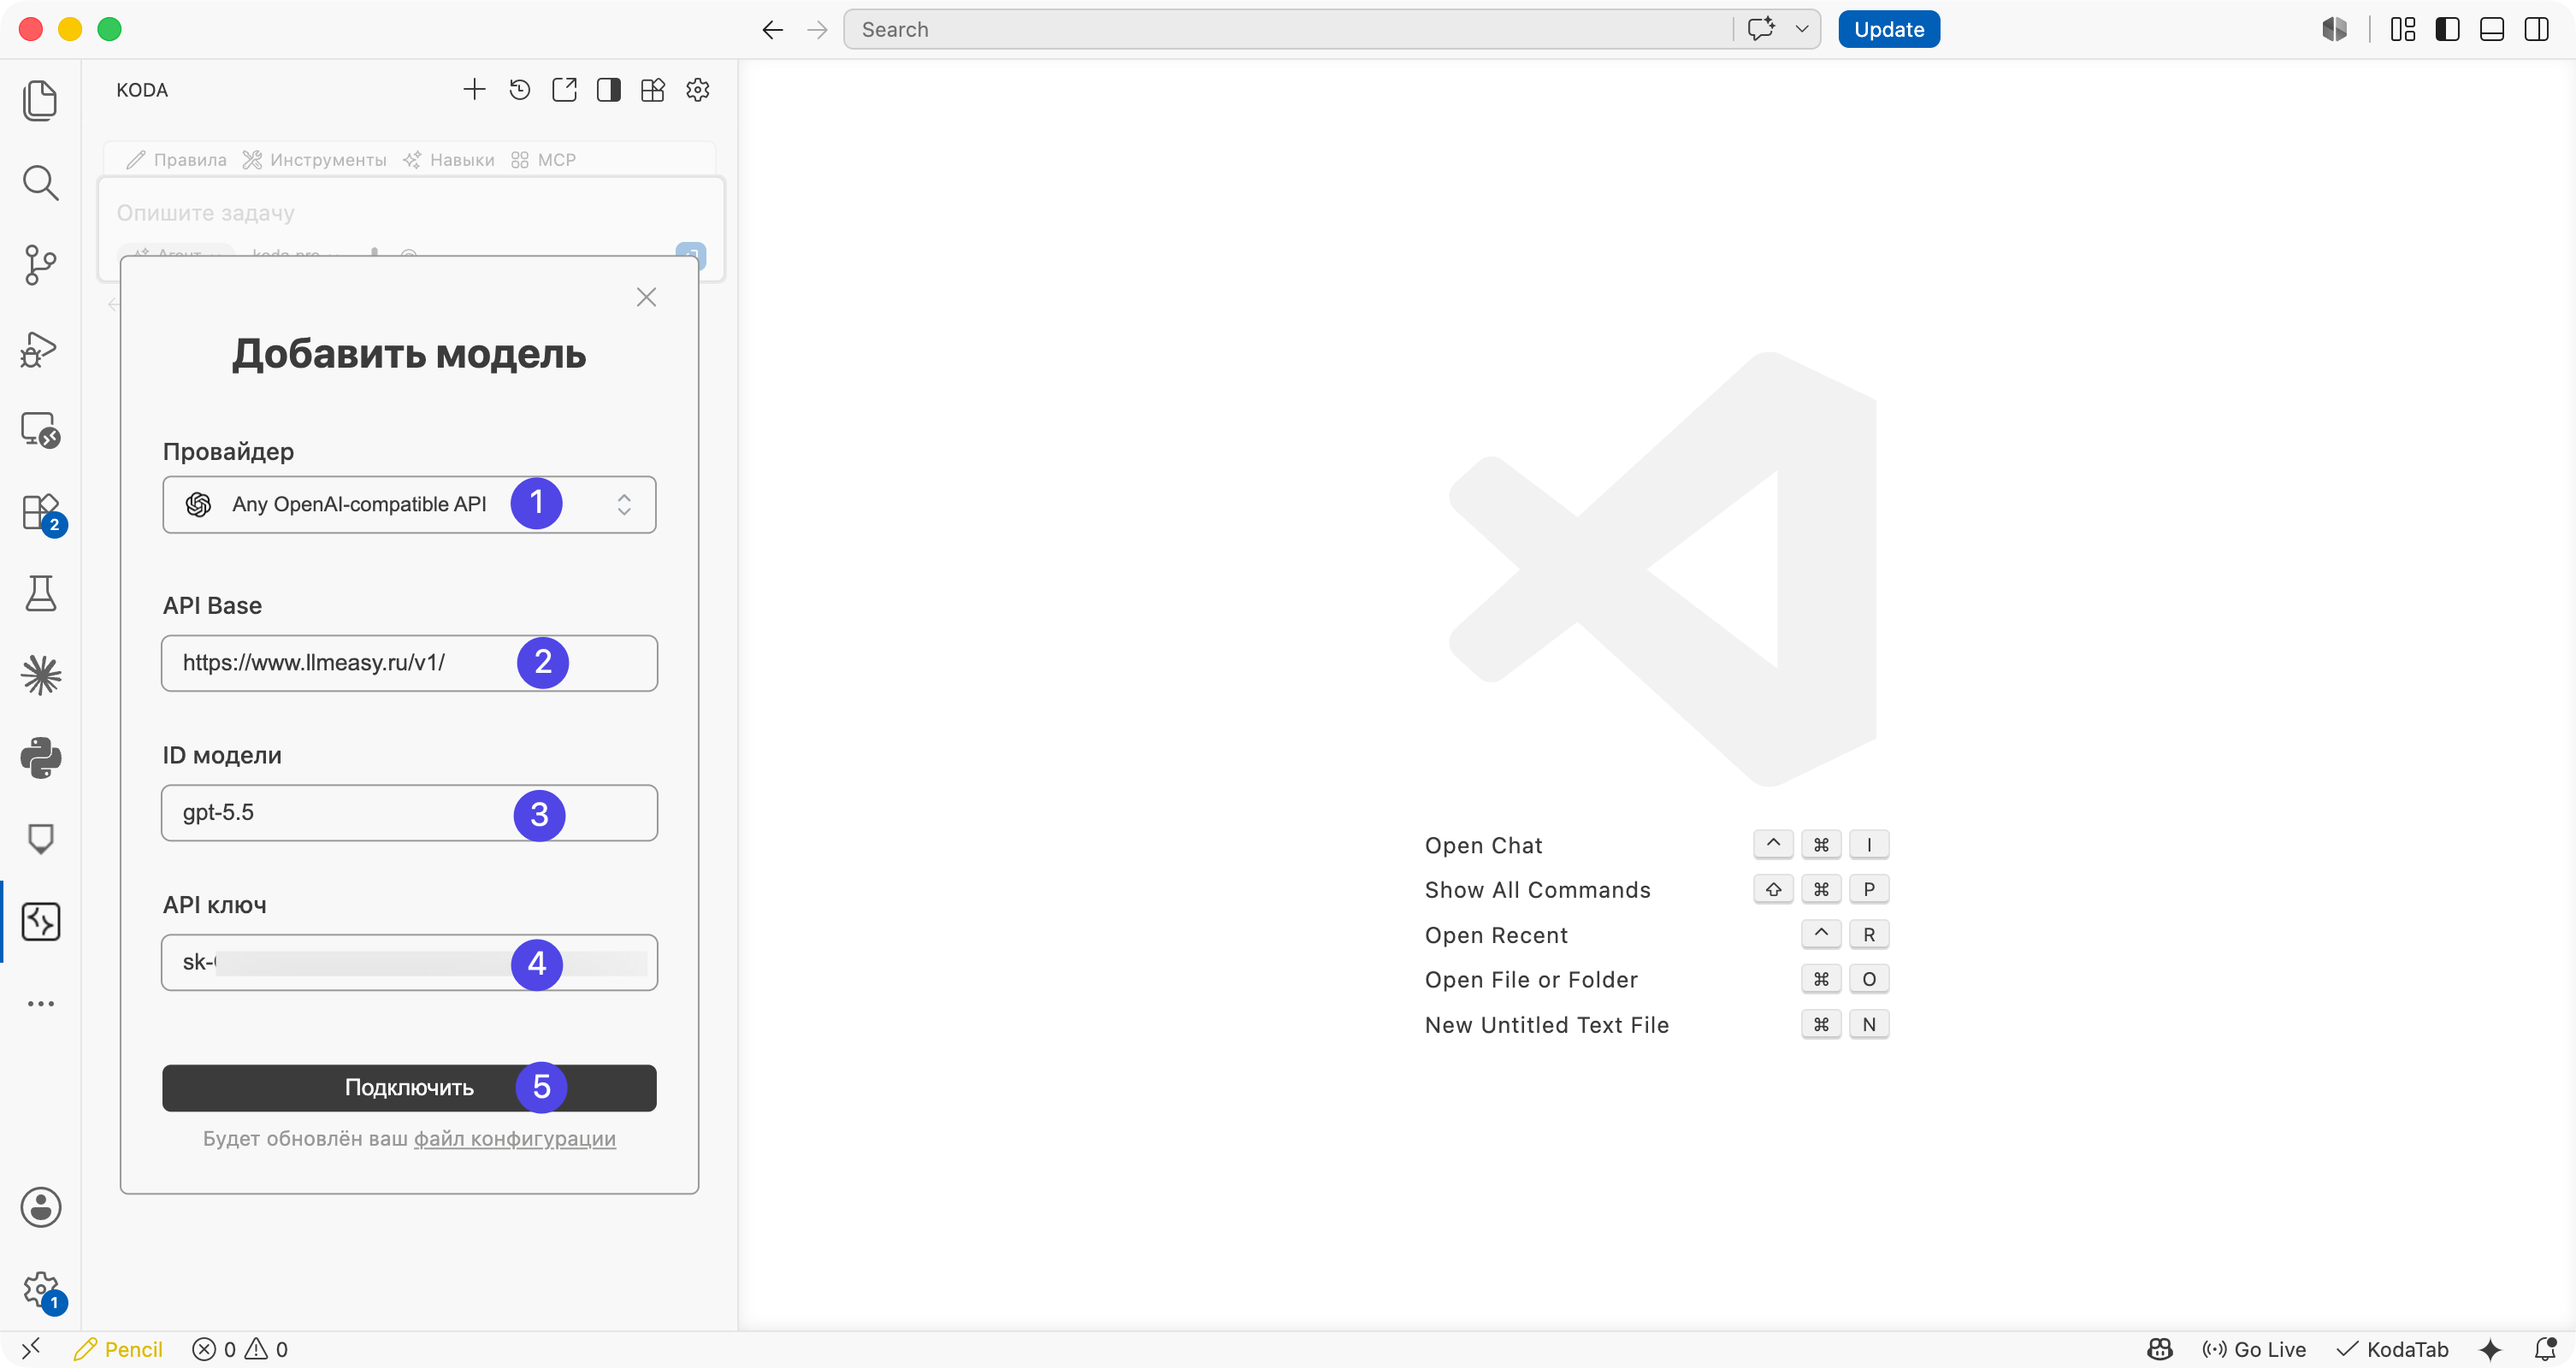
 In the add model dialog, use these values:
| Field | Recommended value |
| -------- | ------------------------------------------------------------------------------------------------------------------- |
| Provider | `Any OpenAI-compatible API` |
| API Base | `https://www.llmeasy.ru/v1/` |
| Model ID | A GPT Key group model ID from the model plaza, for example `gpt-5.5` |
| API Key | Your LLMEasy API Key |
Click **Подключить** / **Connect** after filling in the fields.
In the add model dialog, use these values:
| Field | Recommended value |
| -------- | ------------------------------------------------------------------------------------------------------------------- |
| Provider | `Any OpenAI-compatible API` |
| API Base | `https://www.llmeasy.ru/v1/` |
| Model ID | A GPT Key group model ID from the model plaza, for example `gpt-5.5` |
| API Key | Your LLMEasy API Key |
Click **Подключить** / **Connect** after filling in the fields.
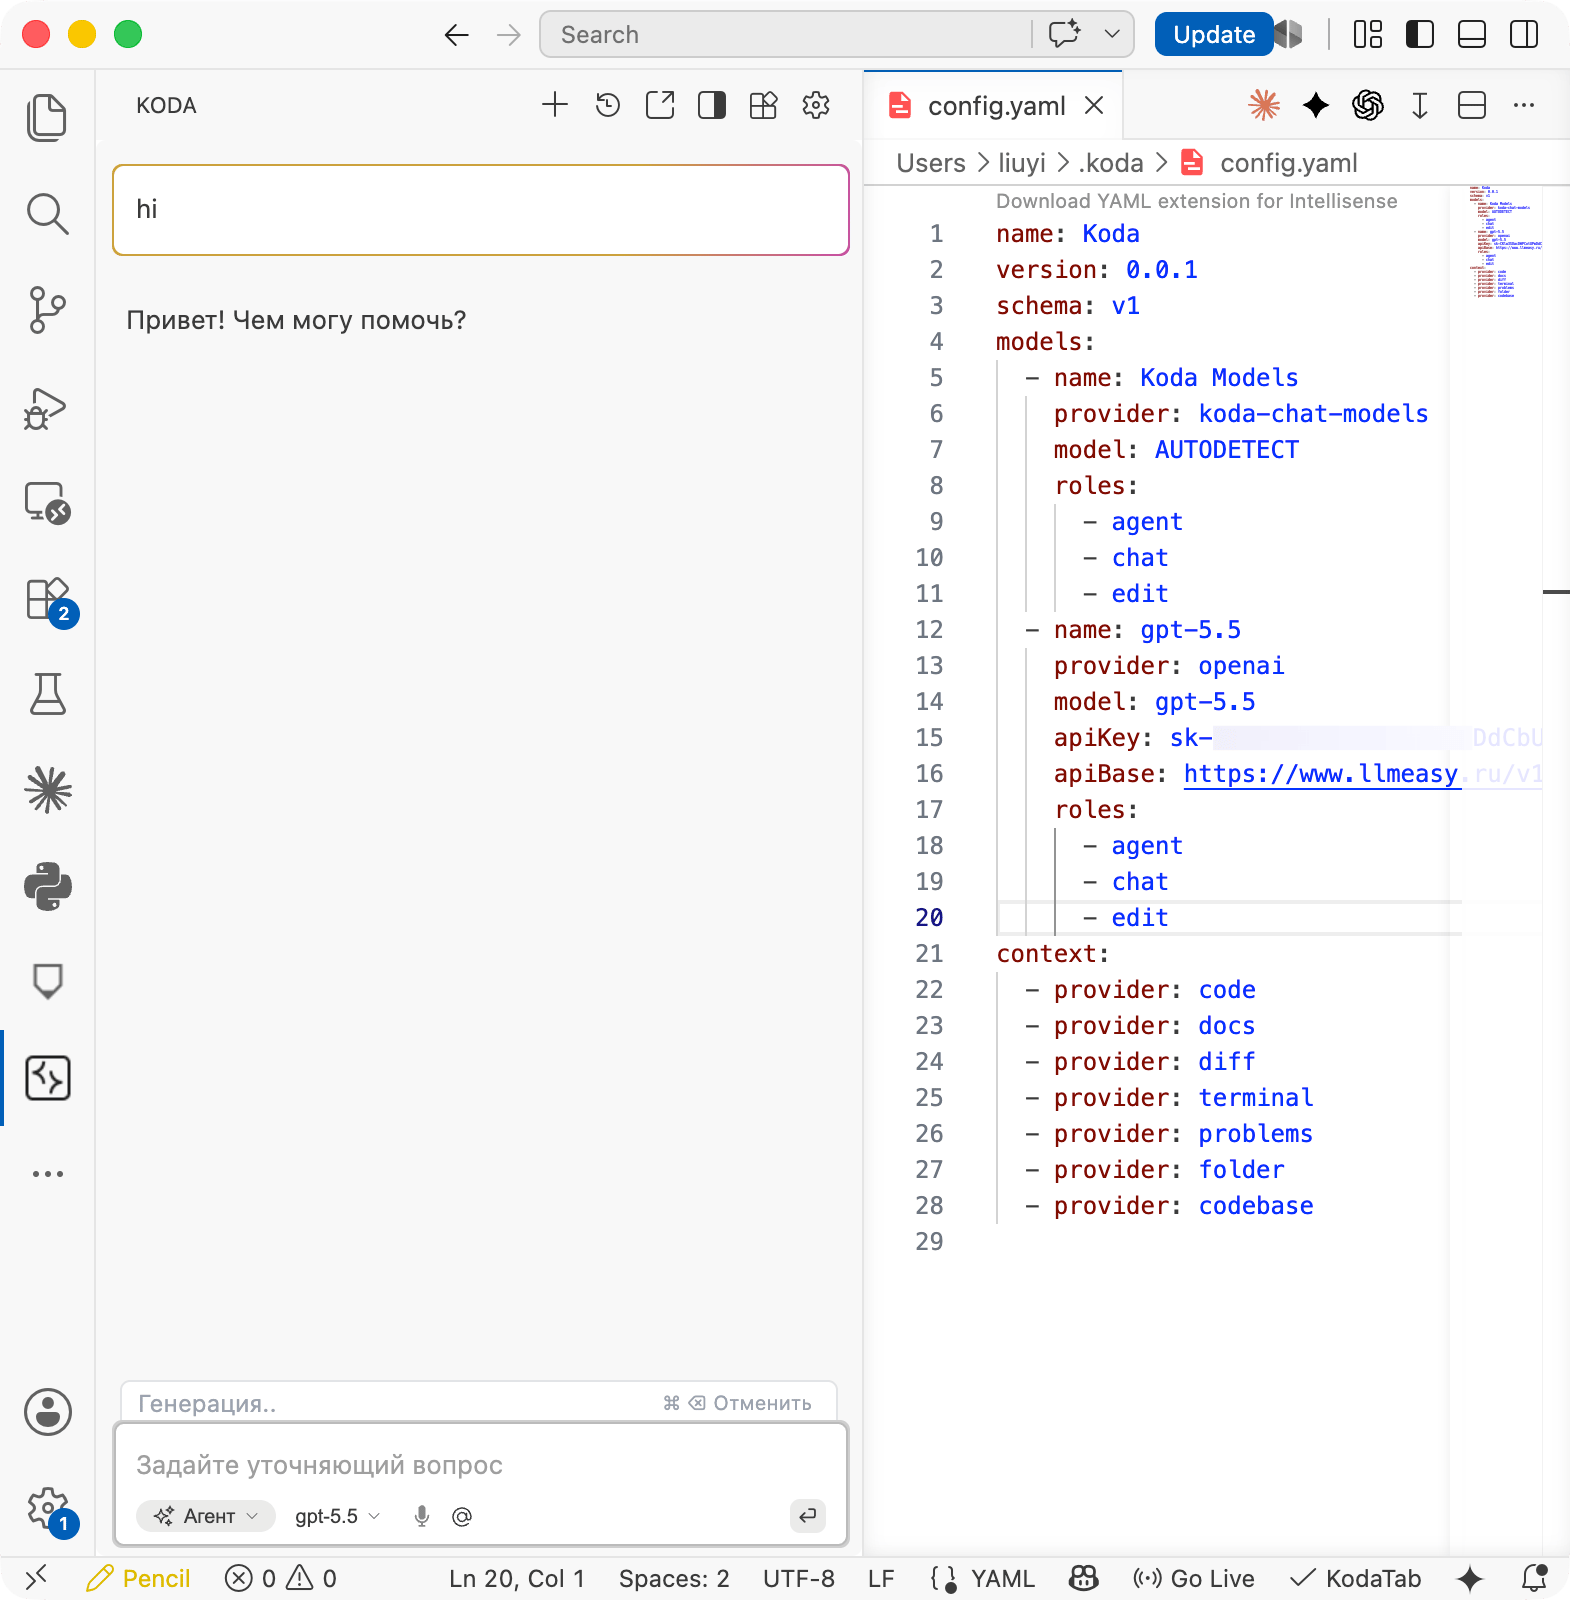
 After the connection succeeds, select the new model, such as `gpt-5.5`, from the model selector under the Koda input box. Send a short message to confirm that it returns a response.
Kodacode writes the configuration to `~/.koda/config.yaml`. Open this file to confirm that the model was added.
After the connection succeeds, select the new model, such as `gpt-5.5`, from the model selector under the Koda input box. Send a short message to confirm that it returns a response.
Kodacode writes the configuration to `~/.koda/config.yaml`. Open this file to confirm that the model was added.
 ## config.yaml example
Use this full structure as a reference. Replace `YOUR_API_KEY` with your LLMEasy API Key, and do not commit a real API Key to your repository.
```yaml theme={null}
name: Koda
version: 0.0.1
schema: v1
models:
- name: Koda Models
provider: koda-chat-models
model: AUTODETECT
roles:
- agent
- chat
- edit
- name: gpt-5.5
provider: openai
model: gpt-5.5
apiKey: YOUR_API_KEY
apiBase: https://www.llmeasy.ru/v1/
roles:
- agent
- chat
- edit
context:
- provider: code
- provider: docs
- provider: diff
- provider: terminal
- provider: problems
- provider: folder
- provider: codebase
```
If you use a model other than `gpt-5.5`, update both `name` and `model` so they match the GPT Key group model ID from the model plaza.
## Troubleshooting
* If the connection fails, confirm that **API Base** is `https://www.llmeasy.ru/v1/` and keep the trailing `/`.
* If the model is unavailable, confirm that **Model ID** comes from the GPT Key group.
* If authentication fails, copy the API Key again and avoid extra spaces or line breaks.
* If `config.yaml` changes do not apply, restart VS Code or run **Developer: Reload Window**.
* LLMEasy usually does not require an extra `User-Agent` or custom headers.
## References
* [Kodacode plugin overview](https://docs.kodacode.ru/plugin/overview.html)
* [Kodacode plugin installation guide](https://docs.kodacode.ru/plugin/install.html)
## config.yaml example
Use this full structure as a reference. Replace `YOUR_API_KEY` with your LLMEasy API Key, and do not commit a real API Key to your repository.
```yaml theme={null}
name: Koda
version: 0.0.1
schema: v1
models:
- name: Koda Models
provider: koda-chat-models
model: AUTODETECT
roles:
- agent
- chat
- edit
- name: gpt-5.5
provider: openai
model: gpt-5.5
apiKey: YOUR_API_KEY
apiBase: https://www.llmeasy.ru/v1/
roles:
- agent
- chat
- edit
context:
- provider: code
- provider: docs
- provider: diff
- provider: terminal
- provider: problems
- provider: folder
- provider: codebase
```
If you use a model other than `gpt-5.5`, update both `name` and `model` so they match the GPT Key group model ID from the model plaza.
## Troubleshooting
* If the connection fails, confirm that **API Base** is `https://www.llmeasy.ru/v1/` and keep the trailing `/`.
* If the model is unavailable, confirm that **Model ID** comes from the GPT Key group.
* If authentication fails, copy the API Key again and avoid extra spaces or line breaks.
* If `config.yaml` changes do not apply, restart VS Code or run **Developer: Reload Window**.
* LLMEasy usually does not require an extra `User-Agent` or custom headers.
## References
* [Kodacode plugin overview](https://docs.kodacode.ru/plugin/overview.html)
* [Kodacode plugin installation guide](https://docs.kodacode.ru/plugin/install.html)